
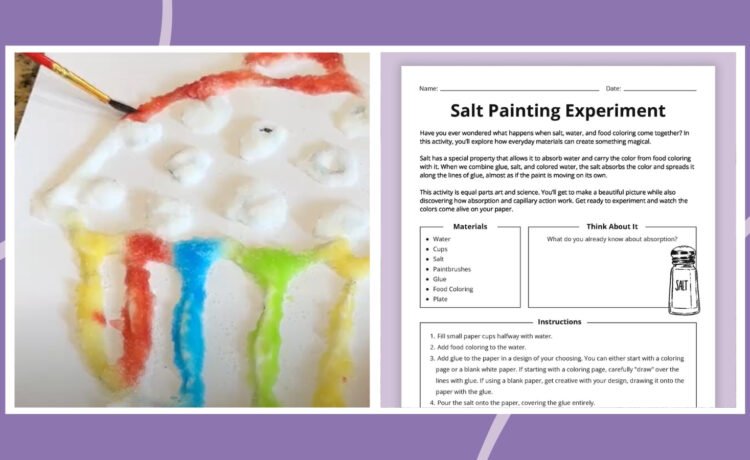
Salt painting is a fun and easy way to combine creativity with a dash of science. You can create vibrant and textured masterpieces or just have some creative fun with a simple recipe that uses salt’s hygroscopic quality. Follow the step-by-step instructions below to get started!
Grab our printable salt painting worksheet by filling out the form on this page. Plus check out the fun ideas for using the printable below.

What do you need to make a salt painting?

- Water
- Cups
- Salt
- Paintbrushes
- Glue
- Food coloring
- Plate
Is there a video for making salt paint?
We had 9-year-old Charlotte help us with this video. She walks you through how to make it right here:
What are the step-by-step instructions for making a salt painting?
Step 1: Fill small paper cups halfway with water.

Start by filling each of the four small paper cups about halfway up with water.
Step 2: Add food coloring.

Add a drop of different food coloring to each of the cups of water.
Step 3: Add glue to the paper.

You can either start with a coloring page or a blank white paper. If starting with a coloring page, carefully “draw” over the lines with glue. If using a blank paper, get creative with your design, drawing it onto the paper with the glue.
Step 4: Pour the salt onto the paper.

Once your glue is squeezed onto the paper, pour table salt over the page, making sure it covers all of the glue. Then, carefully shake off the excess salt.
Step 5: Paint the color onto the salt.

Dip your paintbrushes into the various cups of colored water and then spread it over the salt. The colors will spread quickly across the salt. Finally, let your artwork dry and then show it off to your friends!
Get your free printable salt painting worksheets!

Get the printable salt painting worksheets featured above by clicking the button below and filling out the form.
For more free printables, subscribe to our newsletters to find out when they’re posted!
Plus, get ideas for more easy art projects for kids!


Recent Comments