
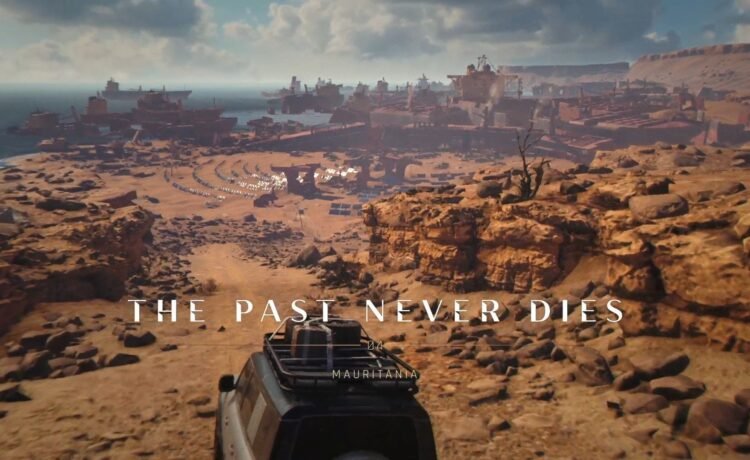

The Past Never Dies is the tenth chapter in 007 First Light, and your main objective is to infiltrate Aleph and find 009. That said, you must go through several complicated segments to progress, and knowing what to do can be a hassle. There are multiple ways to pursue this mission, but this particular guide mostly focuses on stealth tactics.
Here are the details on how to complete The Past Never Dies (chapter 10) in 007 First Light.
Note: This first part of the walkthrough mostly focuses on a stealth approach.
The Past Never Dies (chapter 10) in 007 First Light: Walkthrough
Drive to Aleph
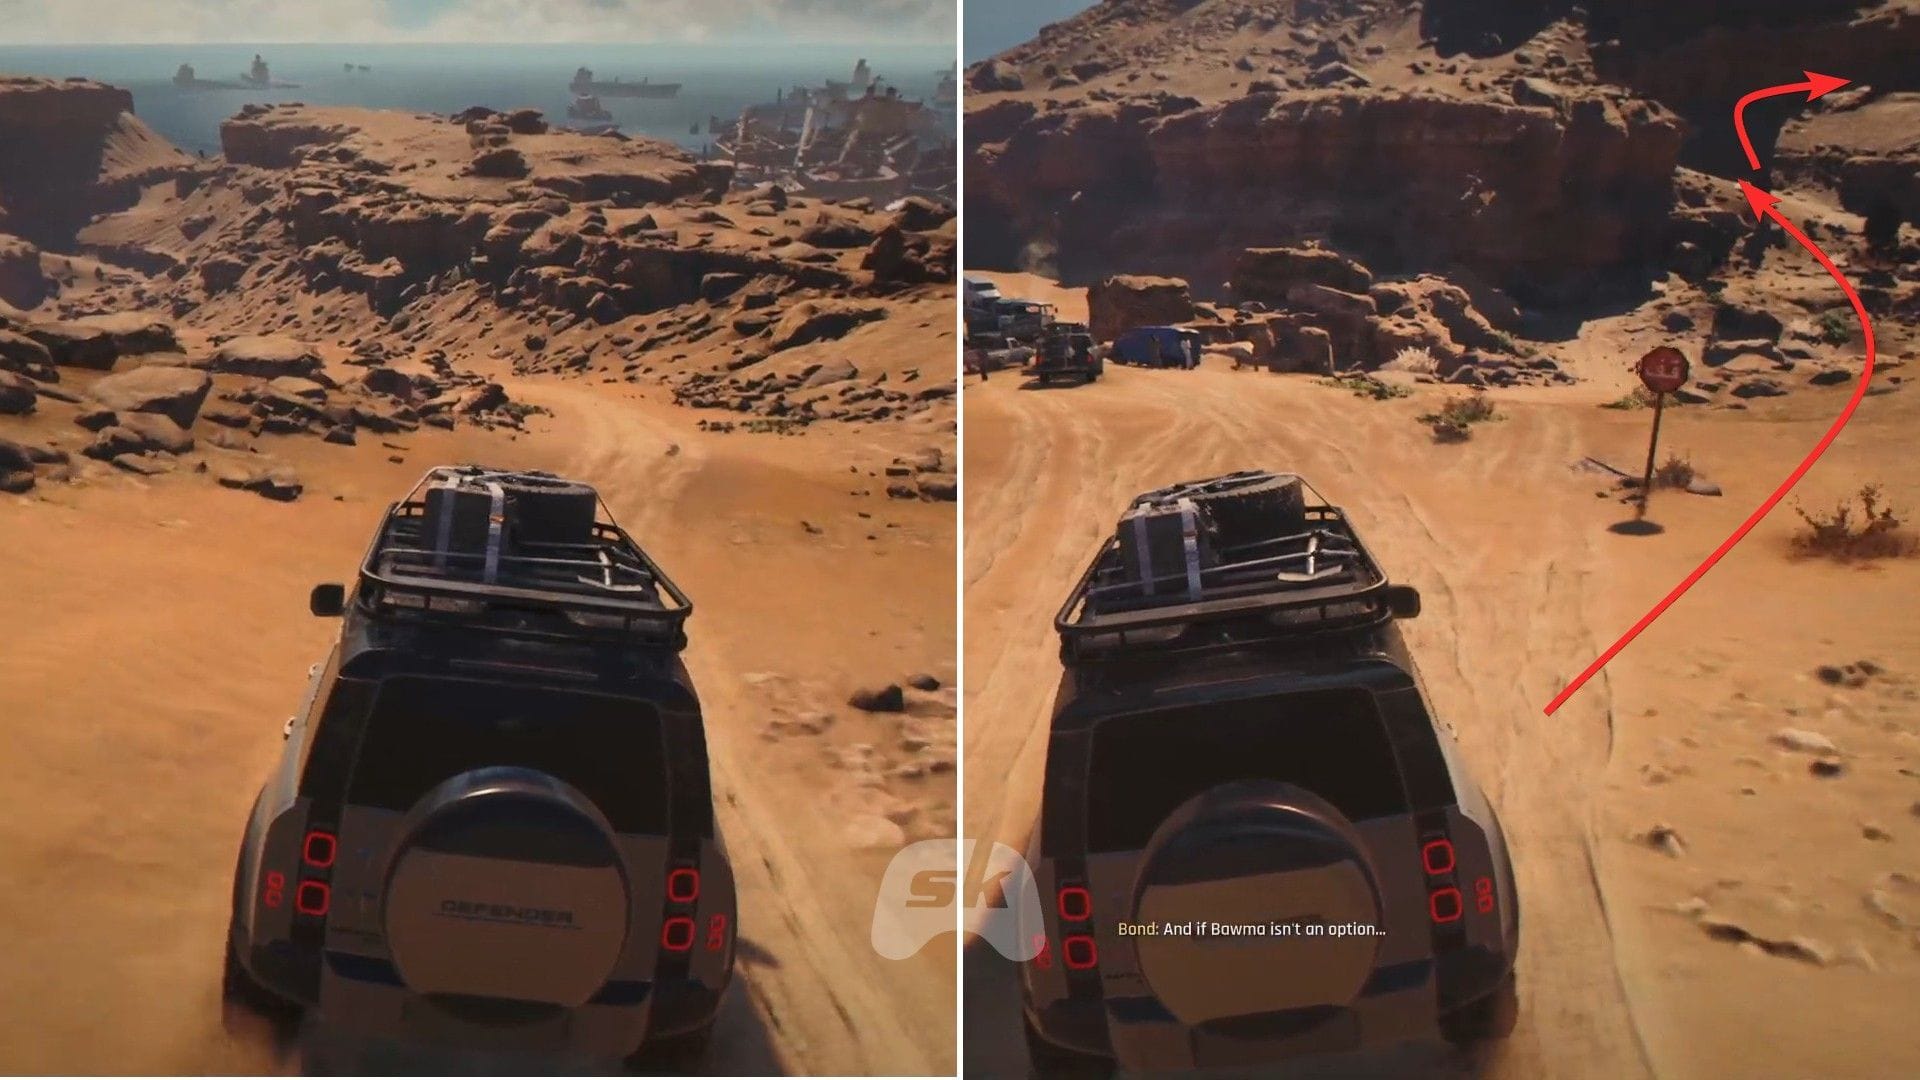
After completing Out of the Ashes (chapter 9) in 007 First Light, Bond will be transported to Aleph with Greenway. First, you need to drive through the desert by following the narrow road. However, you will find a roadblock after a while, where you need to take a right turn. Keep following the road to trigger a cutscene.
Follow Greenway
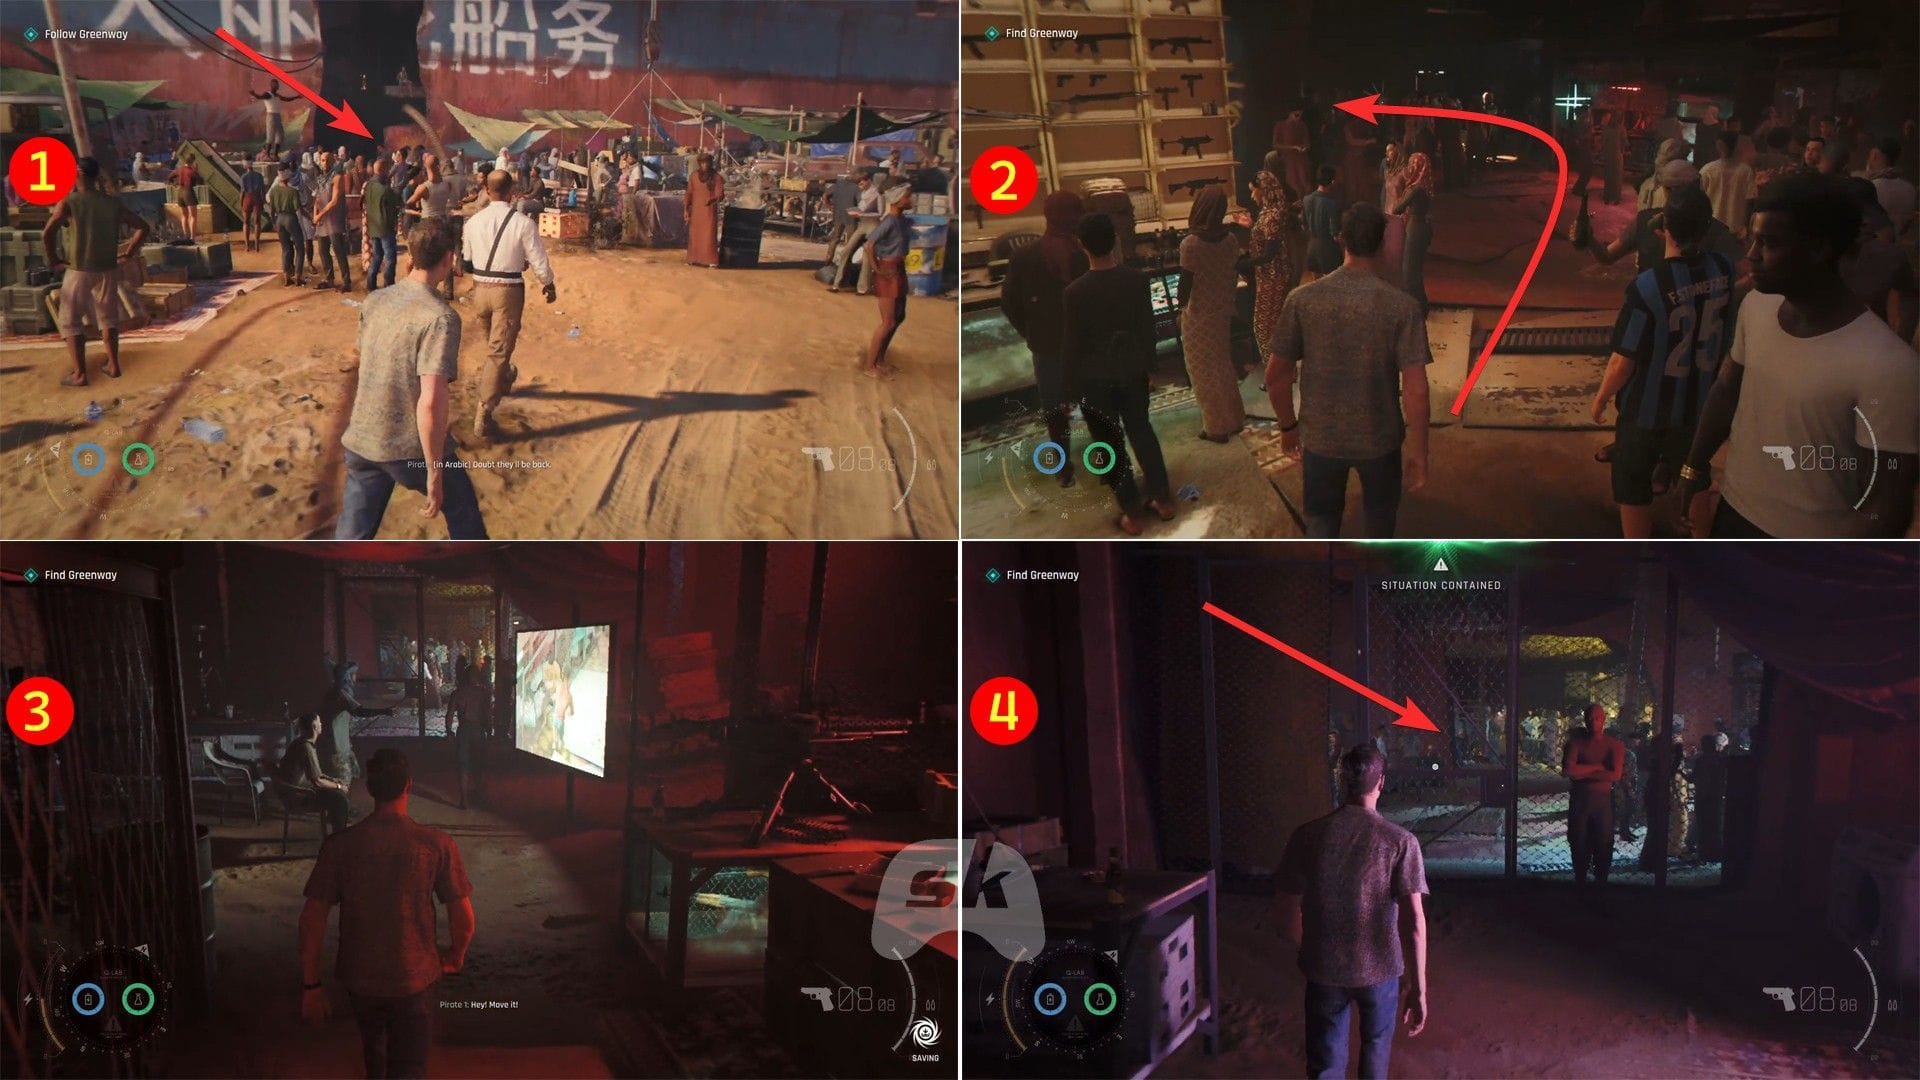
Next, follow Greenway inside the shipwreck, and when you get inside, you will lose him for a bit. There, go from the right side, and turn left, where three guys will start attacking you. Defeat them in a hand-to-hand combat and exit through the door to get to Greenway again.
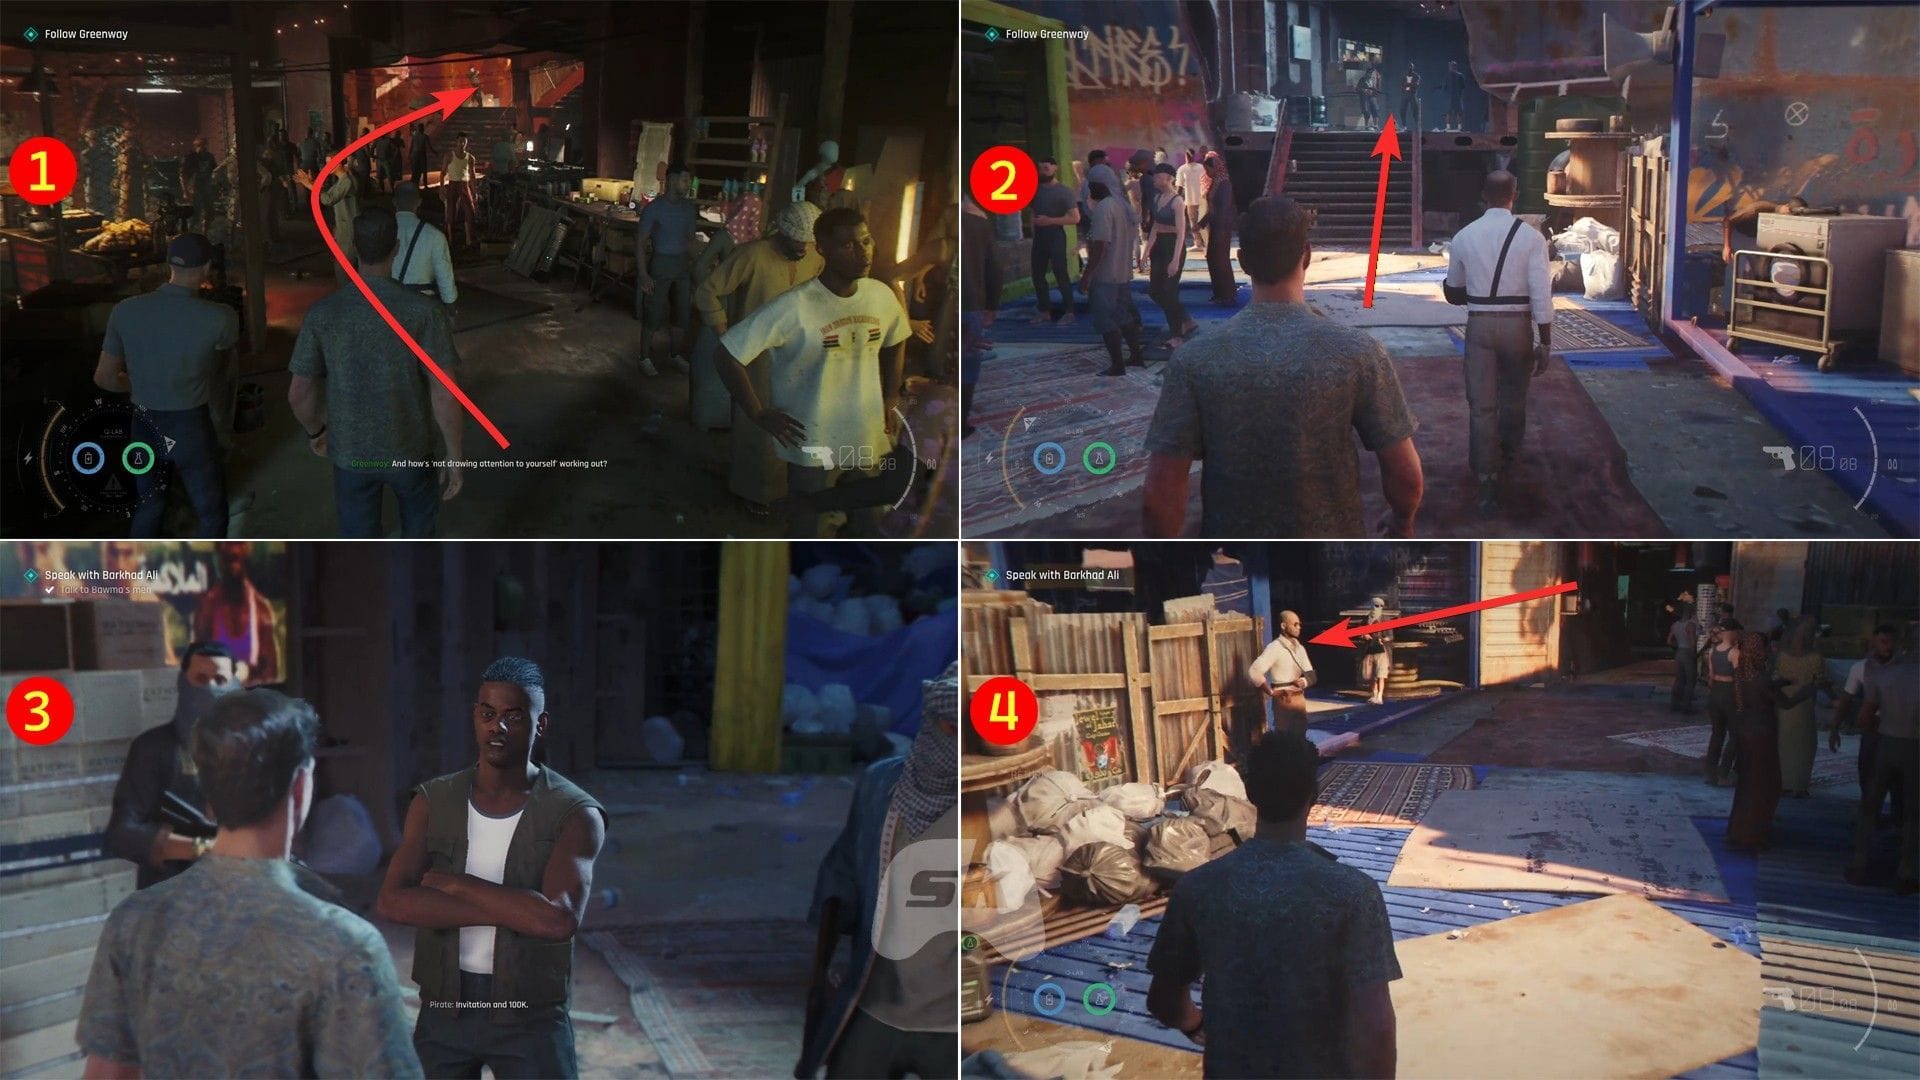
Keep following him to the upper section to trigger another cutscene. Afterward, head straight towards Bawma’s men and speak with them. You can then select any of the options, and you will learn that you need an invitation and 100K dollars to join the auction. Return to Greenway to progress to the next part, where you have to collect the money in various ways.
How to obtain the auction fee of 100,000 dollars in 007 First Light
There are several ways you can collect the required money in the Aleph black market. That said, I’ve only mentioned the most efficient ones, and you only need to complete three of them.
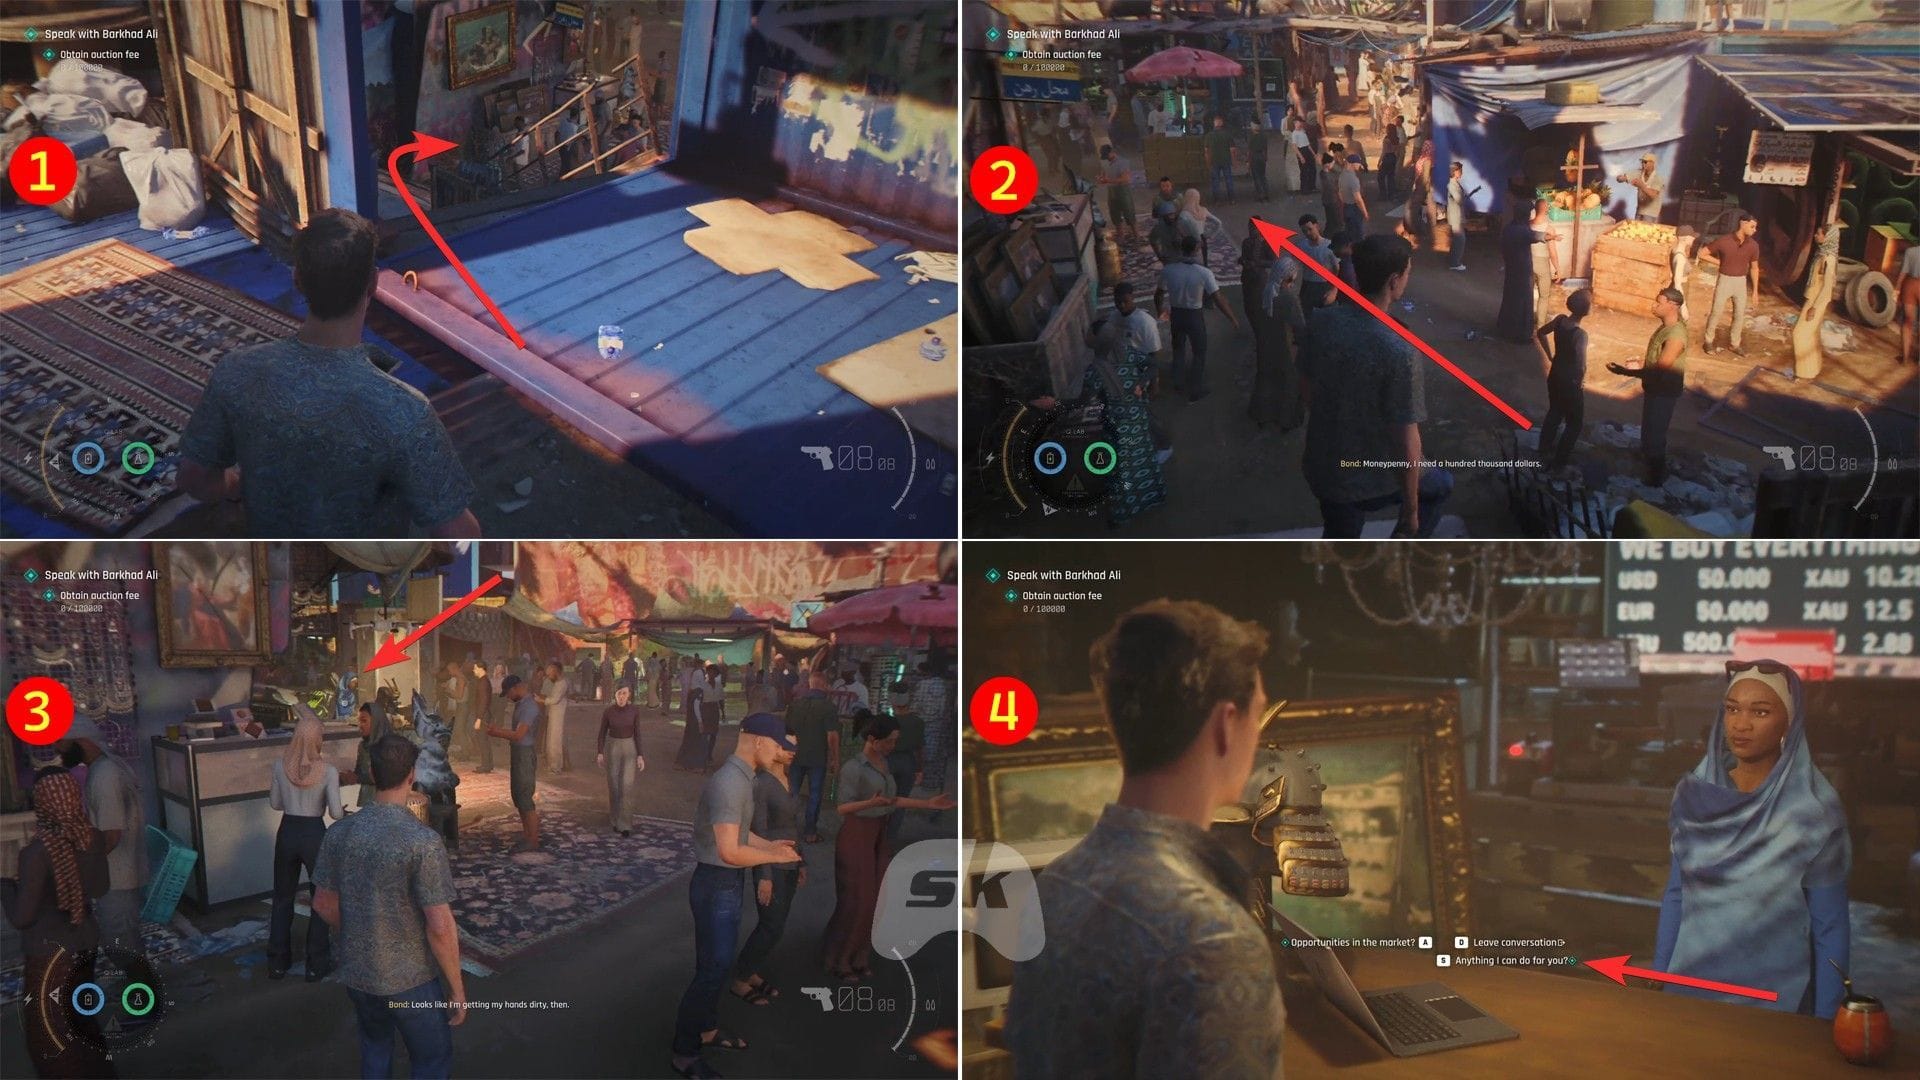
But first, head down to the market, speak with the nearby shop owner, Nirmala, and ask, “Anything I can do for you?” to learn about a red jewel she’s looking to get back from a man. You can get it back for her for a hefty reward, but you need to collect some money elsewhere first.
With that said, here are the steps to collect the required amount of money in 007 First Light:
1) Win the fighting tournament
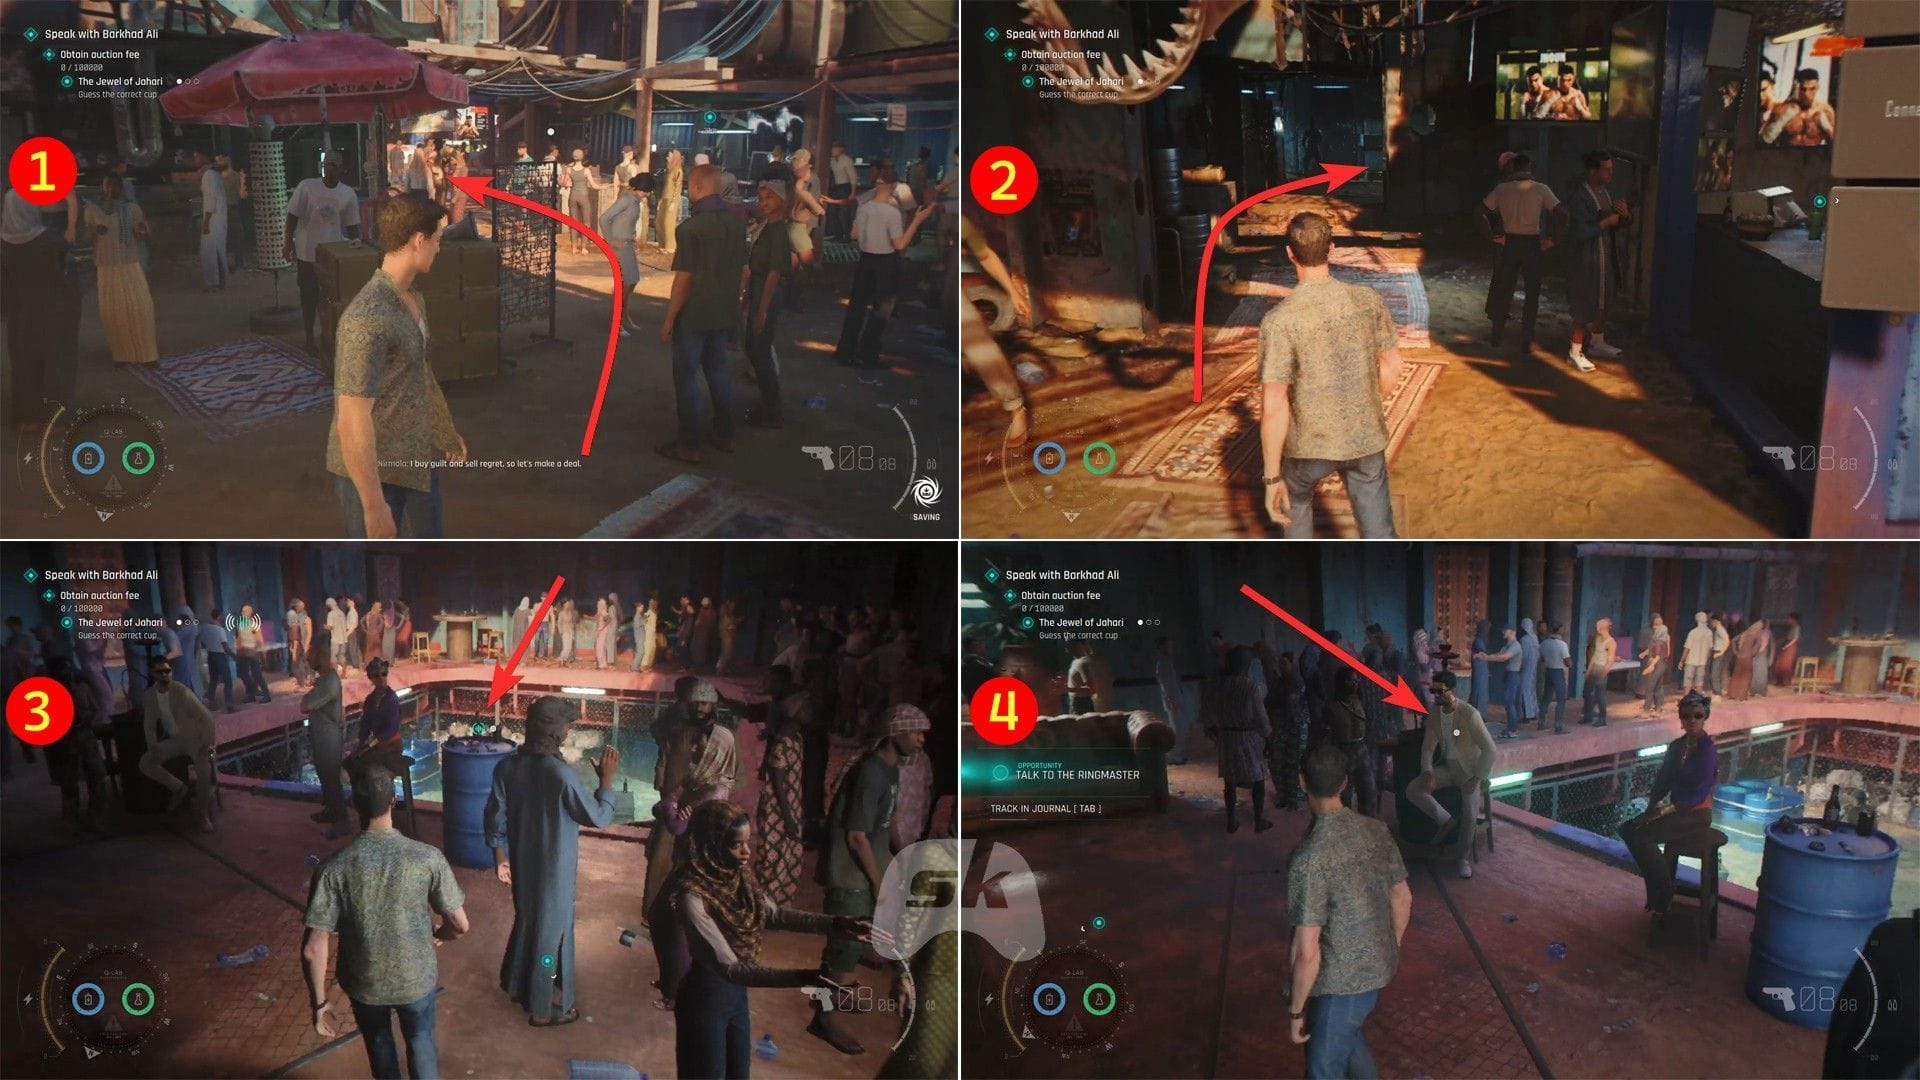
After speaking with Nirmala, head to the opposite side to find some fighters on display. Go straight from there, take the stairs on the right to go up, and you will find an eavesdrop location. Interact with the spot to listen to the Ringmaster and the Trainer’s conversation. When done, speak with the Ringmaster.
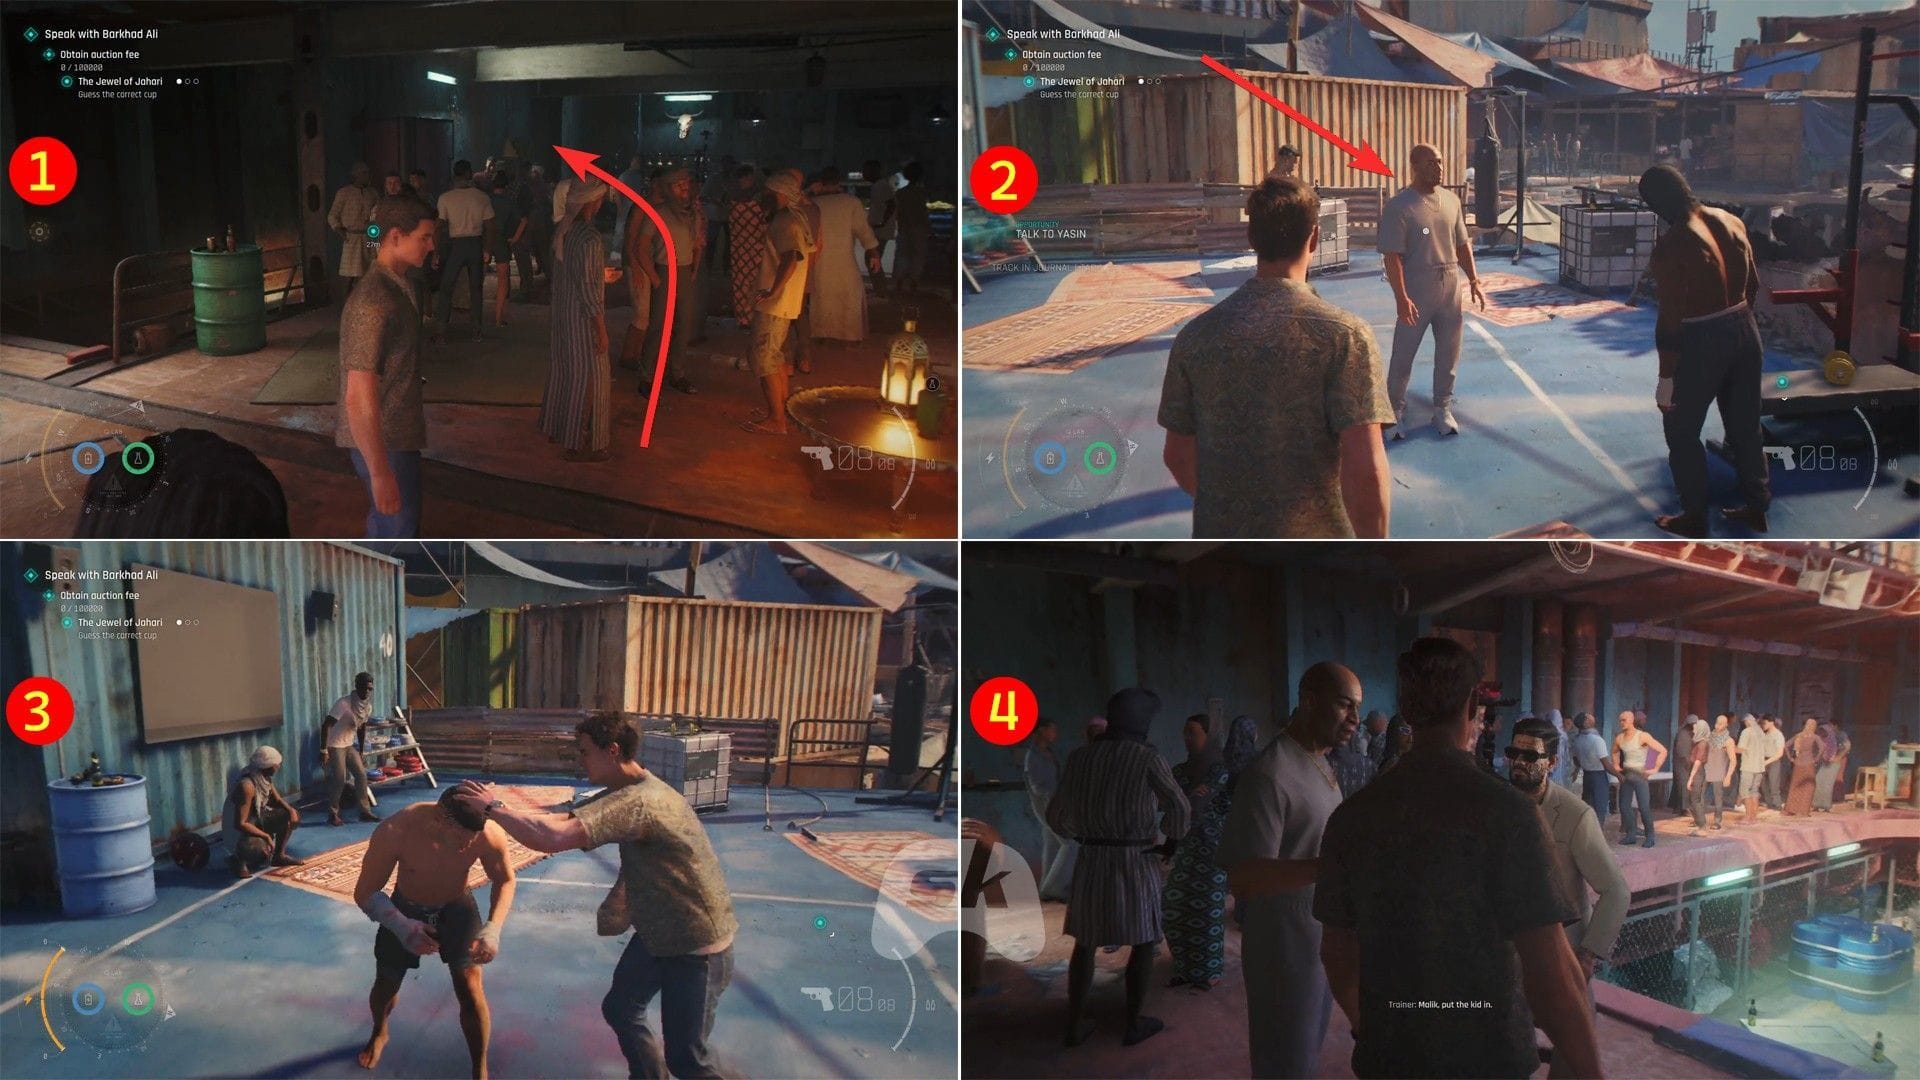
From there, move towards the bar, head right, and speak with the Trainer. You then have to battle one of his fighters as a test to join the tournament. Defeat him, then follow the Trainer to the Ringmaster to start the fighting tournament.
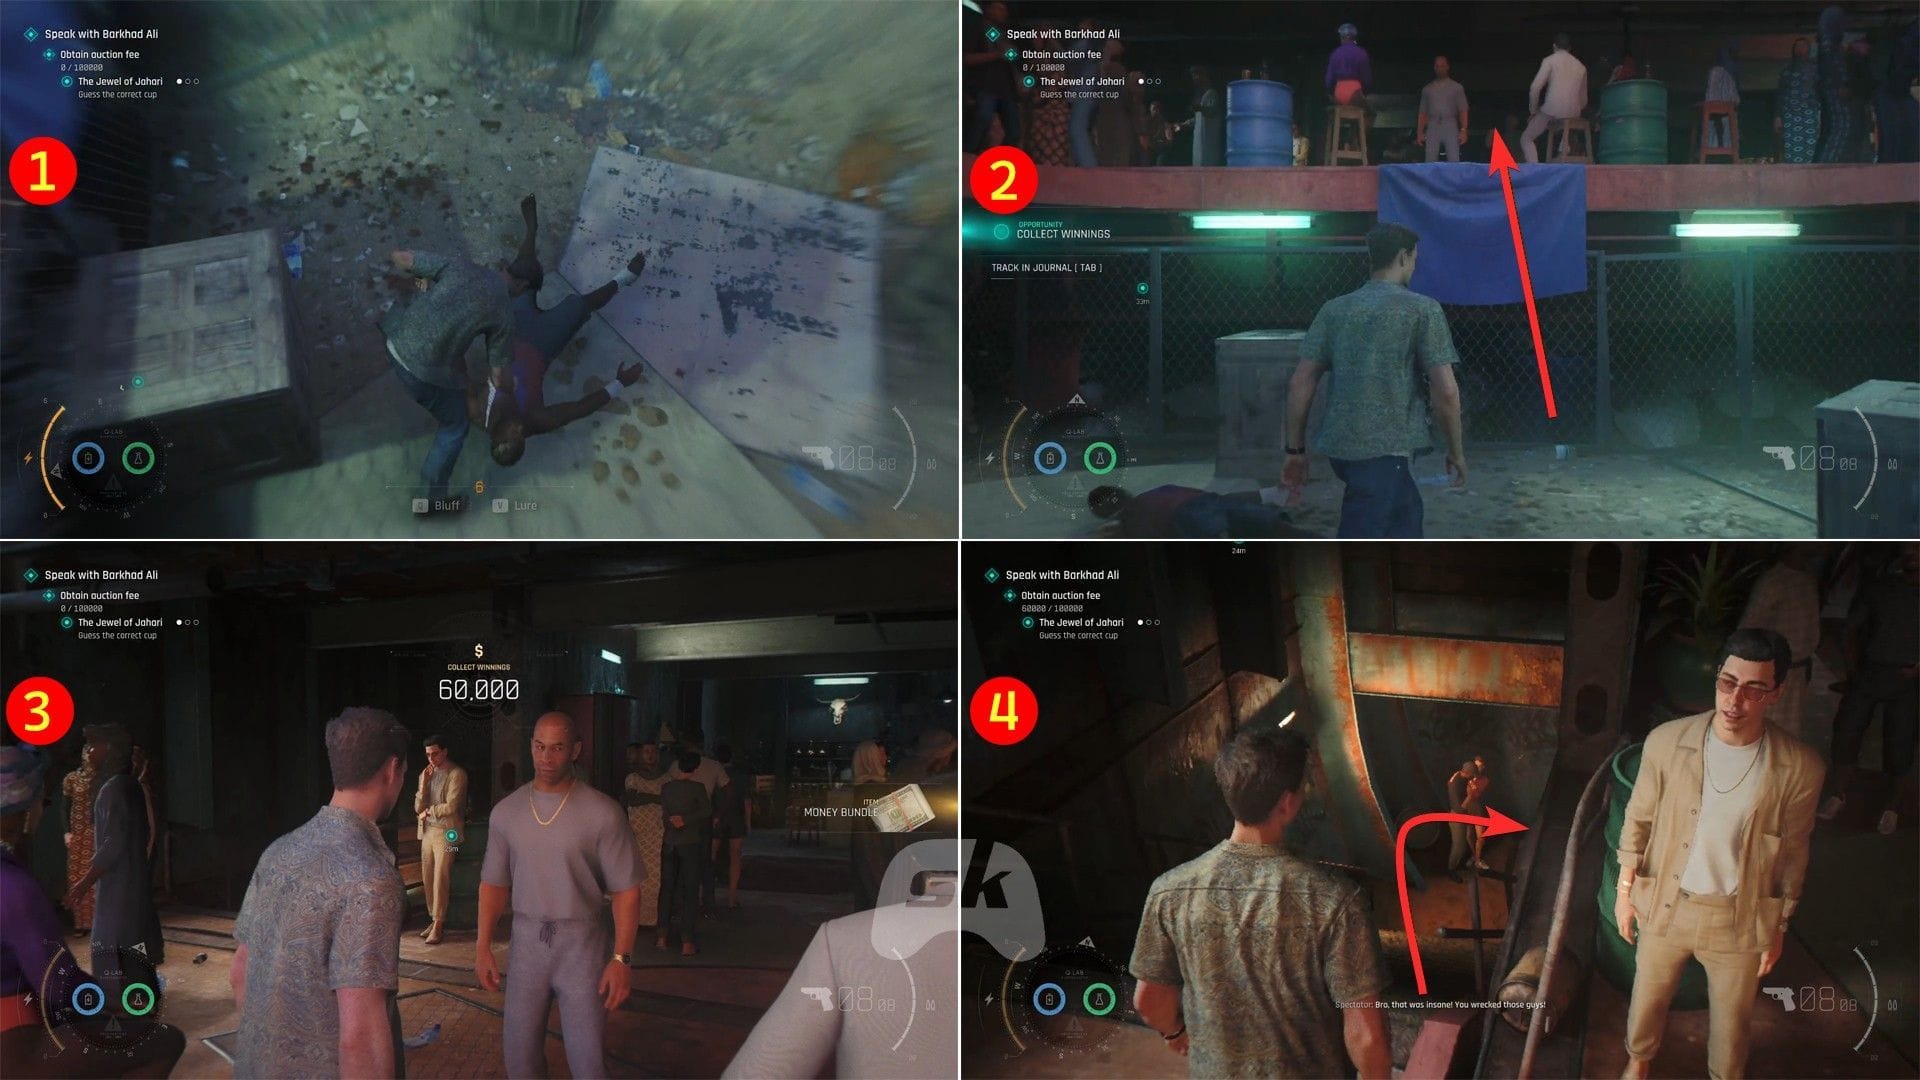
You have to win three stages of hand-to-hand battles here. You need to be patient with the parries and make sure to throw the bottles to stagger the opponents. You can also use your gadget abilities to make the fights easier. When done, exit the ring to collect the winning money.
Oh, and you can also find a cameo of the popular streamer Shroud standing nearby. Take the stairs on his left to reach down, where you have to fight three more guys. Defeat them and exit to the market.
Also read: List of streamer cameos in 007 First Light
2) Get the jewel of Jahari
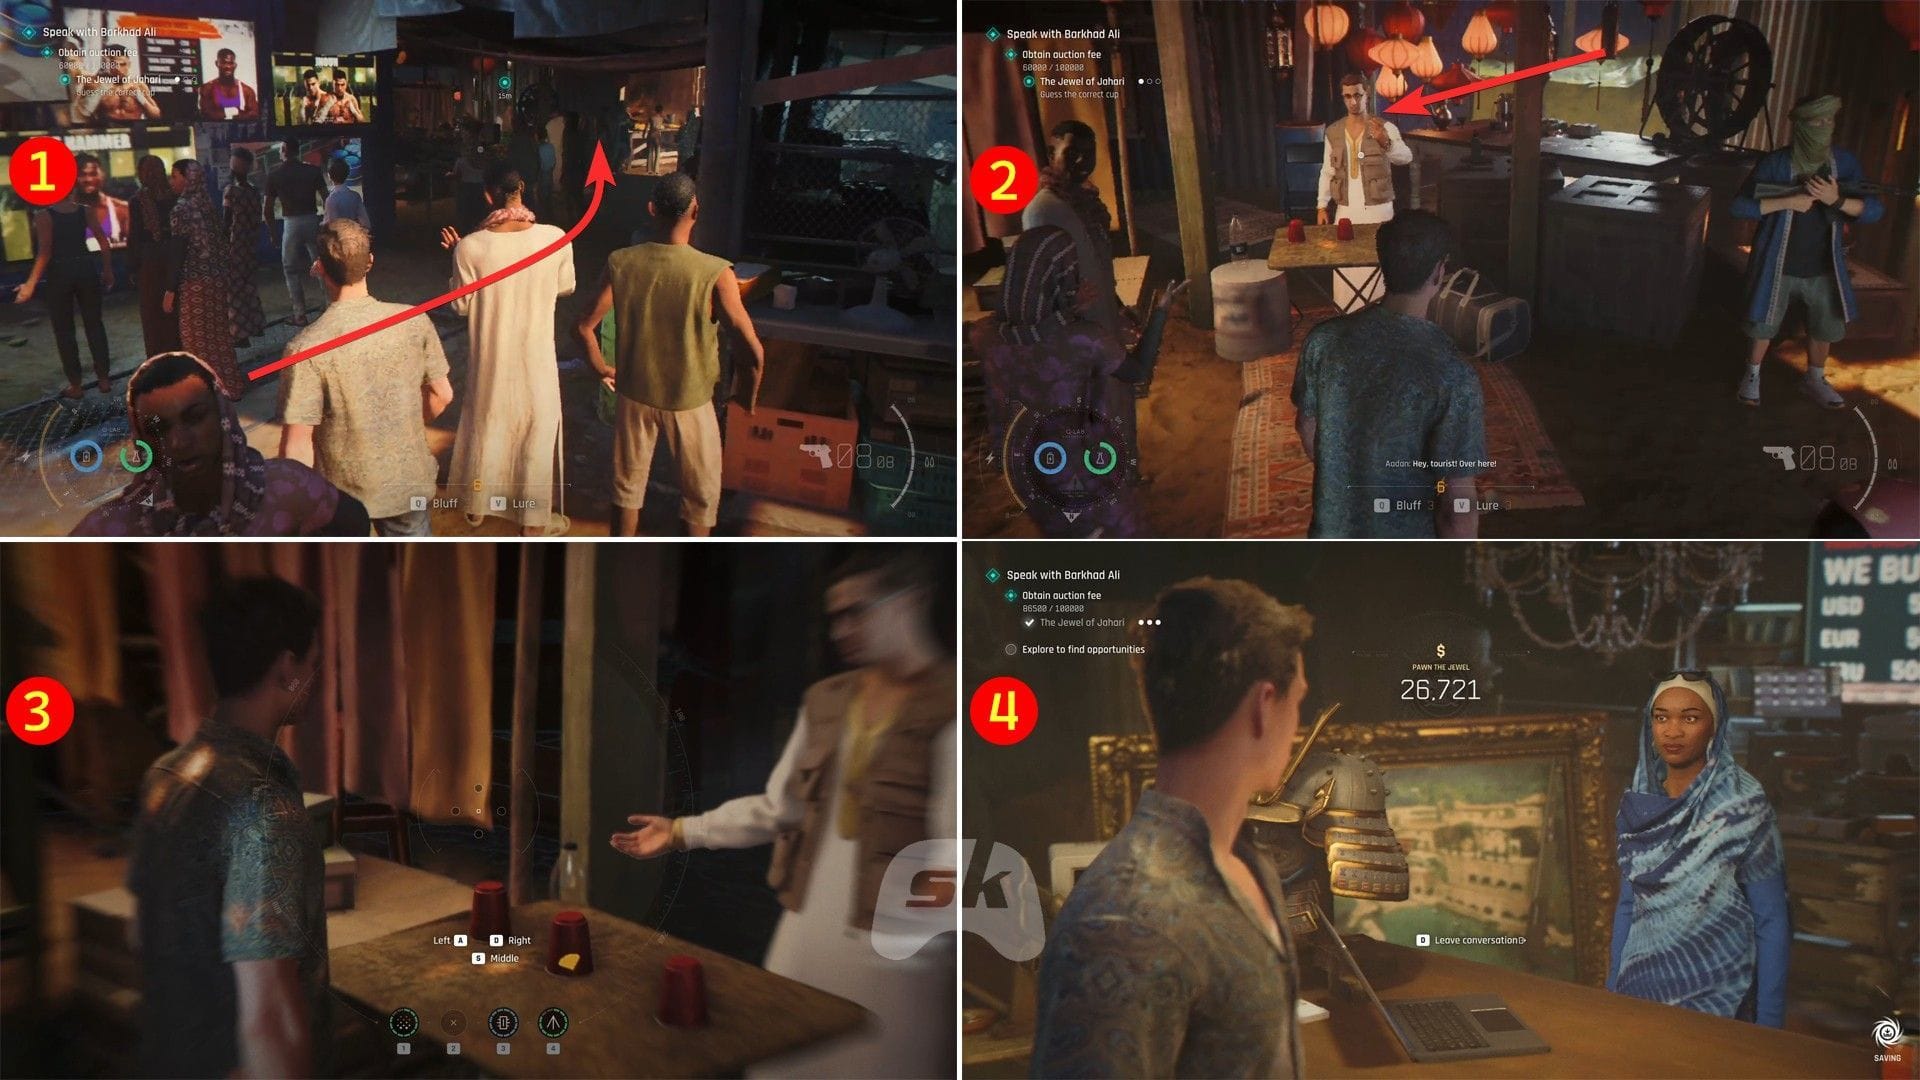
After making an exit, take a left turn to find the man Nirmala was talking about earlier. The one who has the jewel she wanted. Speak with him and pay 3500 dollars as an entry fee (reason why you need to collect some money first) to start the game, where you have to guess the correct cup.
After he shuffles the cup, use your Q-Lens (press T) to detect the jewel inside (shown in yellow). It’s a bit of cheating, but it is what it is. After choosing the correct cup, you will receive the jewel of Jahari. Next, return it to Nirmala to obtain 30,000 dollars.
3) Win the shooting game
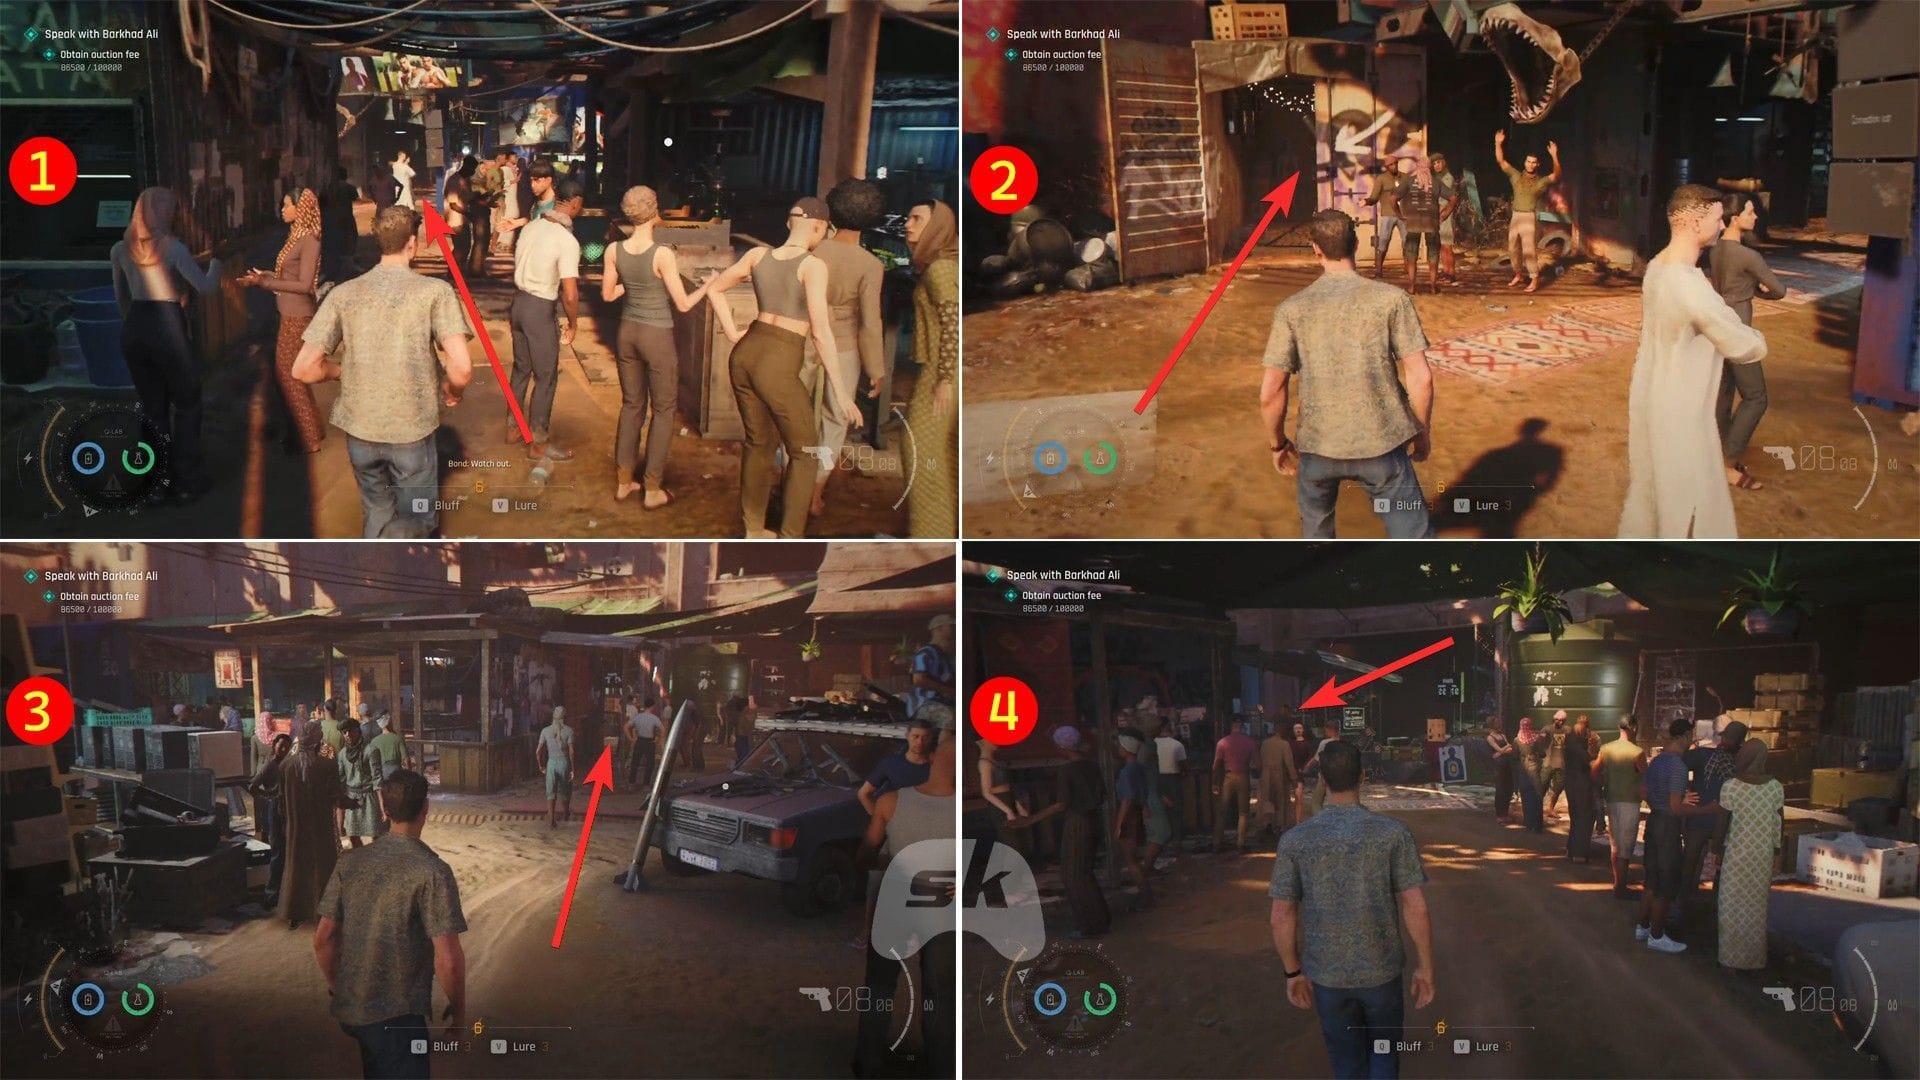
From Nirmala’s shop, go to the opposite side again, then take the narrow path on the left to get to another section.
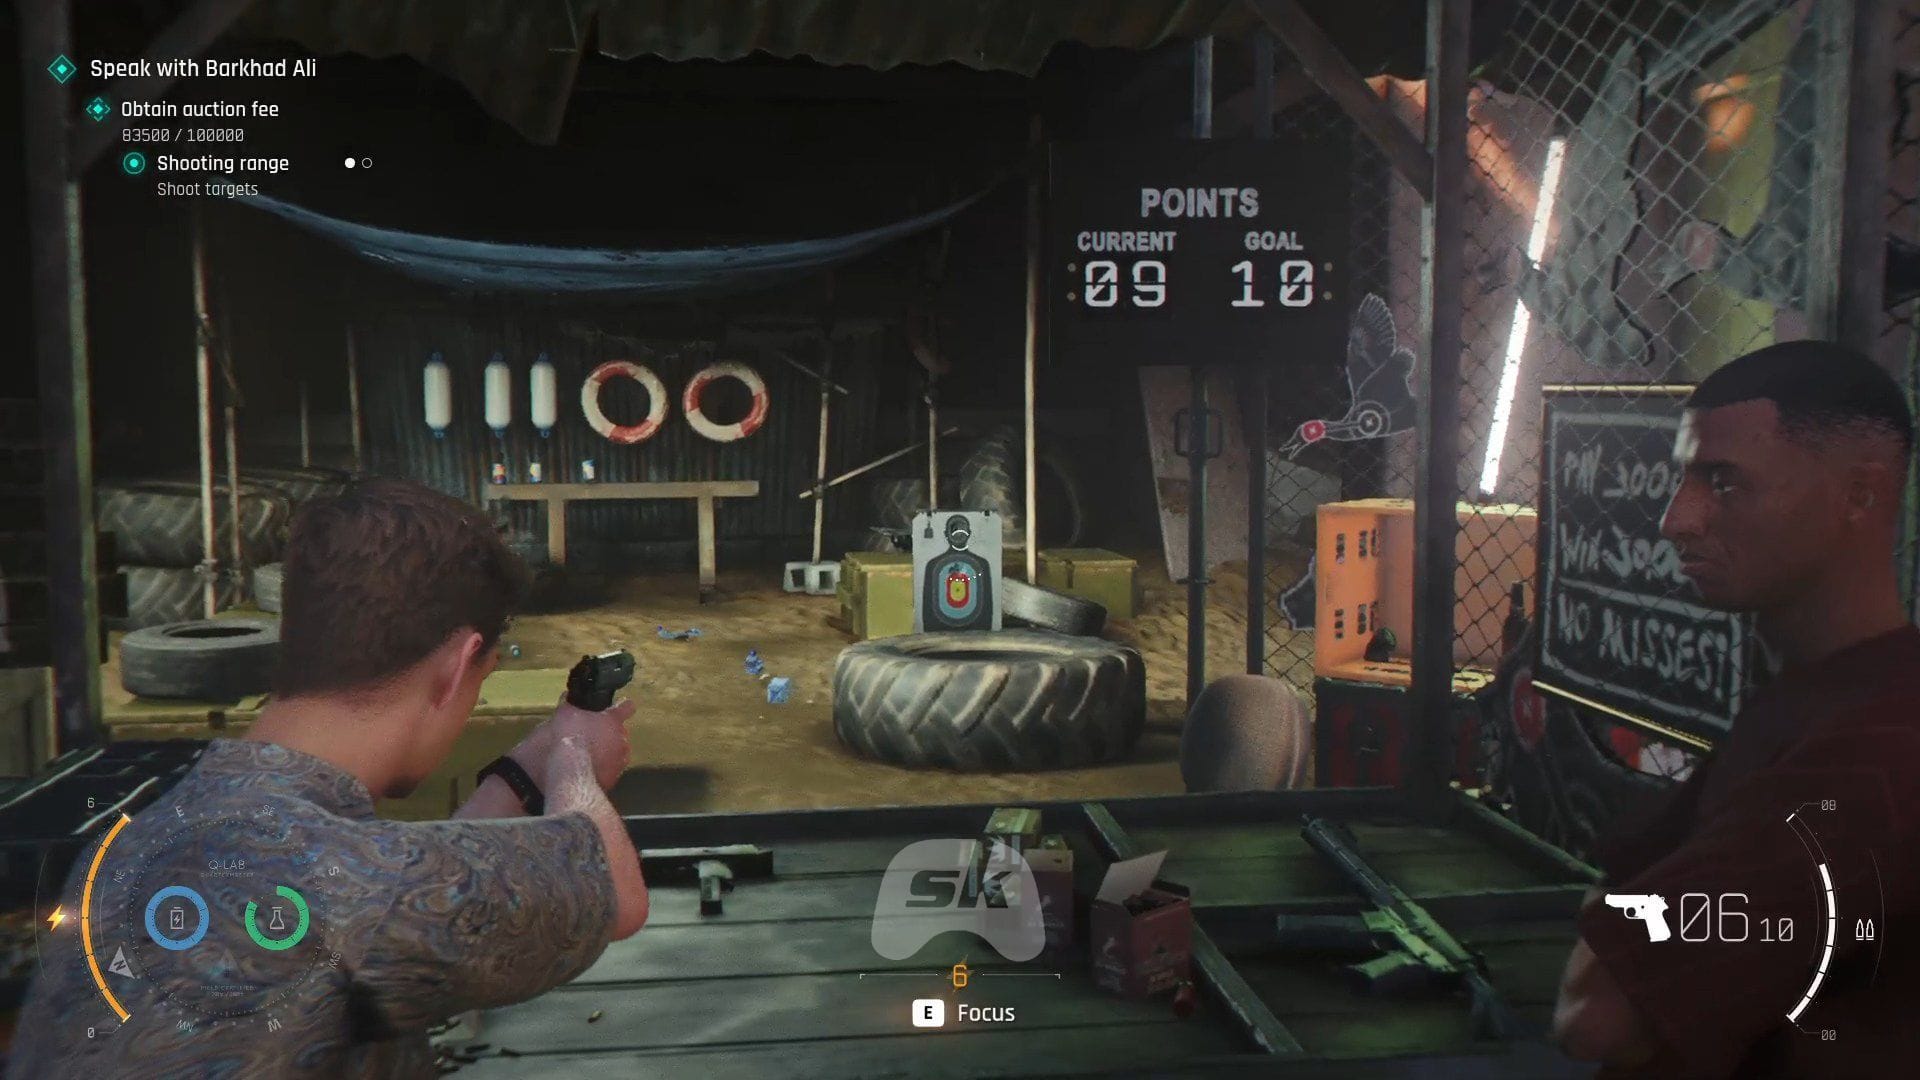
Proceed forward to find Basim’s shop. Talk to him and pay 3000 dollar entry fee. Afterward, you have to hit 10 targets without missing to win 30,000 dollars. With this, you will now have the required funds to access the auction event.
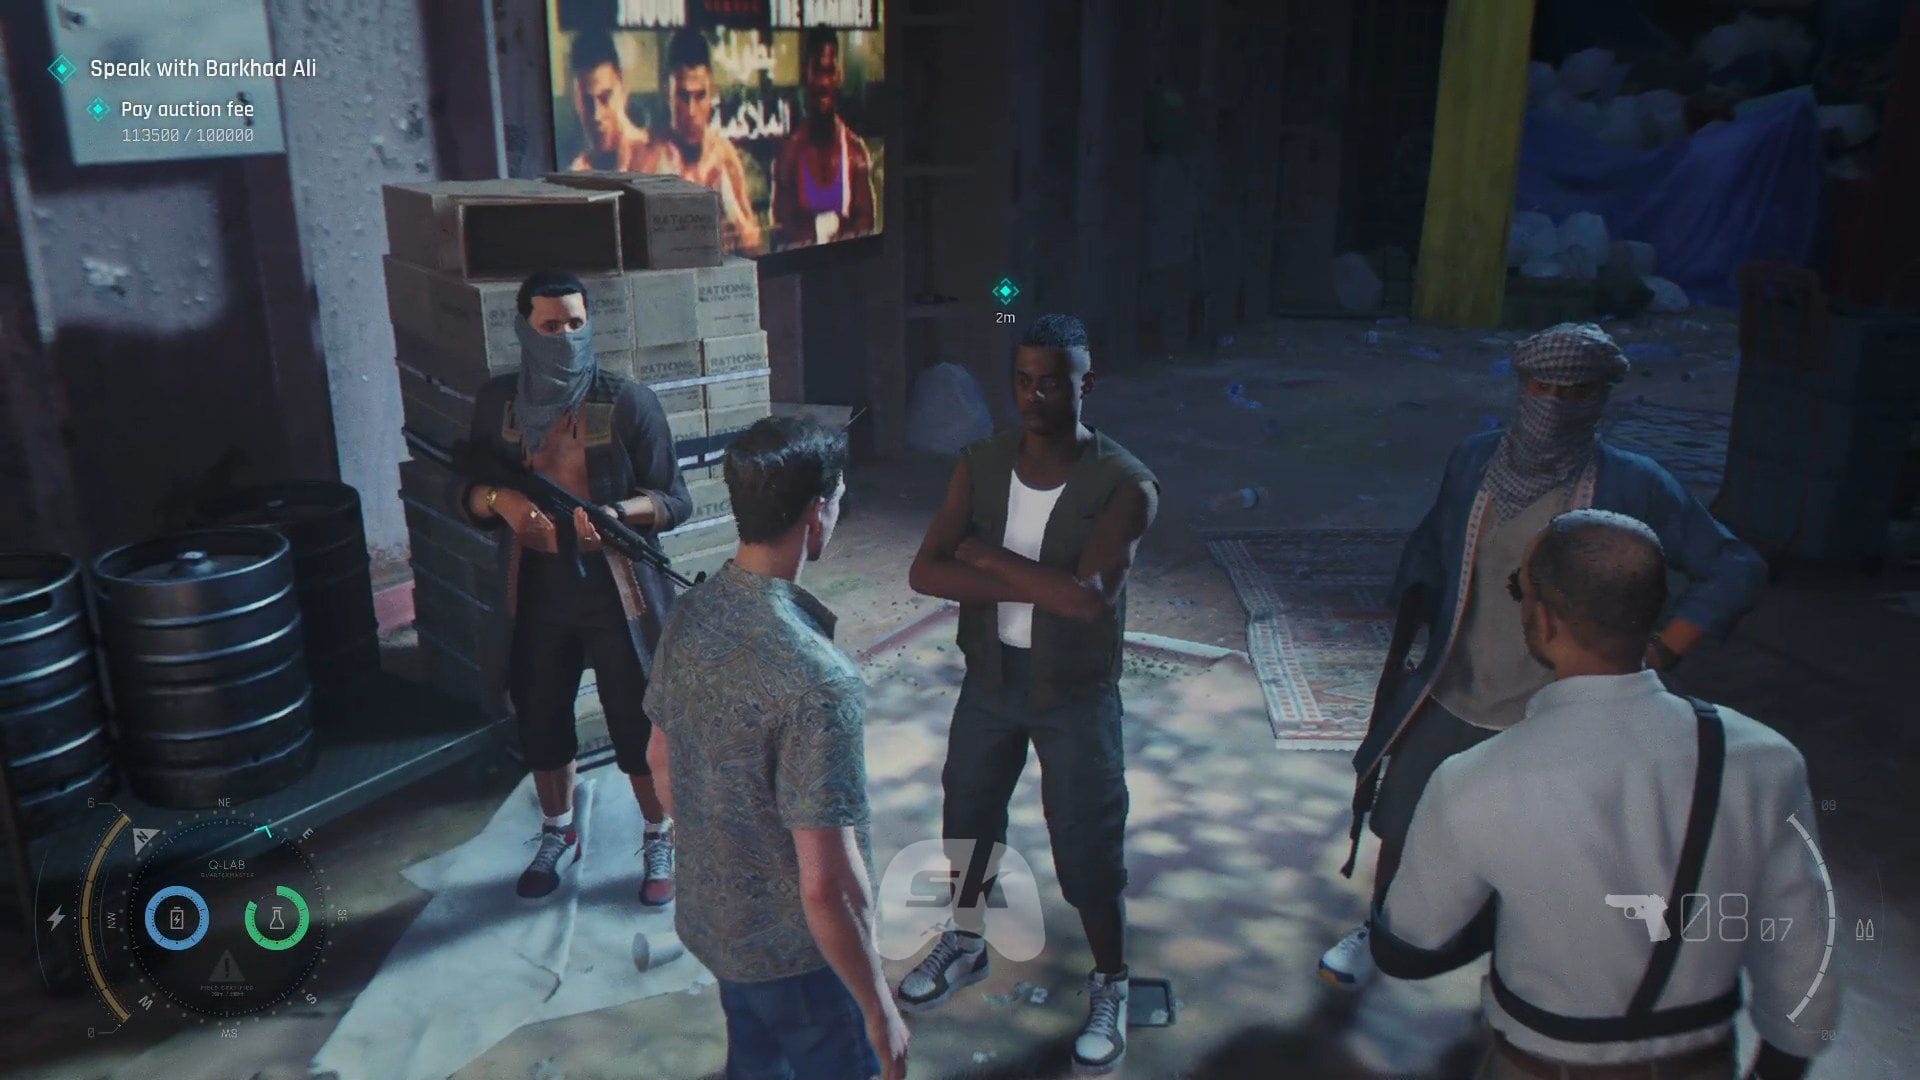
Return to the previous location, speak with Bawma’s men, and give the invitation (which Greenway gathered) and the 100,000-dollar entry fee to proceed.
Join the auction
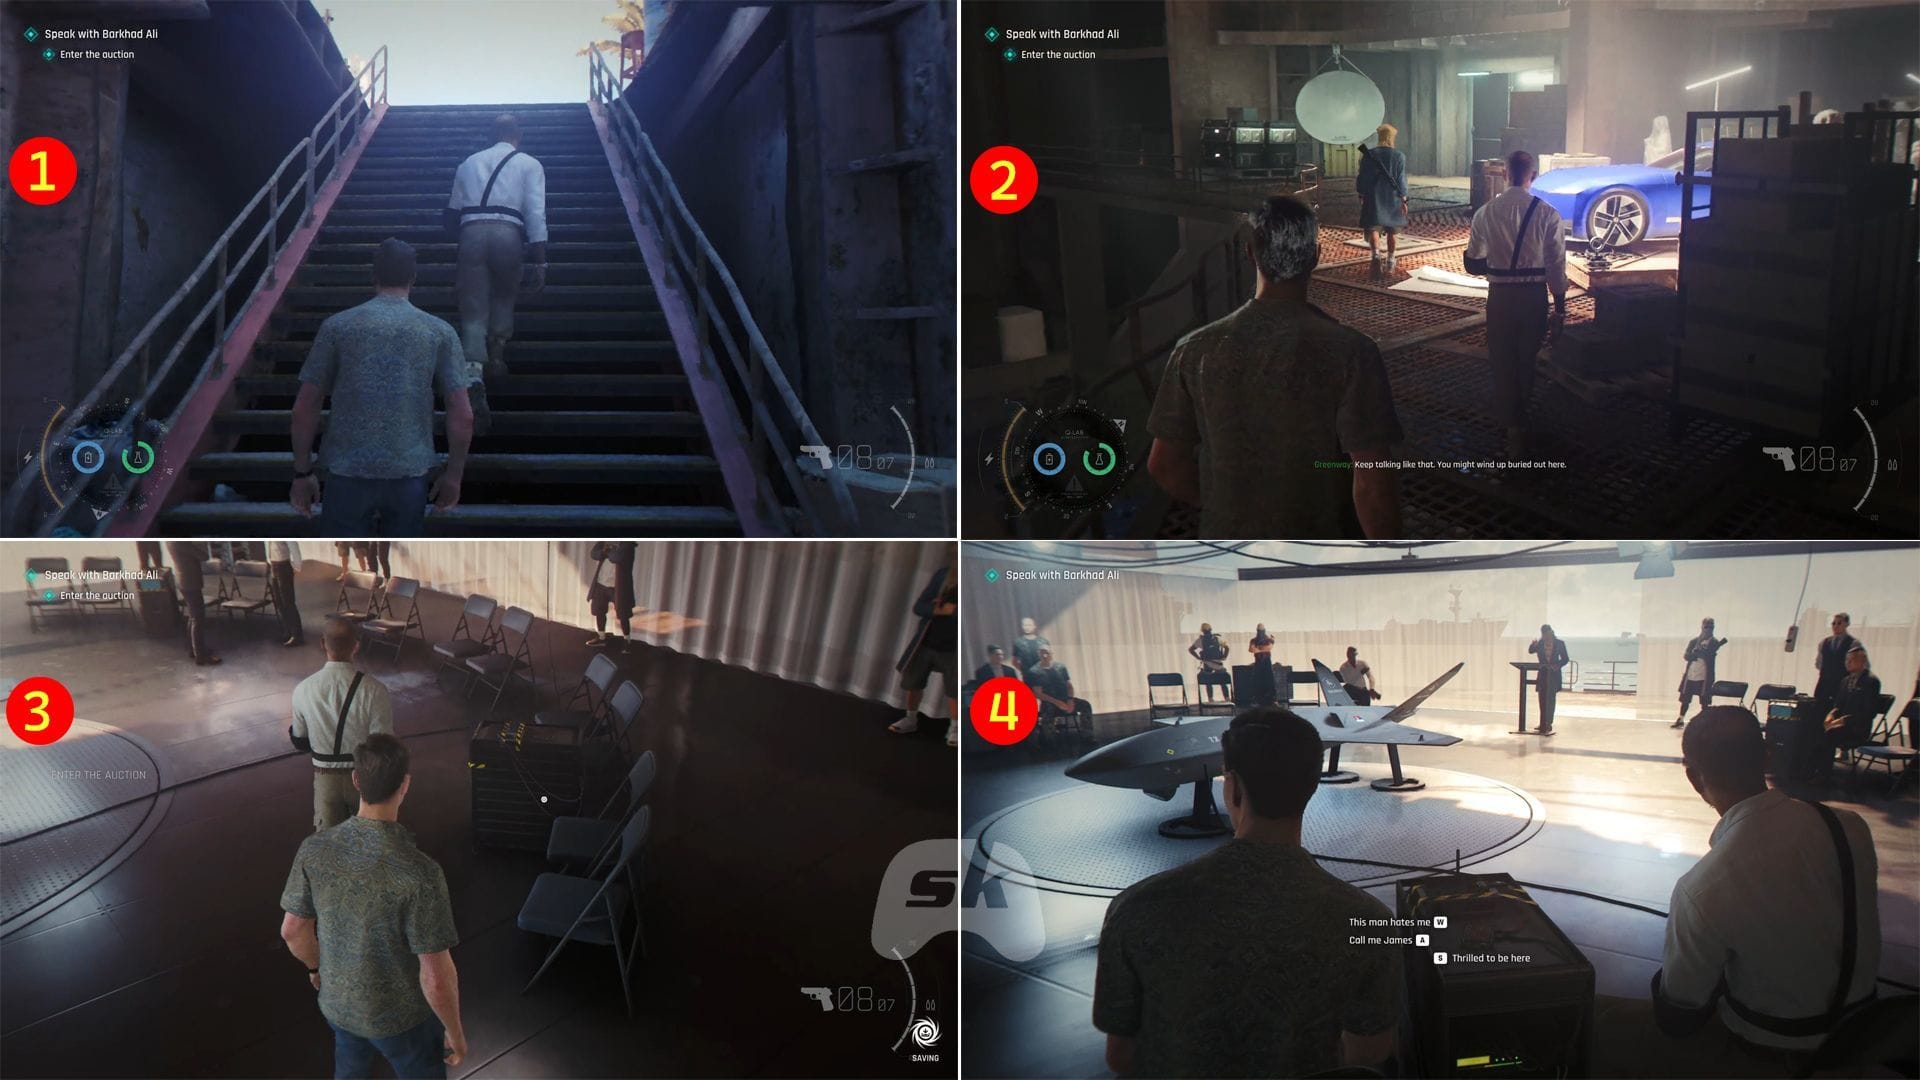
Next, follow Greenway to the auction area and take a seat beside him. Wait for the auction to begin, and when it’s your turn to speak, choose one of the prompts. I chose “This man hates me” during my playthrough.
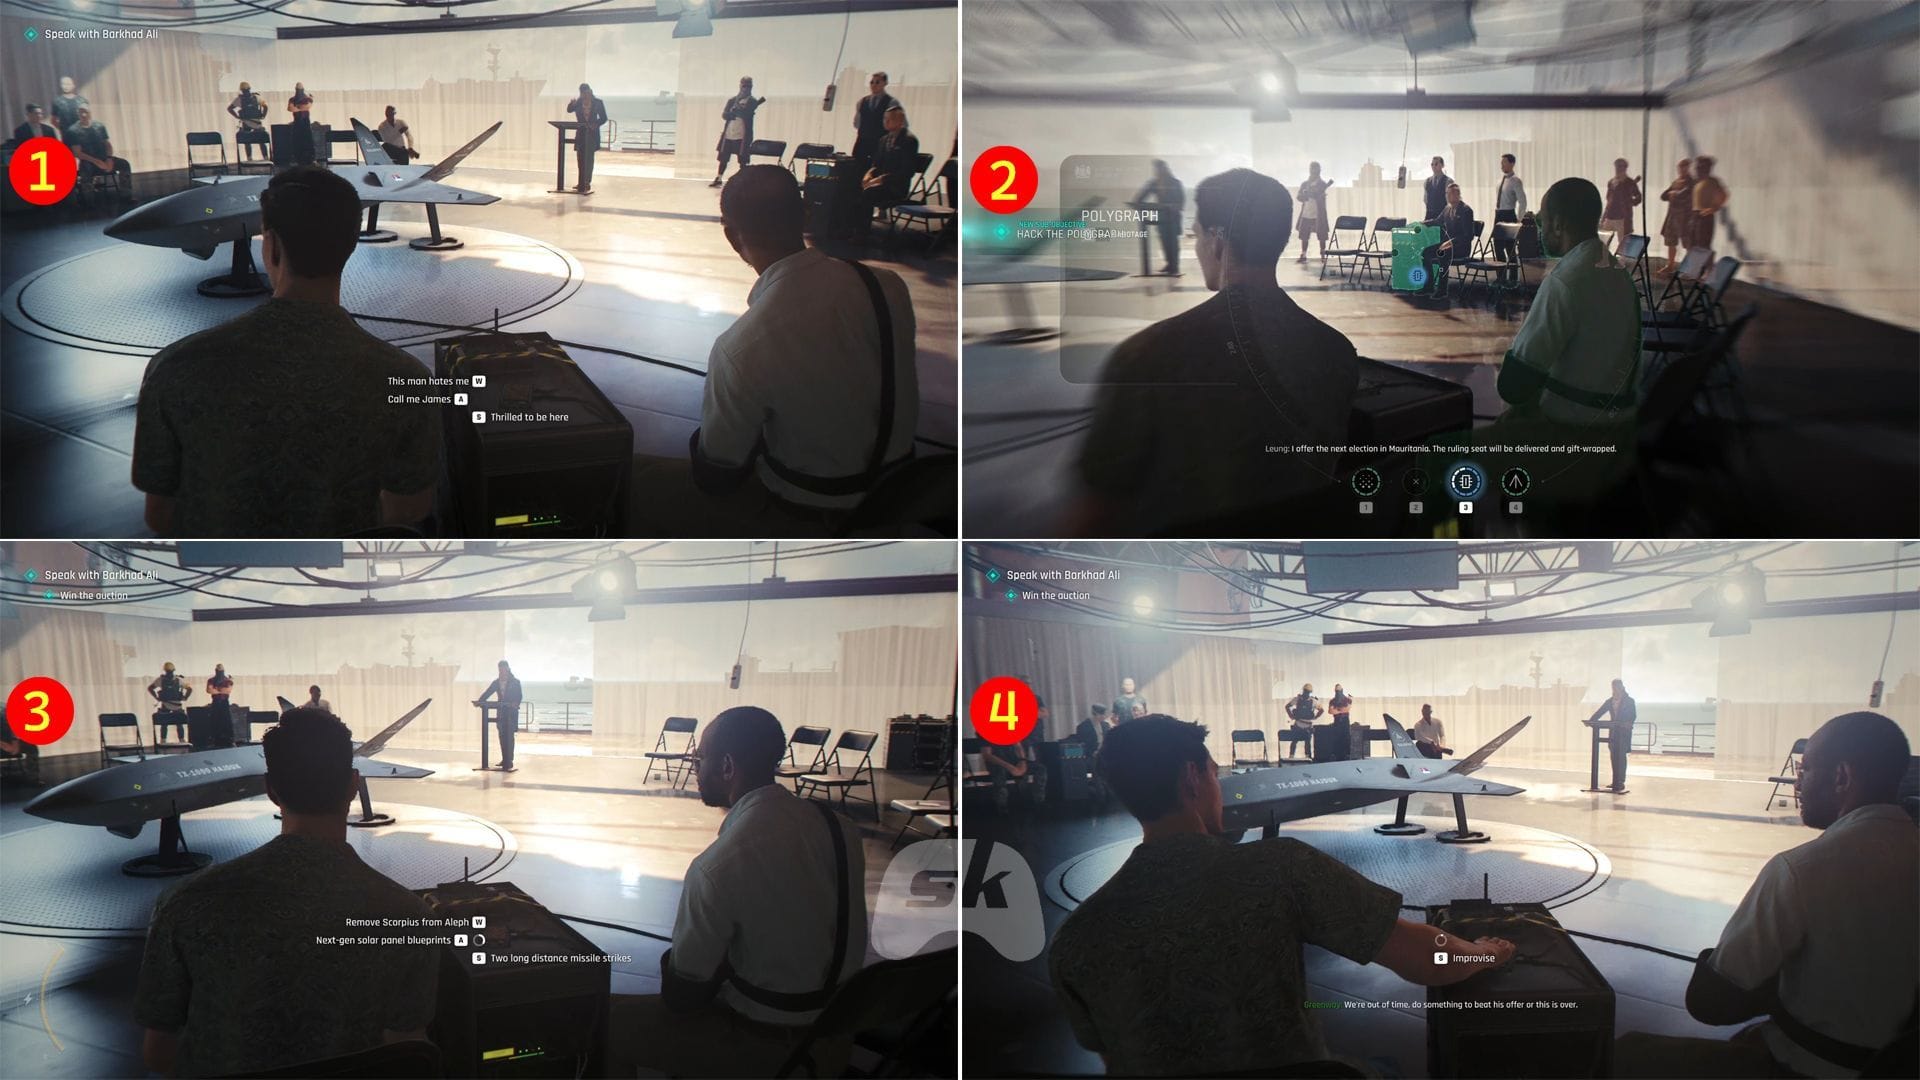
Then you have to submit a bid by selecting one of these three amounts: 9 Million USD, 3 Million USD, or 1 Million USD. However, regardless of what you select, the story progresses the same way. Thus, choose any amount, and wait for Leung’s turn to bid. When that happens, use your watch to hack the polygraph machine.
Following that, you have to raise a bid by selecting any of the prompts. Choose whatever, and in the end, select the “Improvise” prompt to win the auction.
Reach 009’s boat in 007 First Light
Get to the crane
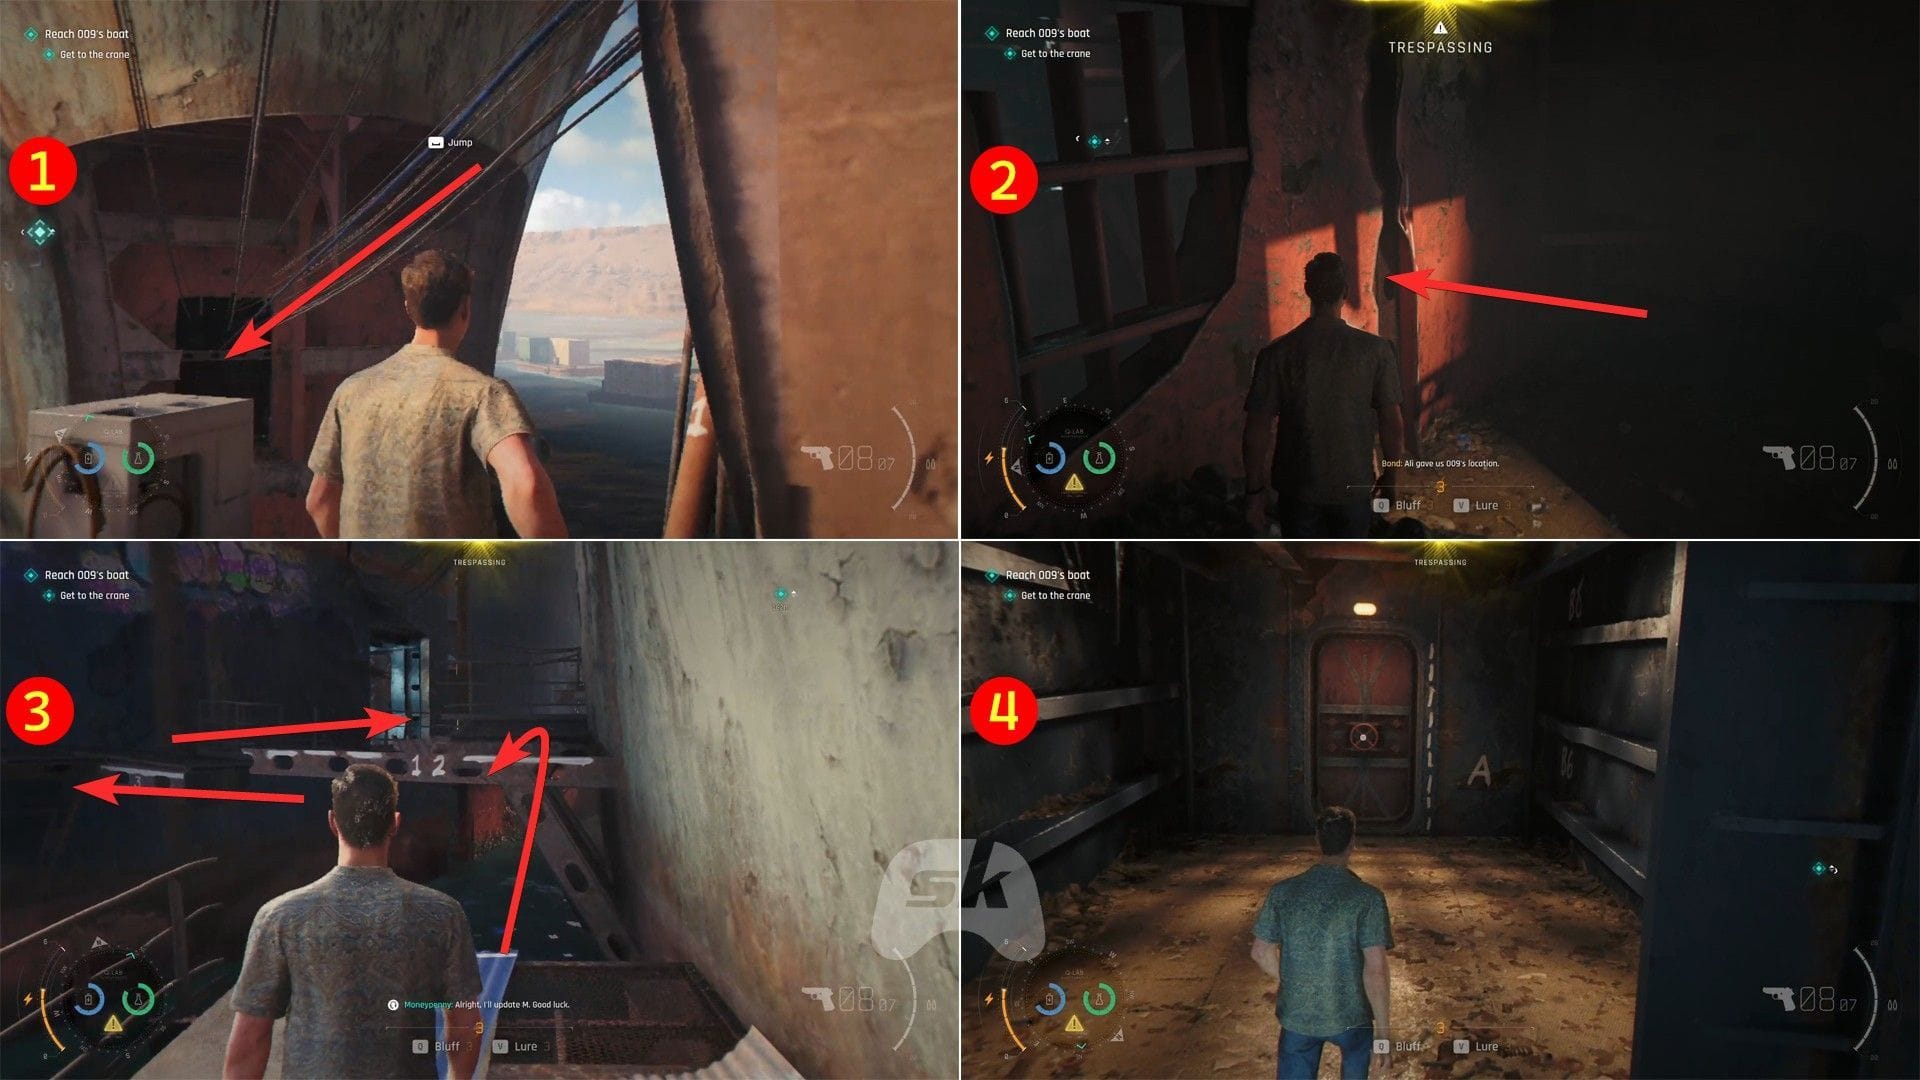
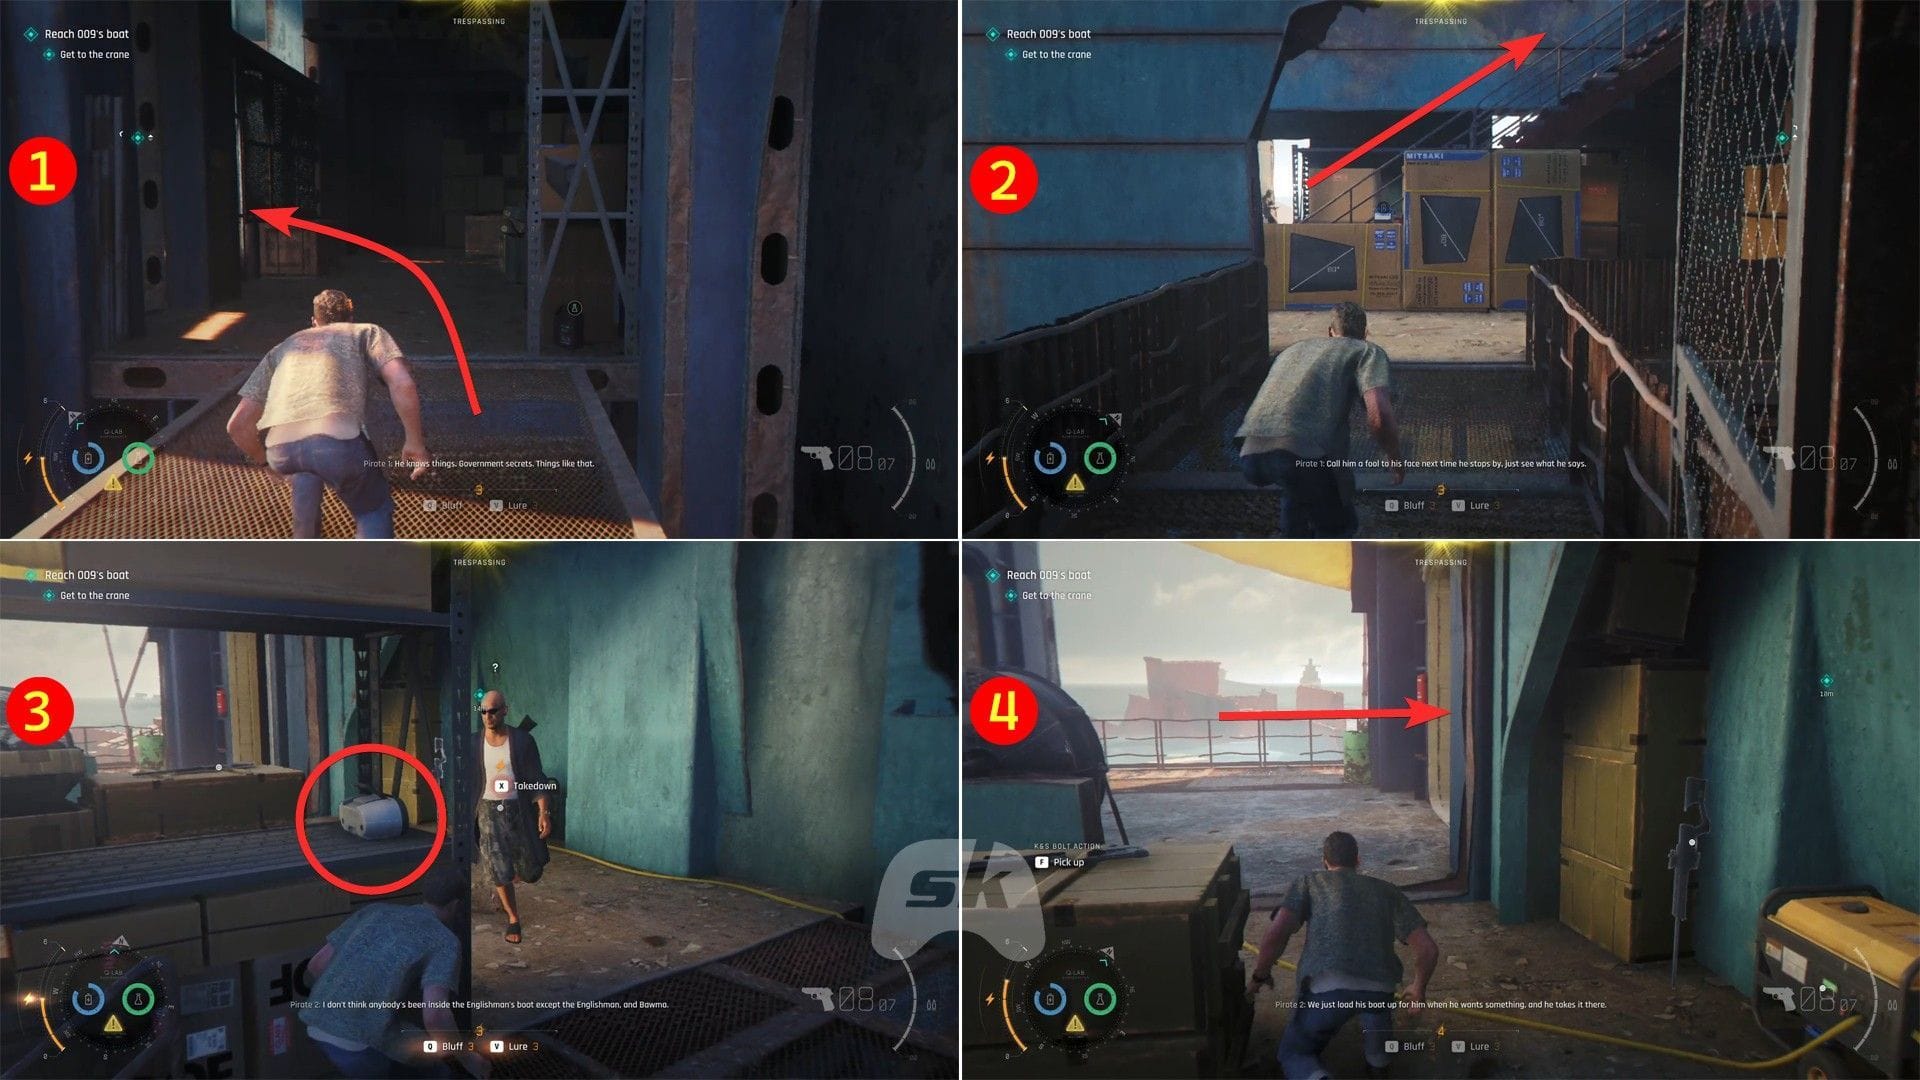
After the subsequent cutscene ends, you have to take a different route to reach 009’s boat. After speaking with Greenway and Ali, use the zipline to get to the other ship. Then, squeeze through the gap, turn left, and grab the ledges ahead to proceed left. Continue forward and open the bulkhead door. Next, go up the stairs to reach an open area with lots of pirates.
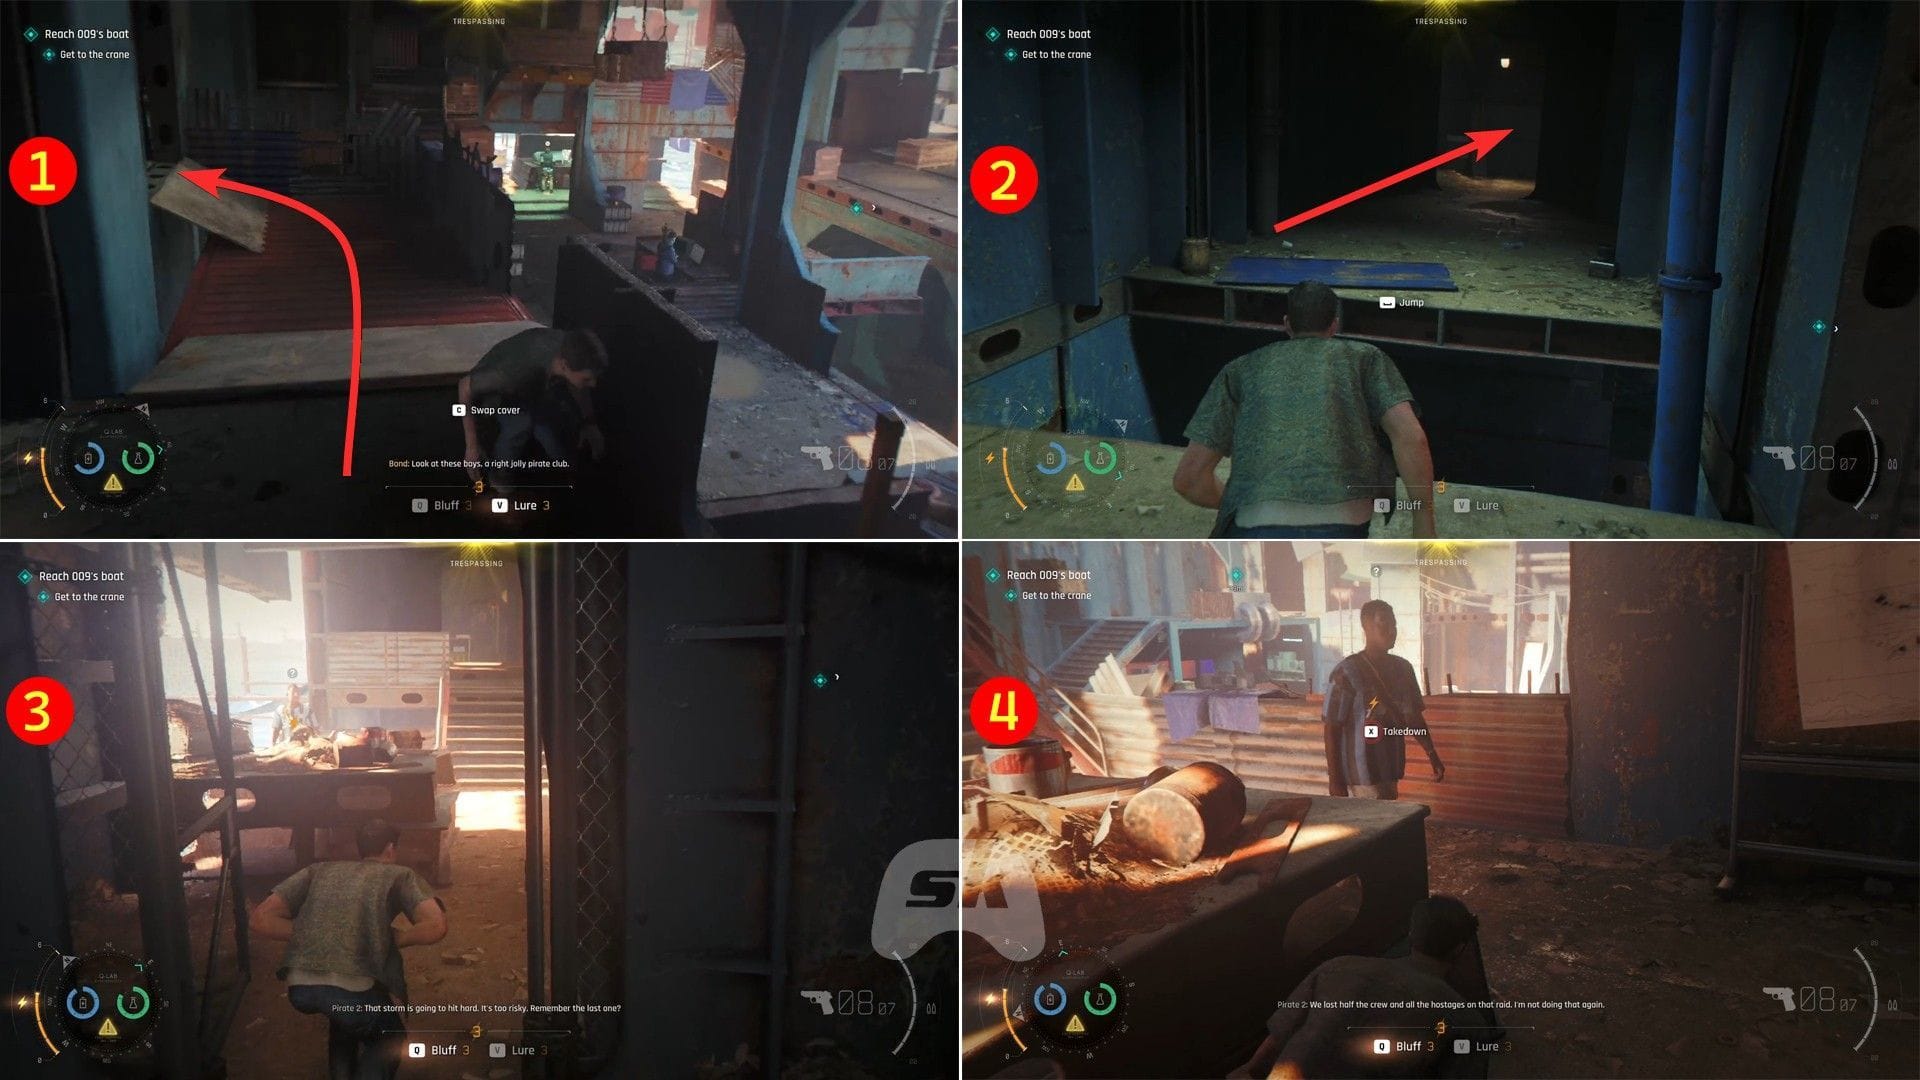
From there, proceed left, jump across the gap, continue forward, and kick the door open while being crouched. This will alert the nearby pirate. Hide behind the table, wait for him to approach, and take him down.
Note: You can also use the Laser Strap gadget to break the lock silently, and then perform a takedown.
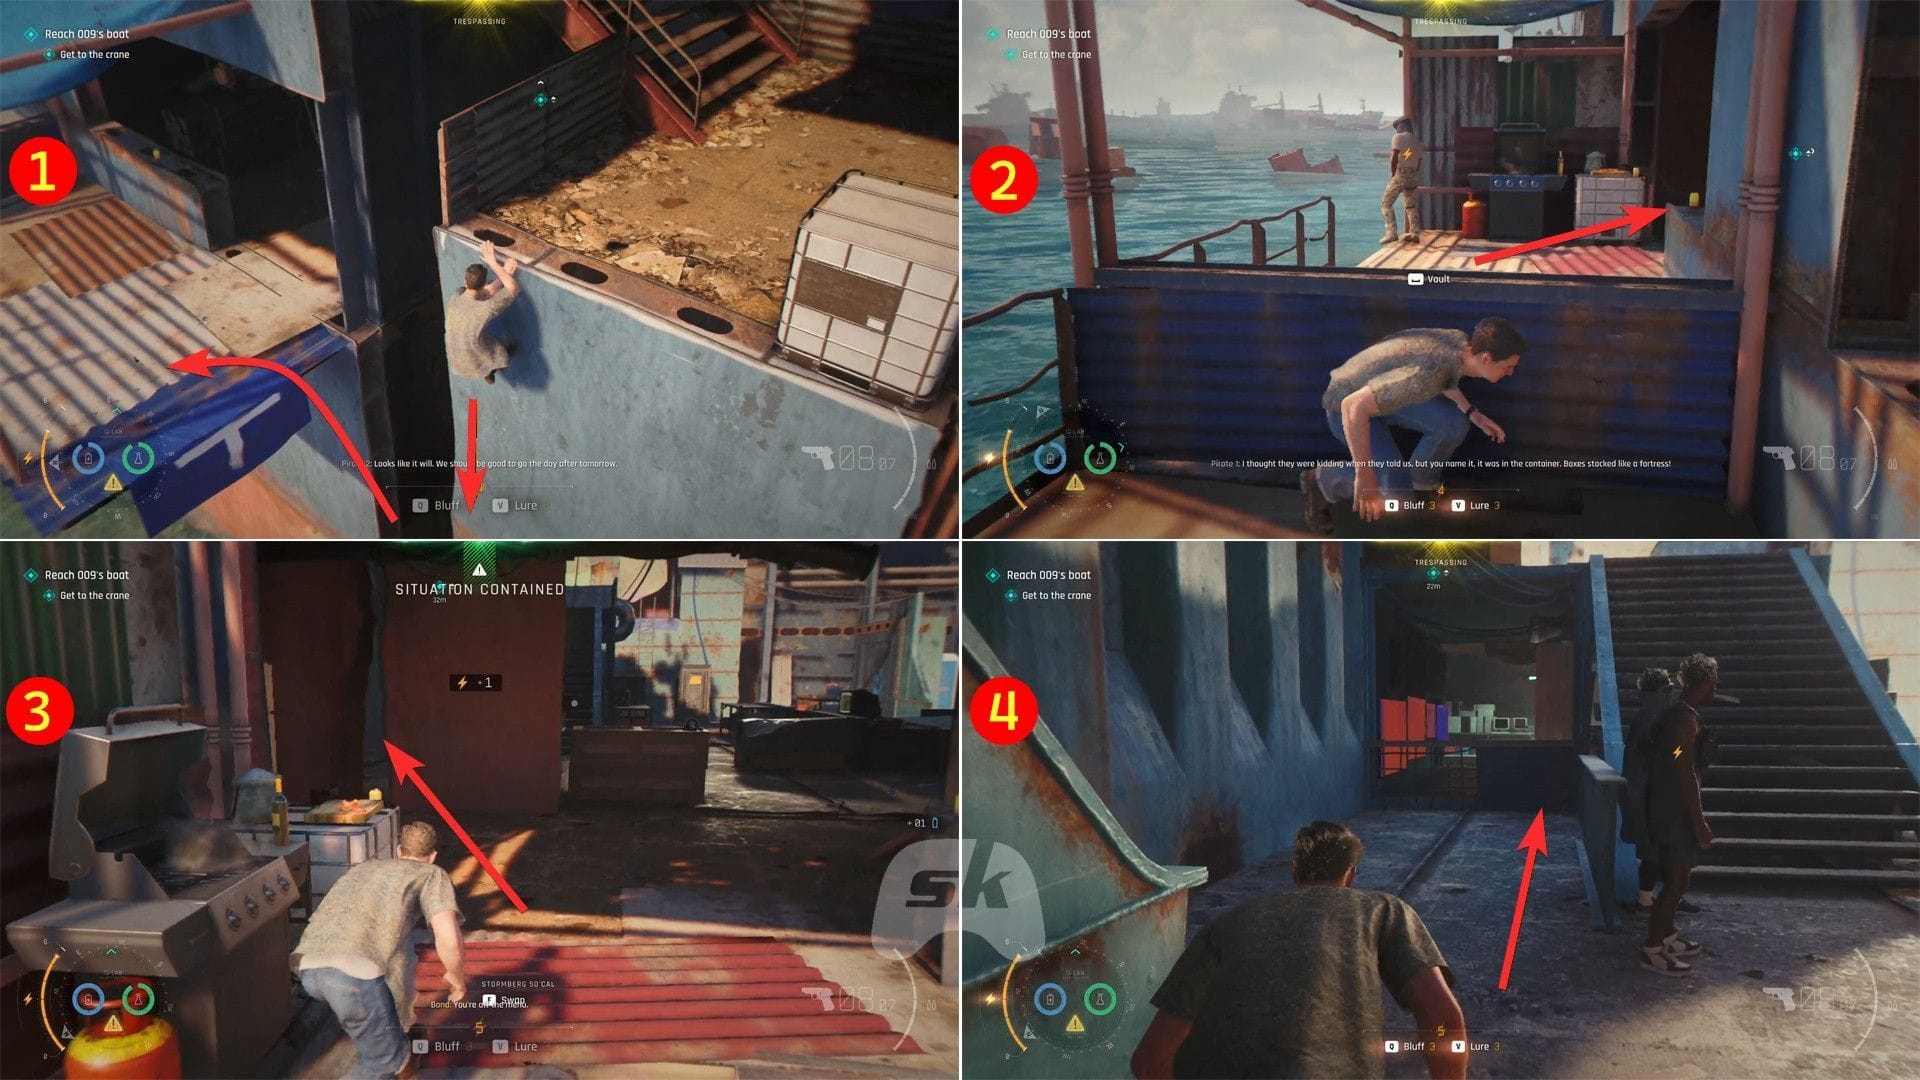
Afterward, hang from the left side’s ledge, drop down, and jump to the next platform. Take down the unaware enemy (you can ignore him as well) ahead and squeeze through the gap on the right (next to the fridge). Then, carefully go past the standing pirates to the cover in the front.
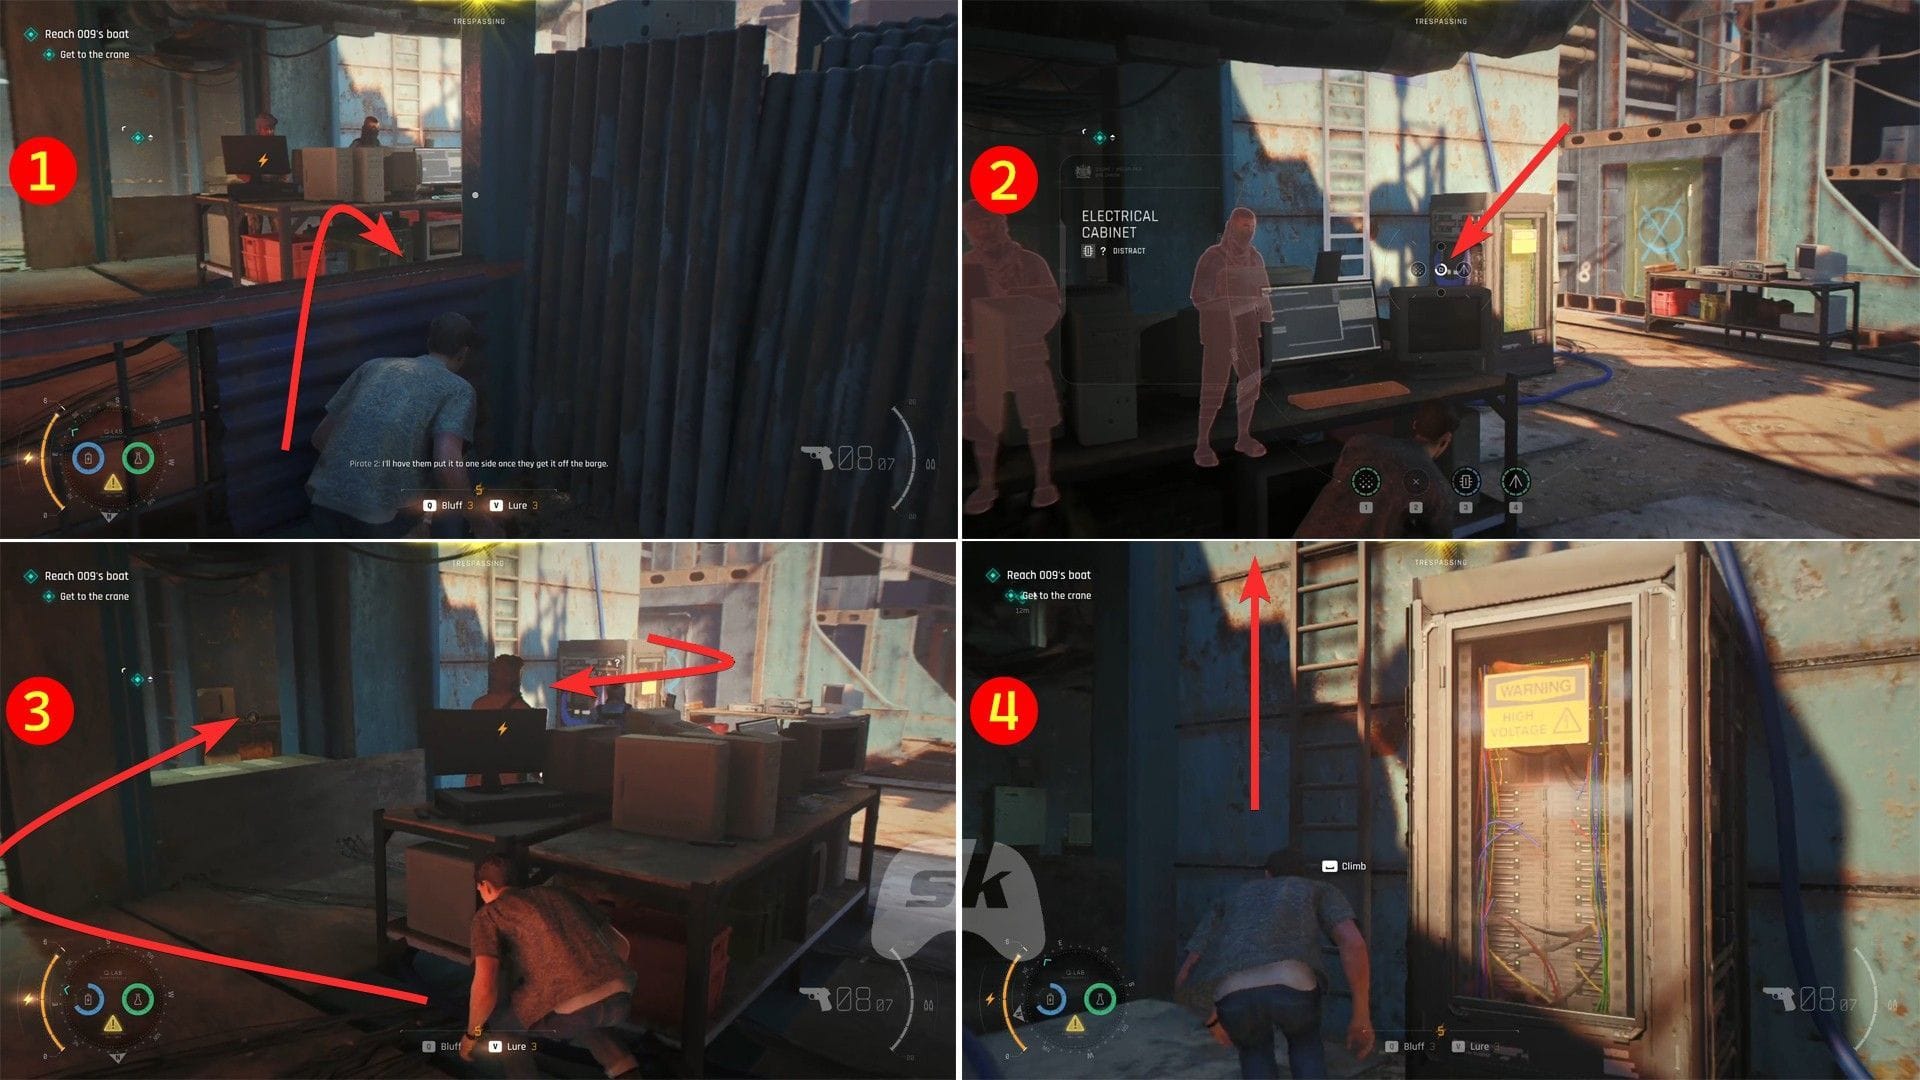
Now, vault over to the table ahead, and then use your Q-Watch on the electric cabinet nearby to distract the pirates. Use that opportunity to take the left-side pathway, reach the cabinet from the other side, and use the ladder to go up. Then, open the door on the left to trigger a cutscene (and unlock a checkpoint).
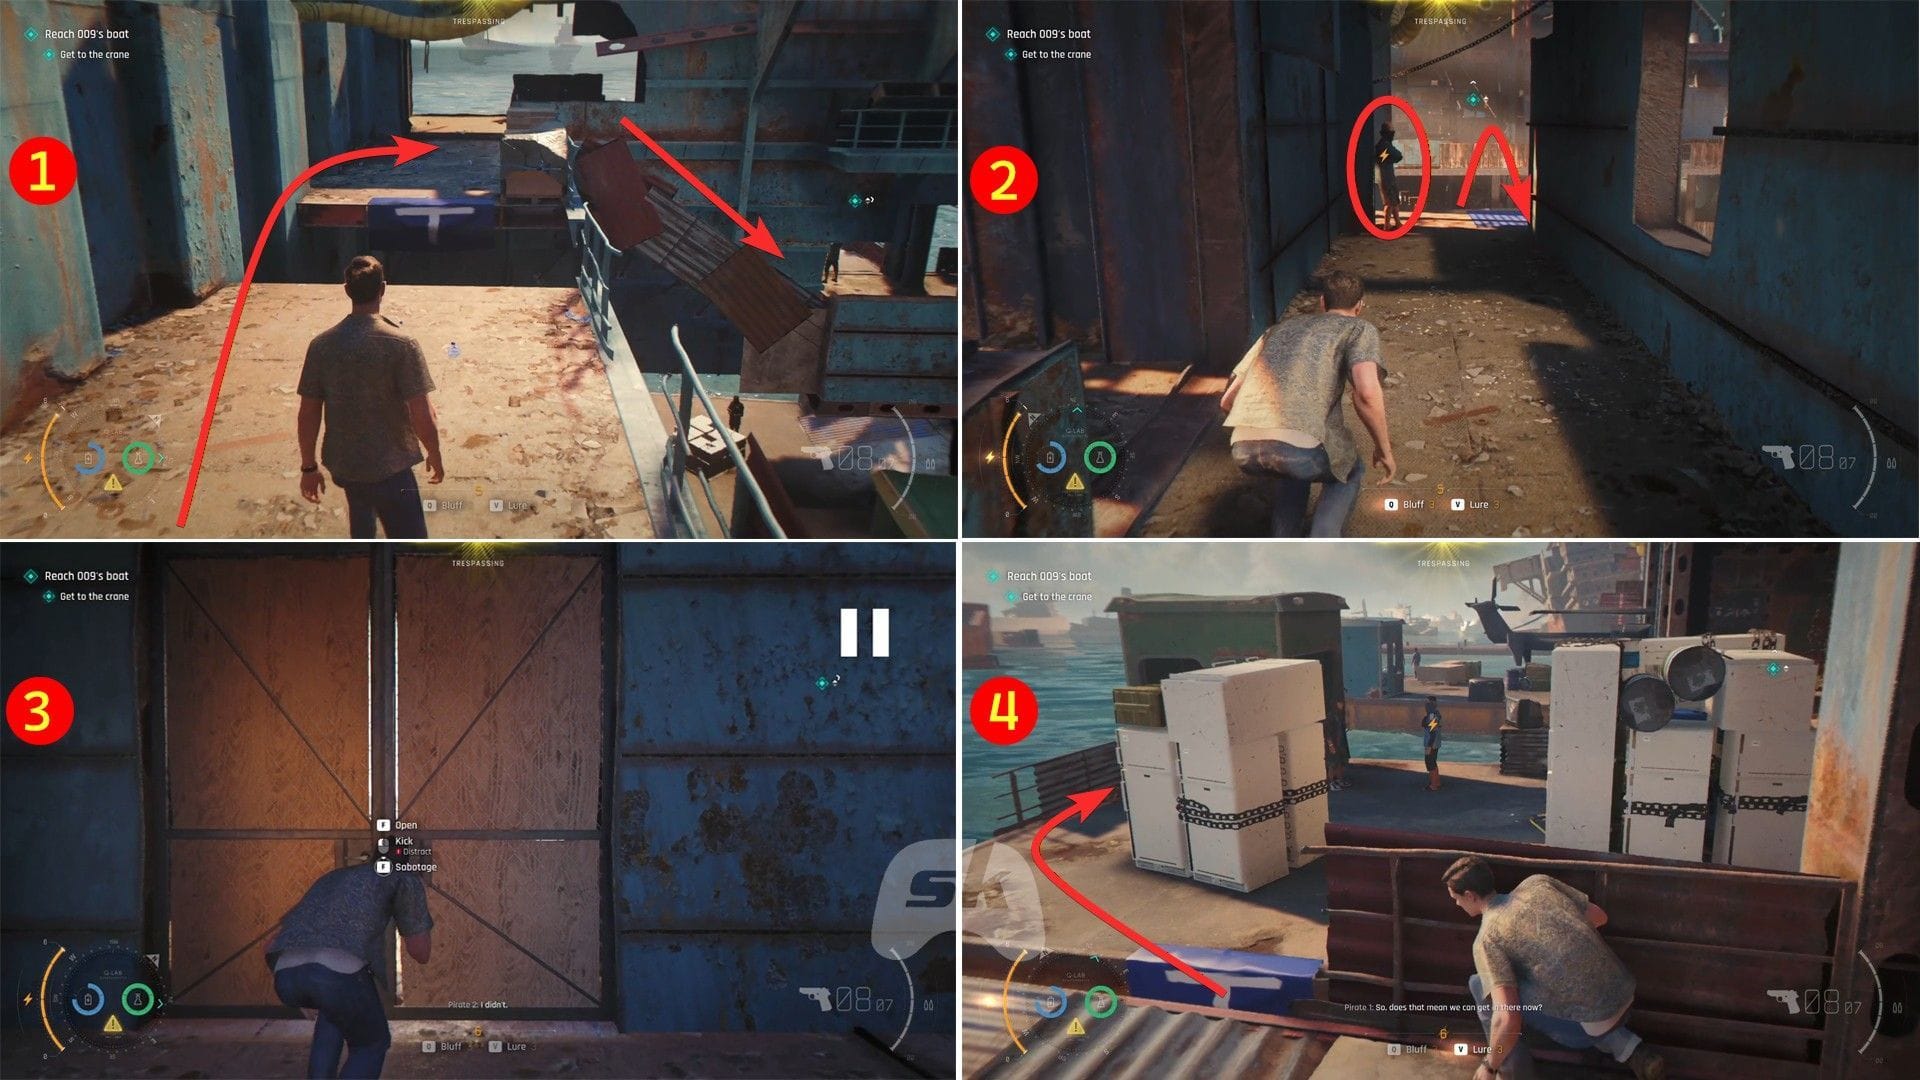
Now, head left, go down the stairs, and just ahead, take down the pirate from behind. Then, drop down from the right, and turn around to open the gate. Proceed right, take cover, and wait for the pirates to separate. When it happens, go from the left and take down the standing pirate.
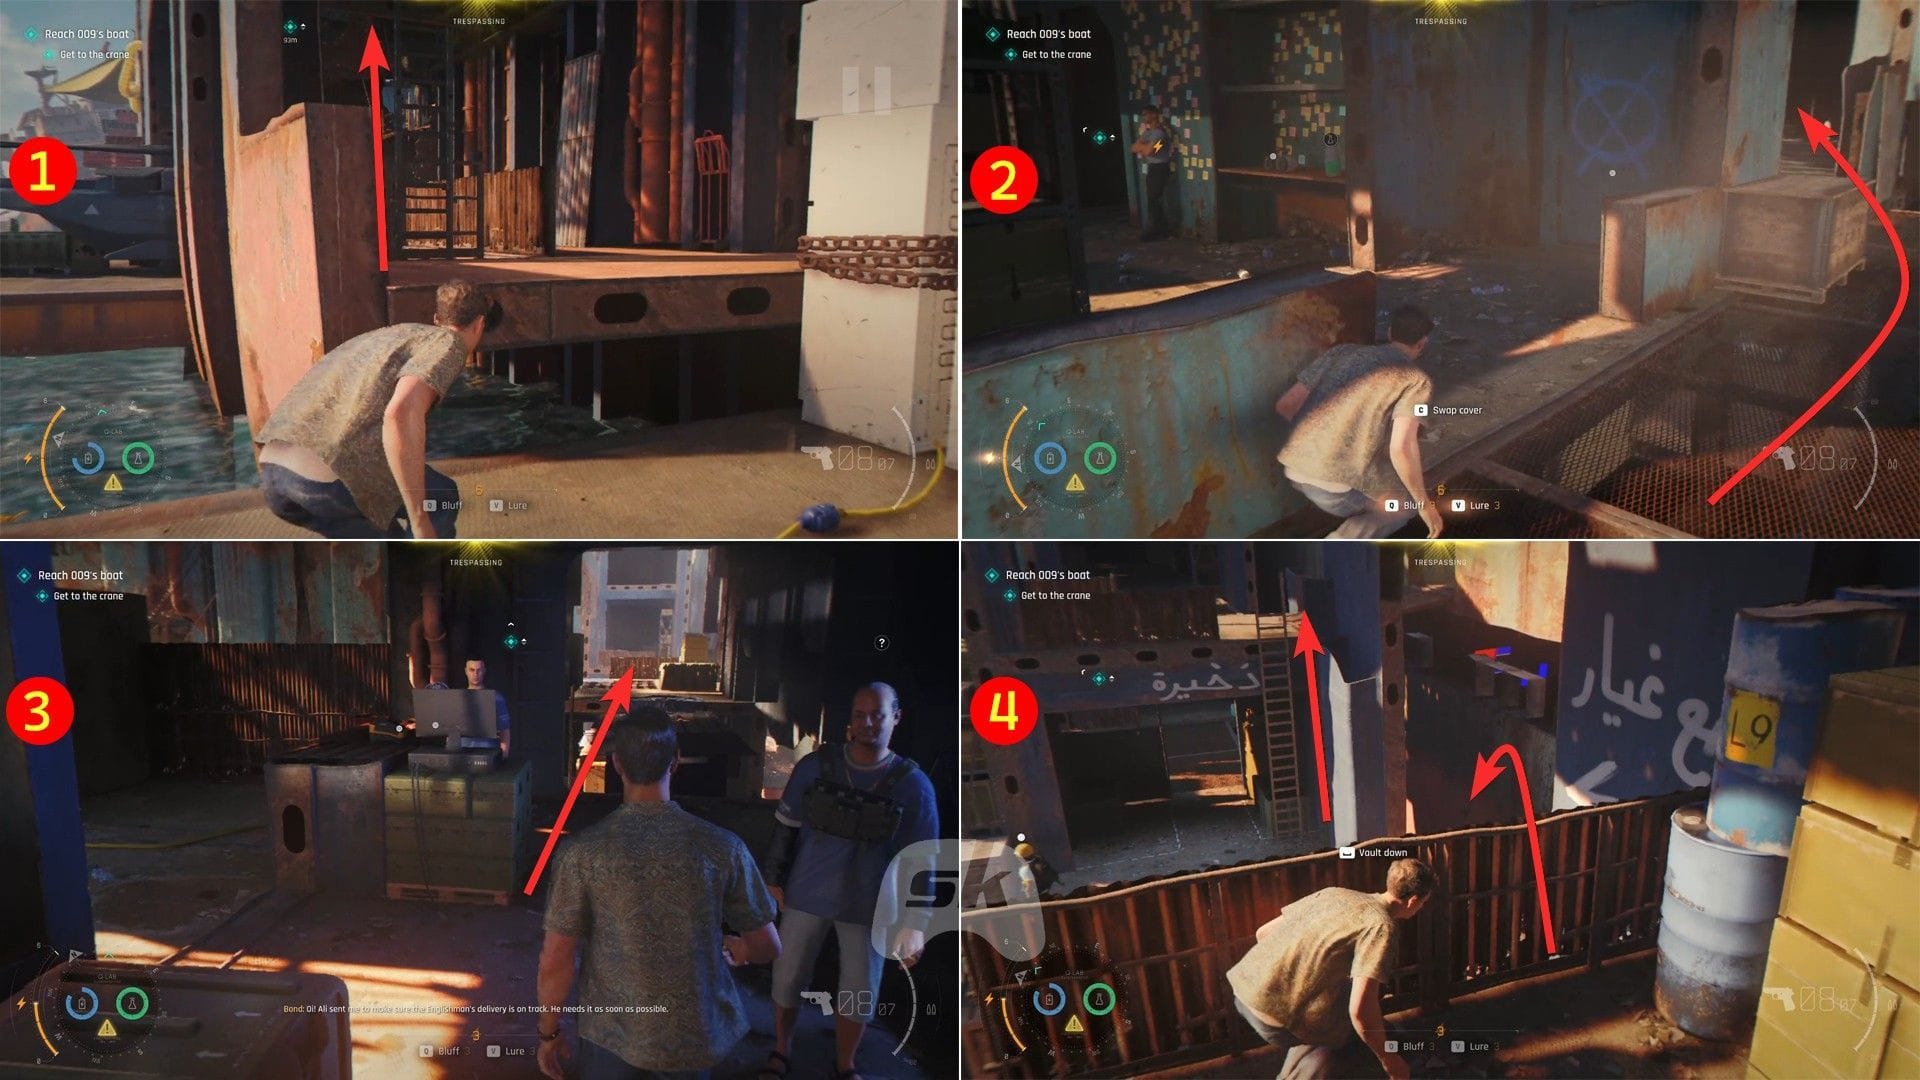
Next, use the ladder on the left to go up. Use Q-Lense to track the enemy’s movement and avoid him. Then proceed right, then left, to find two pirates with a blue screen nearby. Use the Bluff ability here and continue forward while jumping across the gaps. After that, fall to the ground while tracking the enemy’s movements, then use the ladder ahead to climb up.
Move forward, sabotage the door on the left, and use the stairs to go up. You will find a stereo soon after reaching up. Turn it on to lure a pirate to you. Let him come near to take him down. Next, use the right-side entrance and open the bulkhead door.
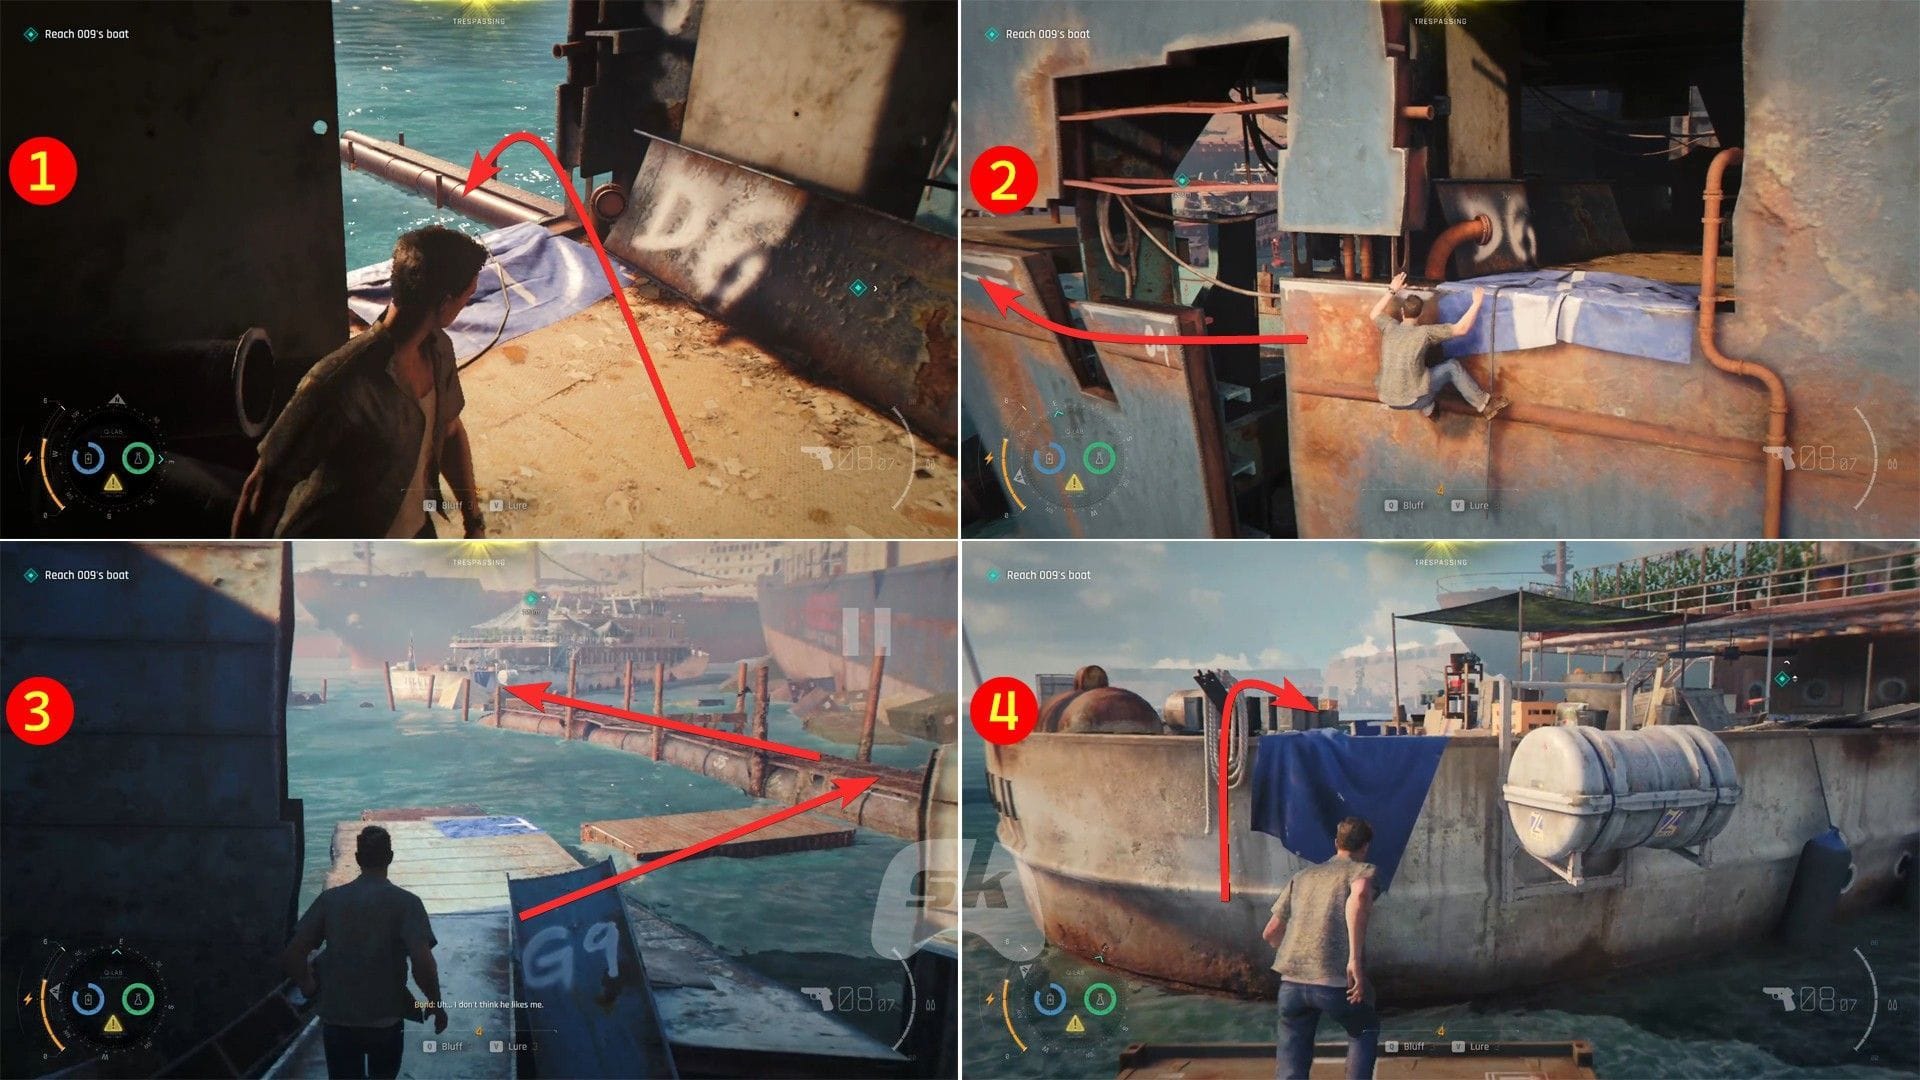
Afterward, climb down the left side’s ledge, then proceed to the left to reach a platform. From there, make your way downwards and continue forward to reach the boat.
Find 009 in 007 First Light
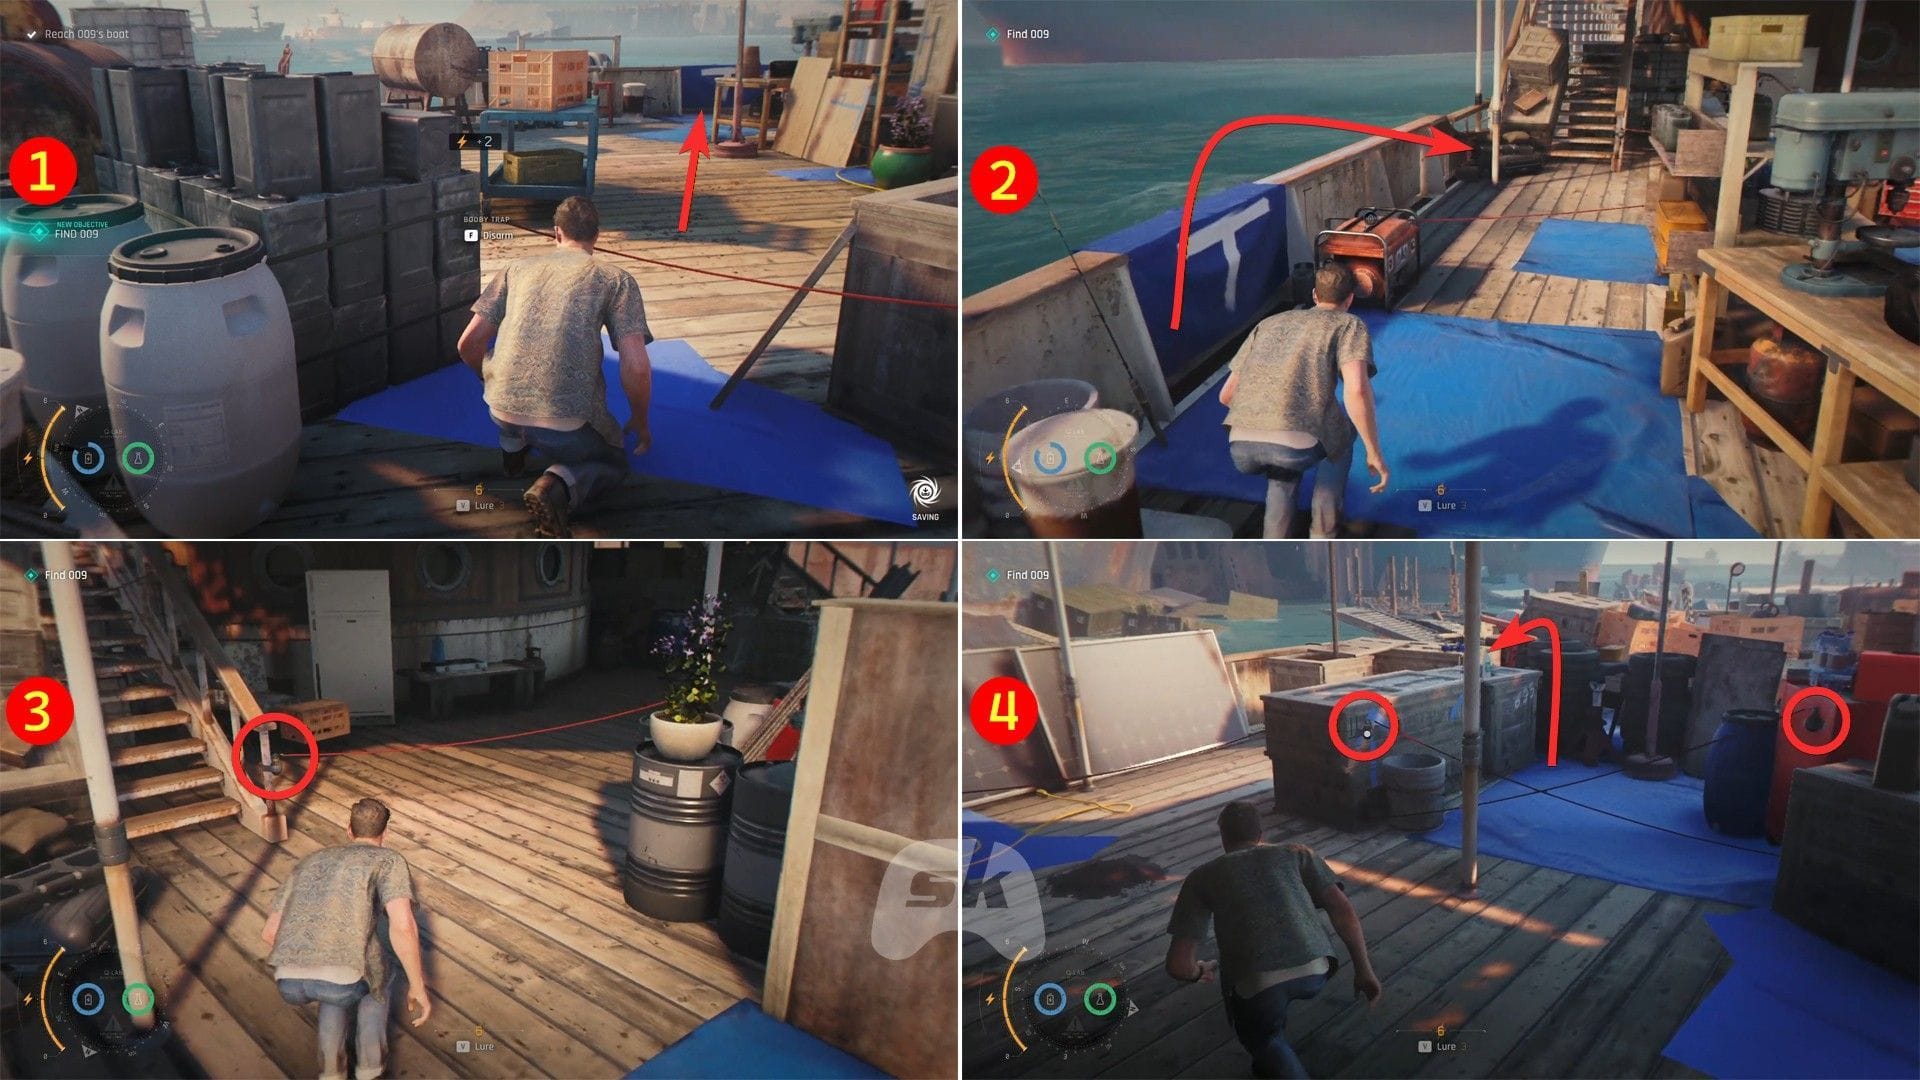
After getting into the boat, disarm the booby trap first. Then go left, hang on the ledge, proceed left, and get back up again to avoid the booby trap. Then, go in the middle, disarm the two booby traps there, and vault over the box on the left. Go up the stairs in front, and here, you will have to avoid laser tripmines.
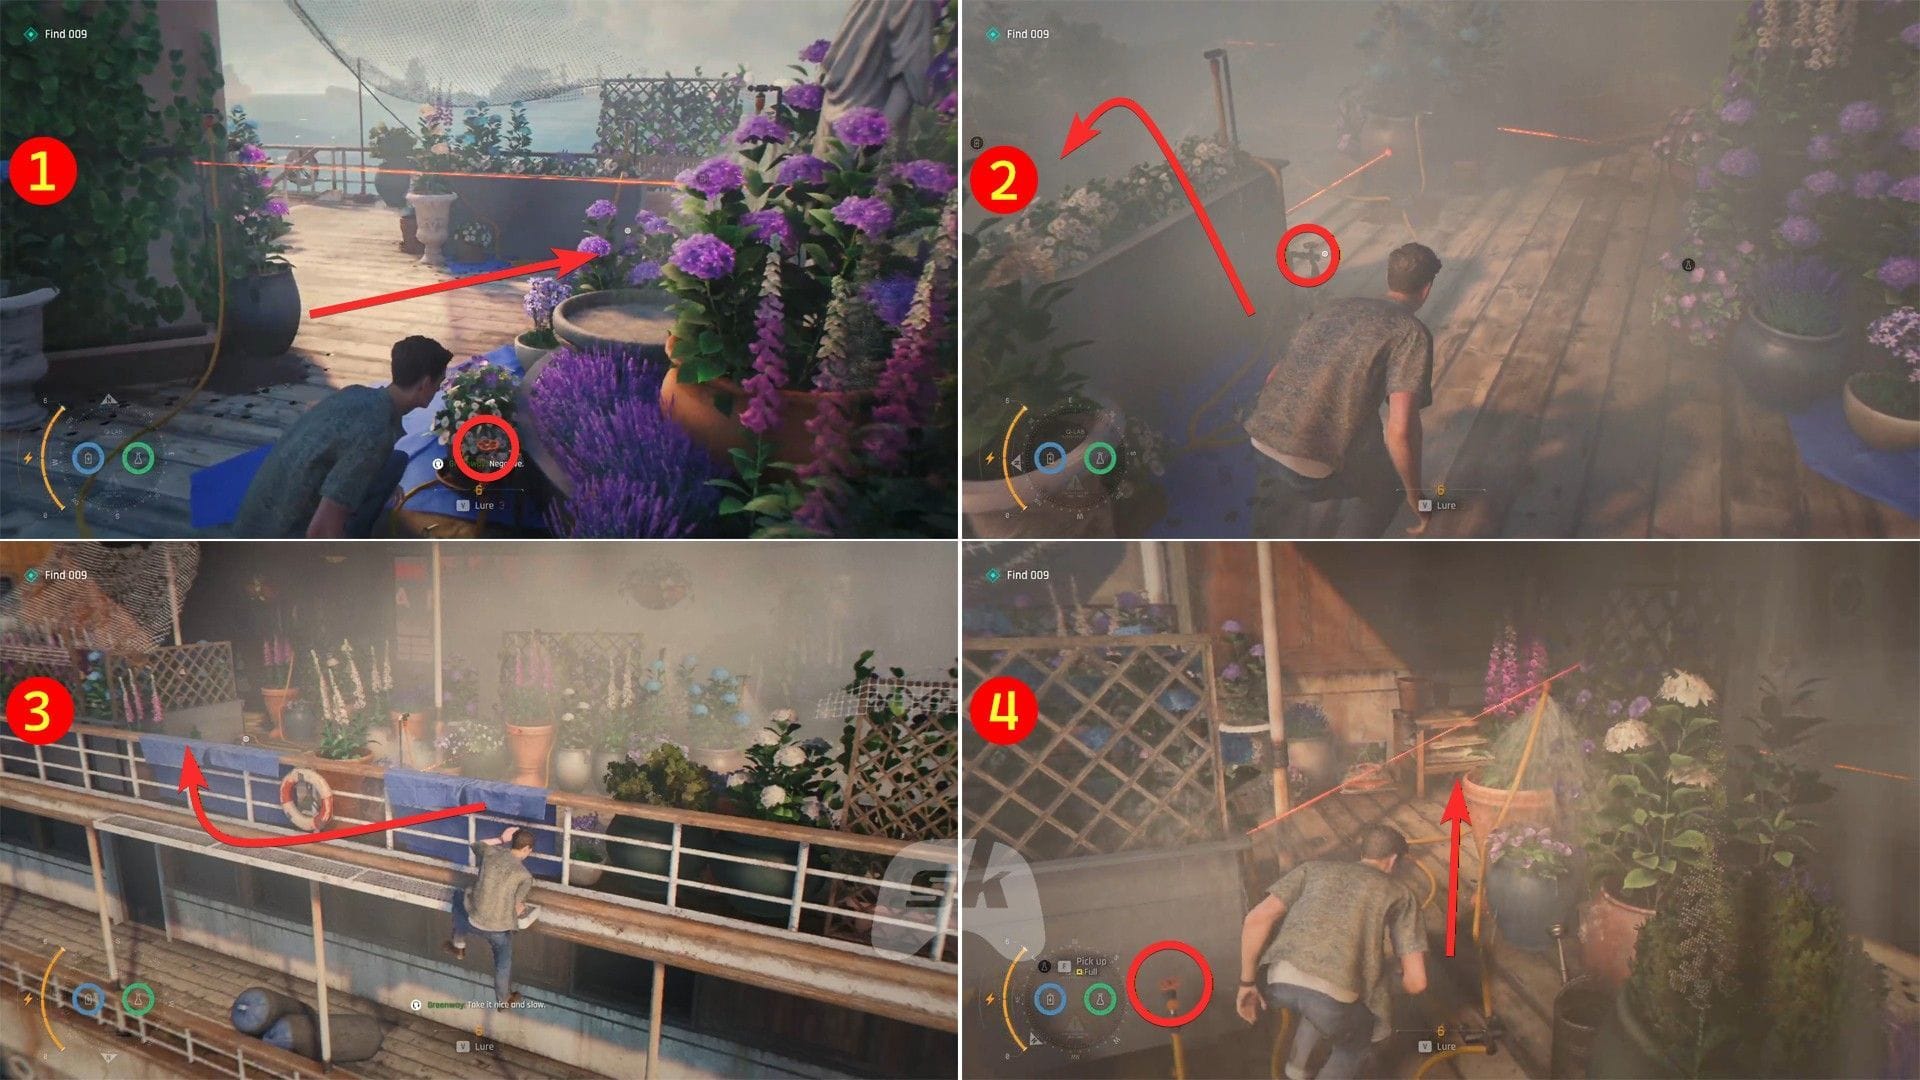
Move ahead and turn on the water to reveal the laser nearby. Then, move forward while crouched, turn on the water there, and vault over the block. Now, hang on the left side’s ledge, move left, and climb up to the boat. Turn on the nearby water and crouch-walk to avoid the laser in front.
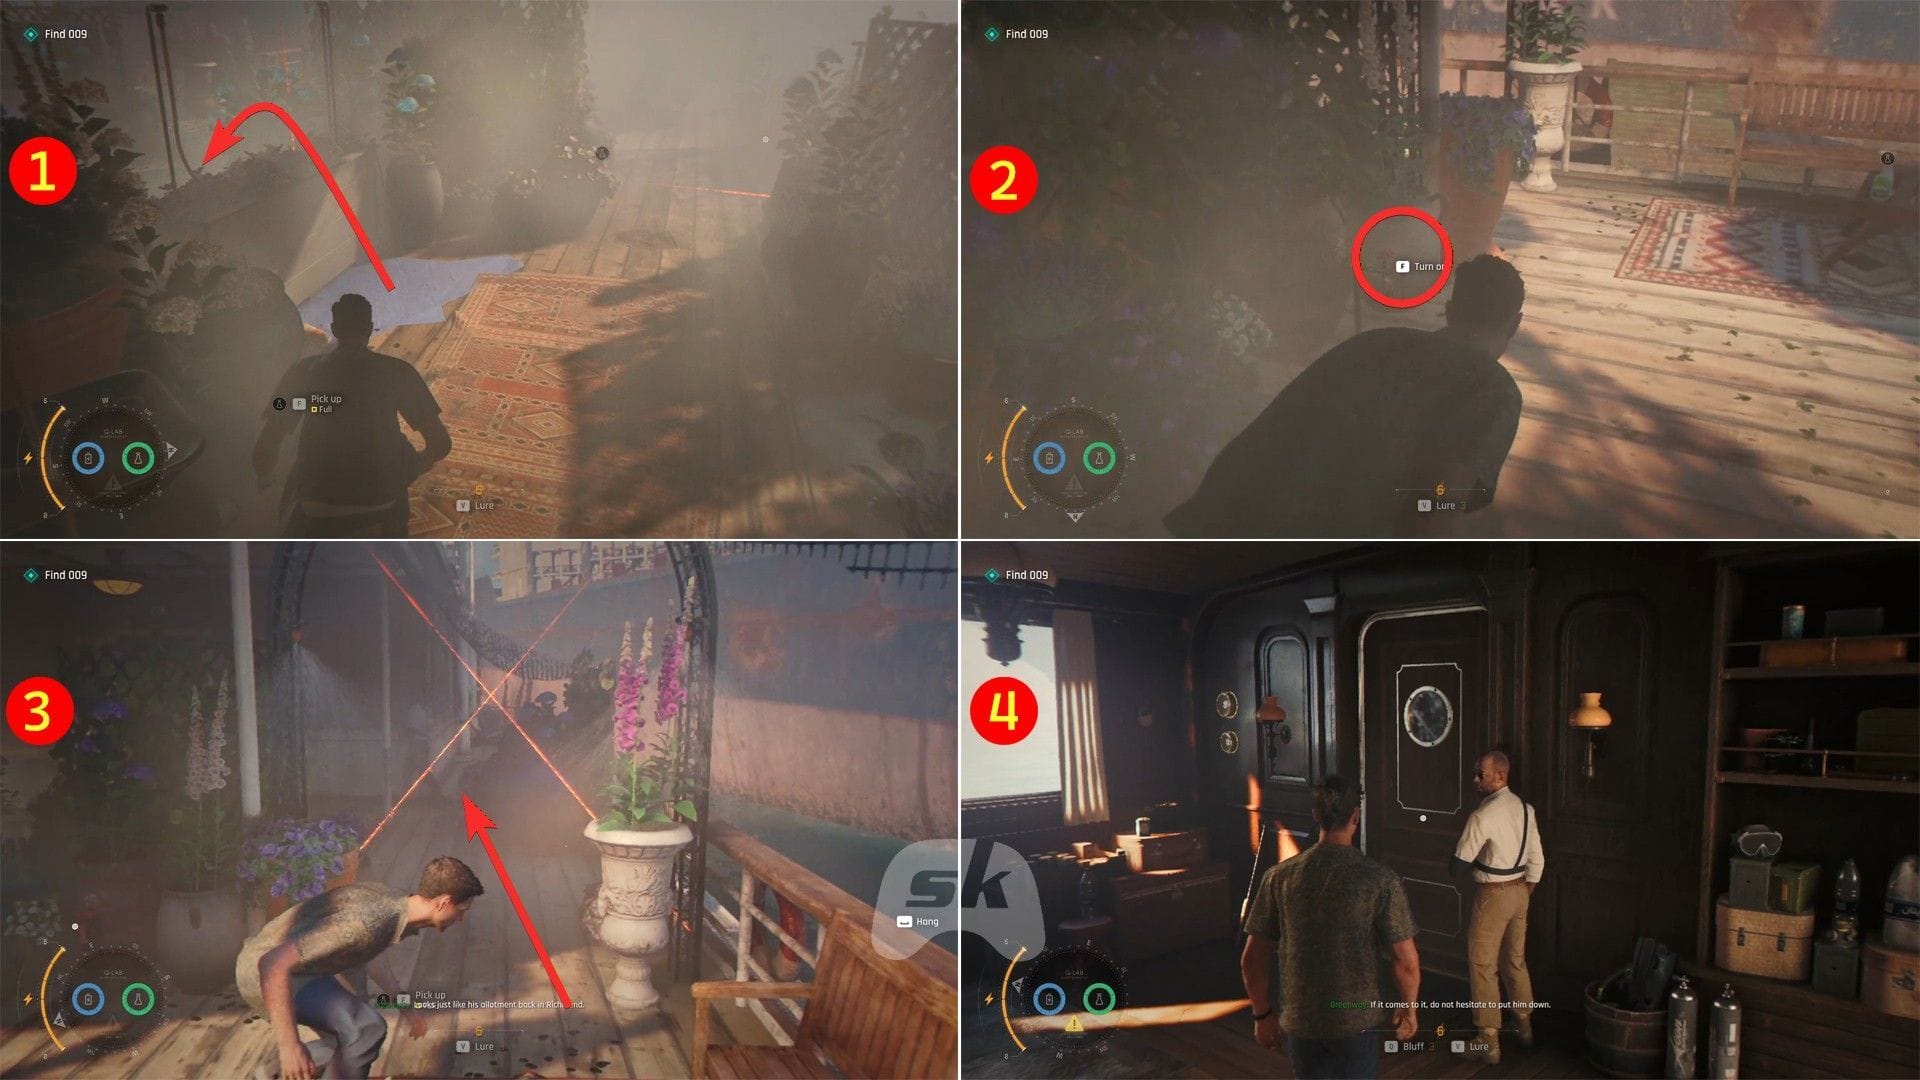
Navigate to the middle section and vault over to the other side. Turn on the water, check the lasers’ movement, and go past it at the correct time. Next, interact with Greenway to trigger a cutscene.
Examine the crime scene
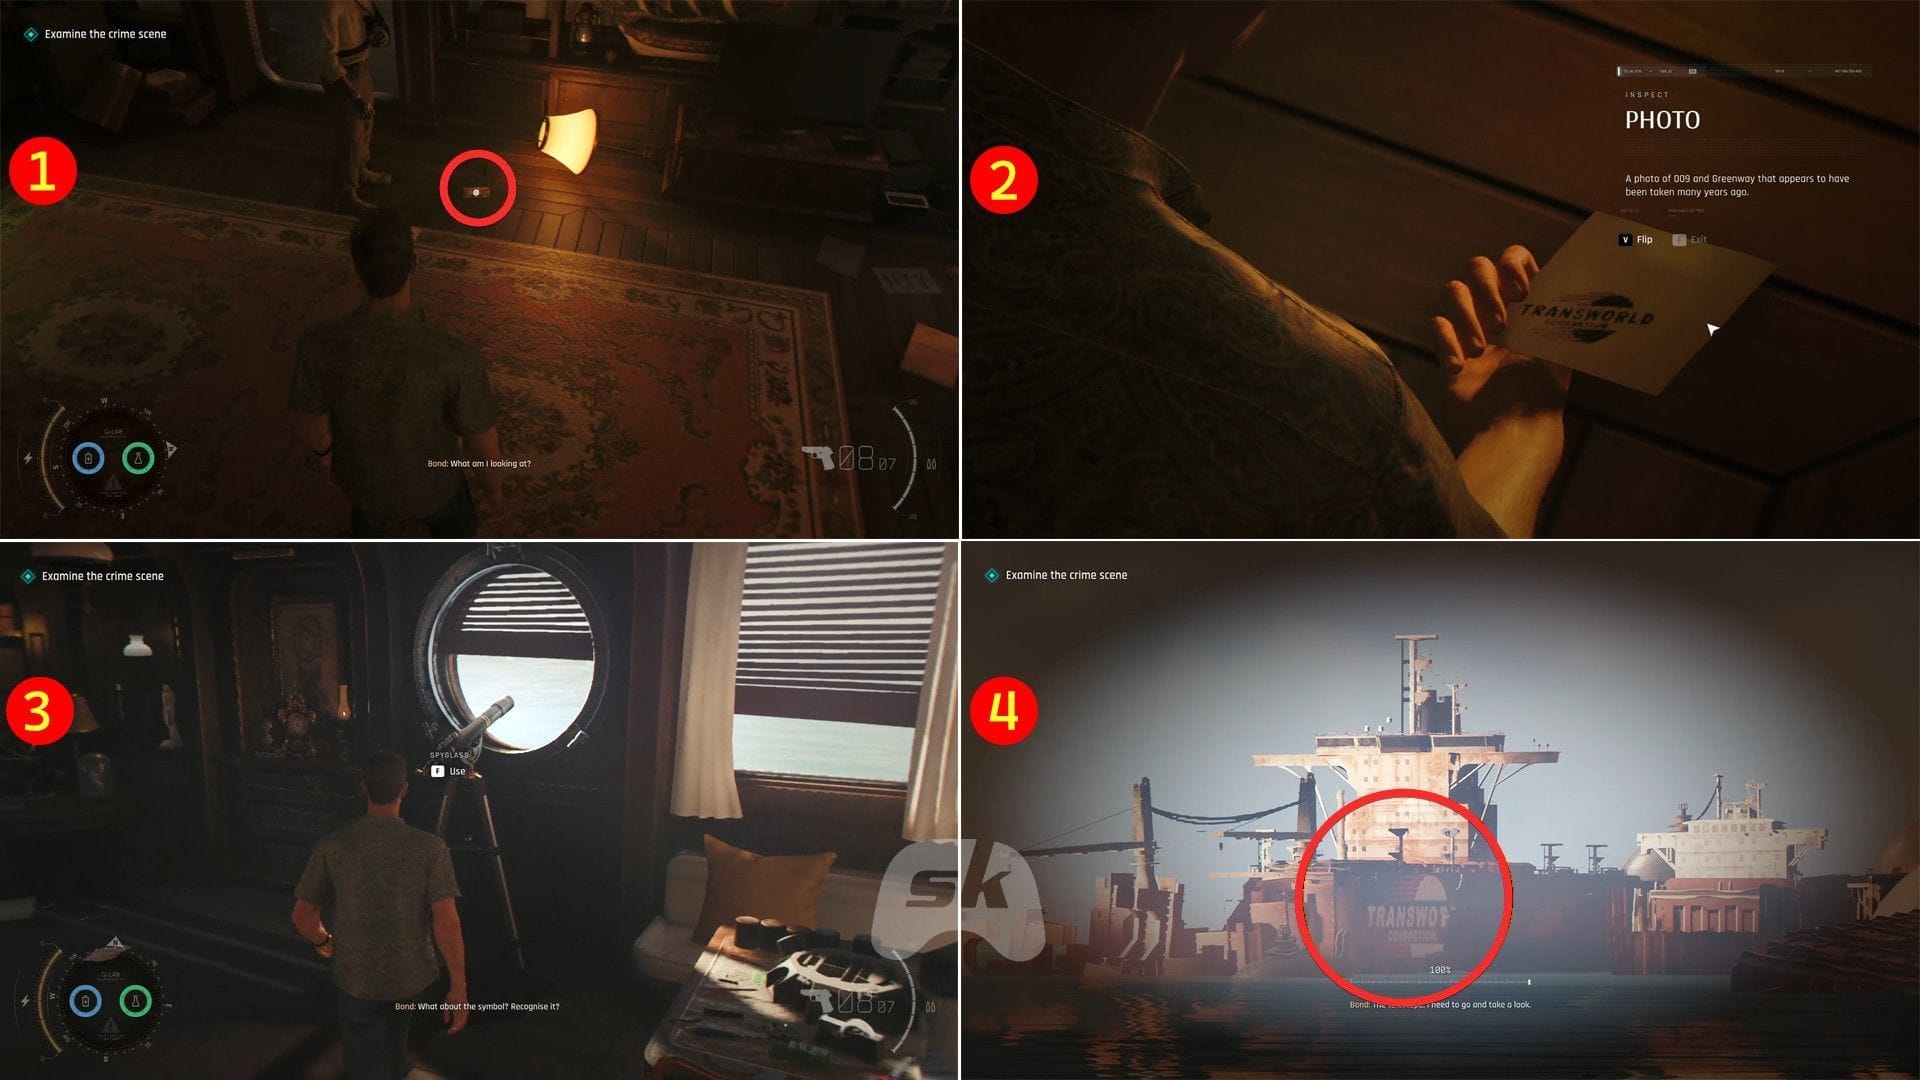
In this segment, you have to inspect several elements around the area. Check the objective marker to track the following:
- 009’s body on the chair
- Diamonds on the table
- Newspaper
- Spyglass near the window
- Blueprints on the table
- Bomb materials near the window
- Photo of Greenway in the last room
- All the attachments on the wall
After going through all of them, check the picture on the ground and flip it. Then use the spyglass, zoom in, and hover over the ship on the right side. Stop using the spyglass to trigger a cutscene.
Wake Greenway
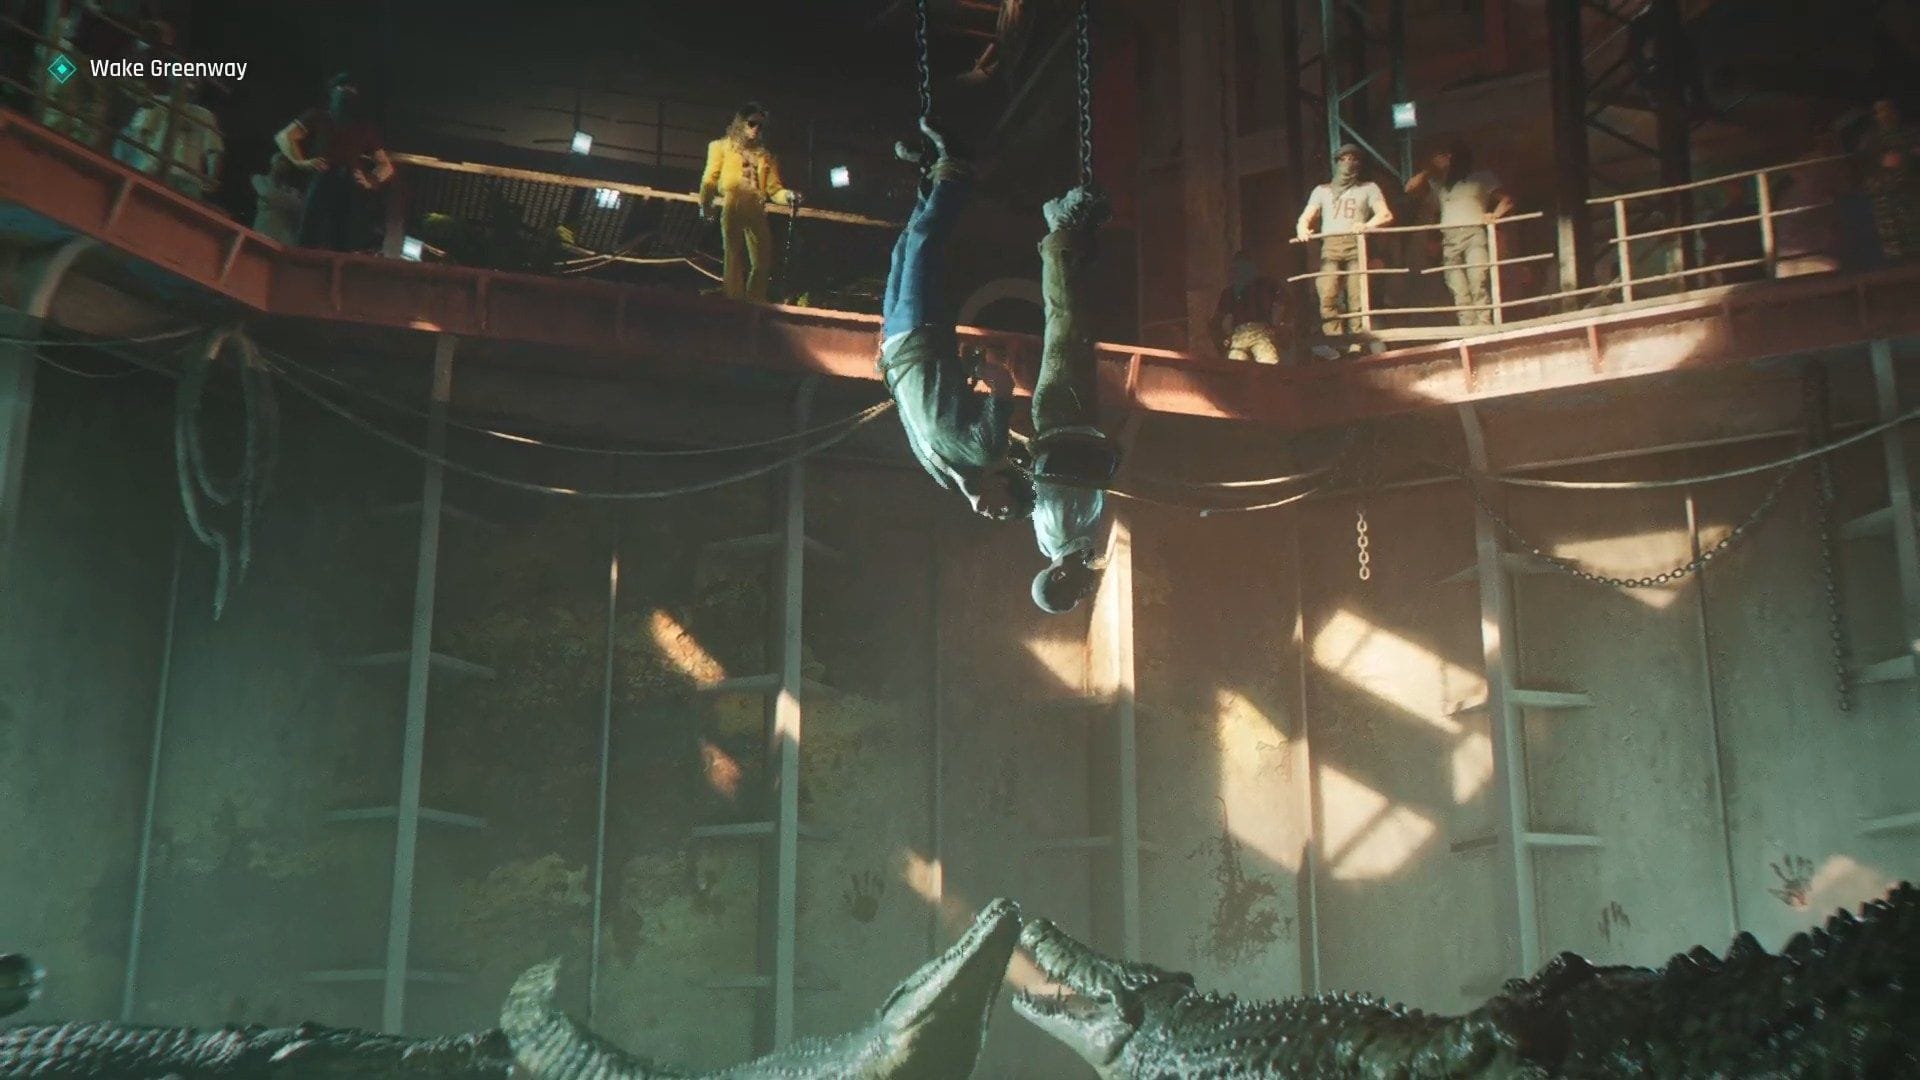
As you and Greenway are captured, you need to wake your partner to avoid death. To do that, perform these actions:
- Threaten
- Wake Greenway
- Press A and D (left and right movement keys) one after another to swing and hit Greenway
When Greenway wakes up, he will negotiate and save themselves from the situation. Afterward, follow Bawma to the car, wait for the conversation to end, and get in.
Drive to the Transworld wreck
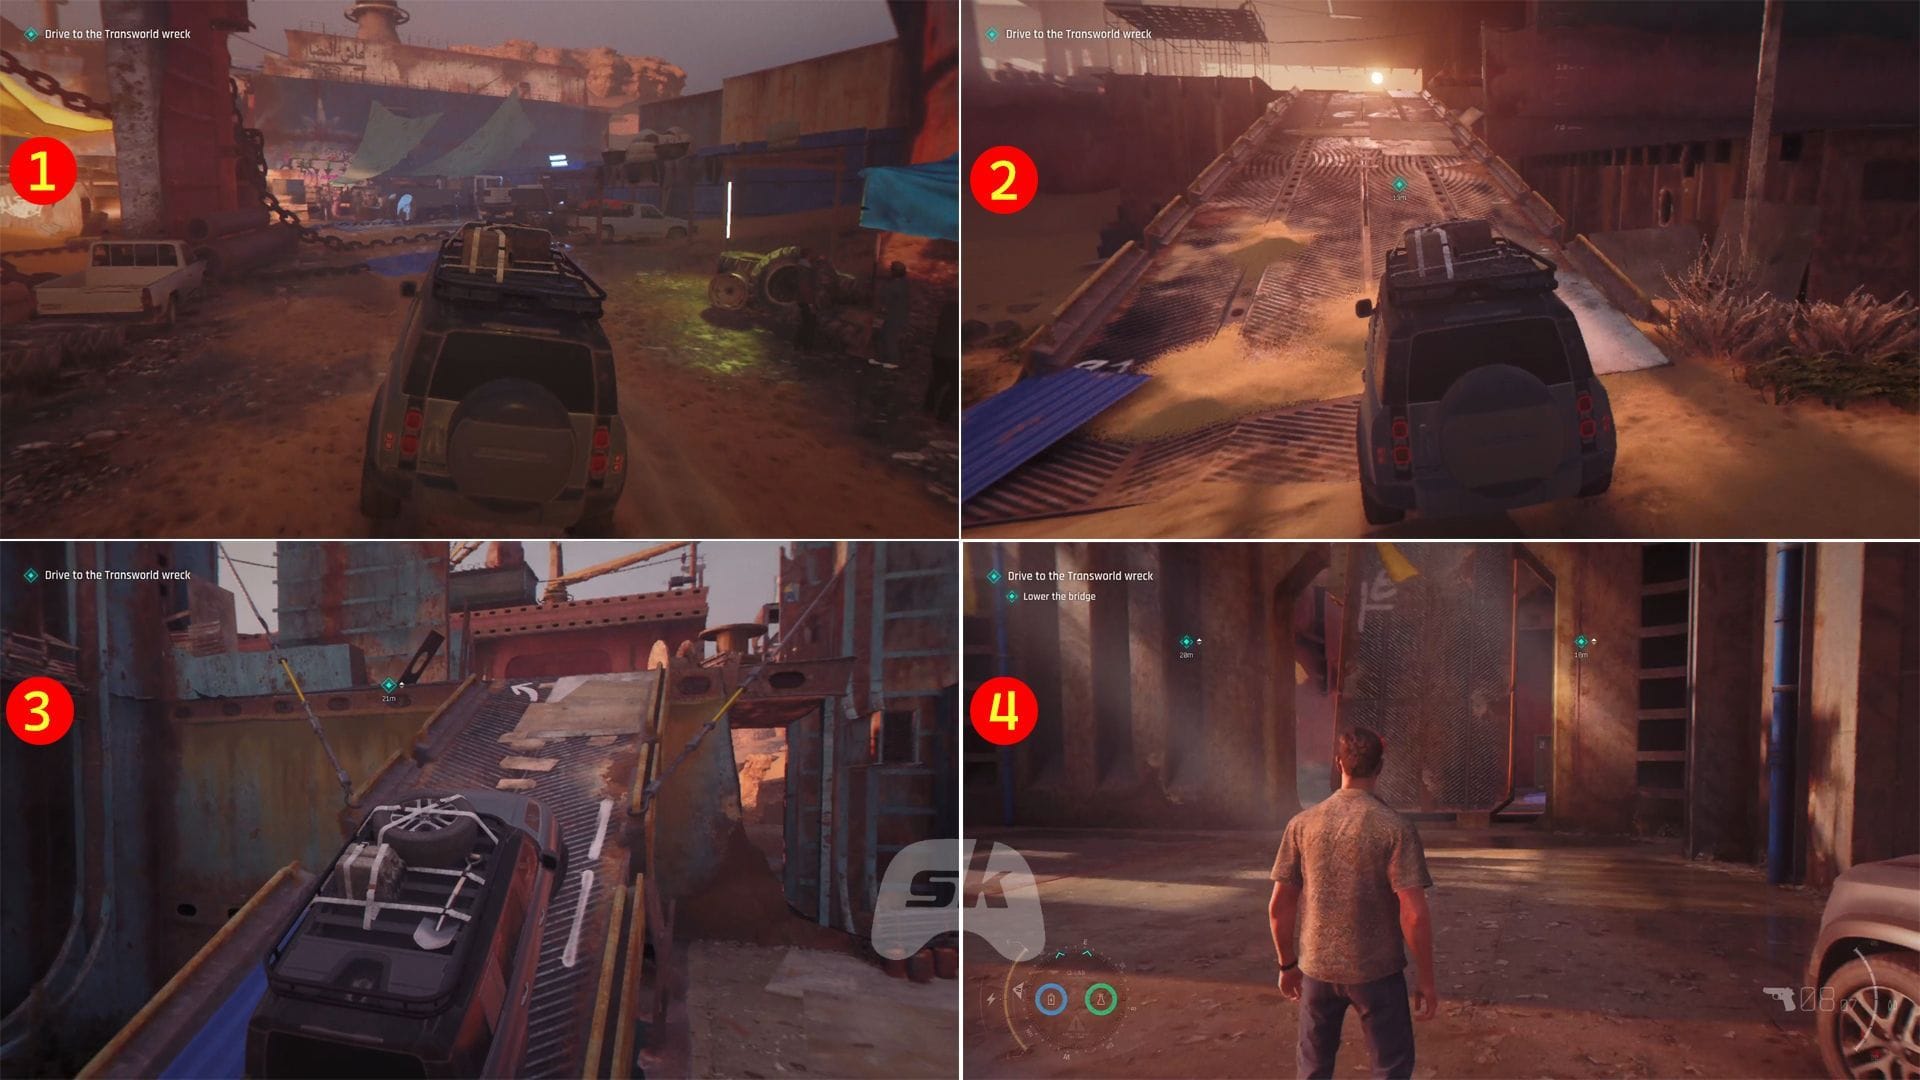
Proceed forward to the objective markers to reach the Transworld wreck’s location. Drive inside, go through the narrow pathways to get to a location where you will have to lower a bridge to advance.
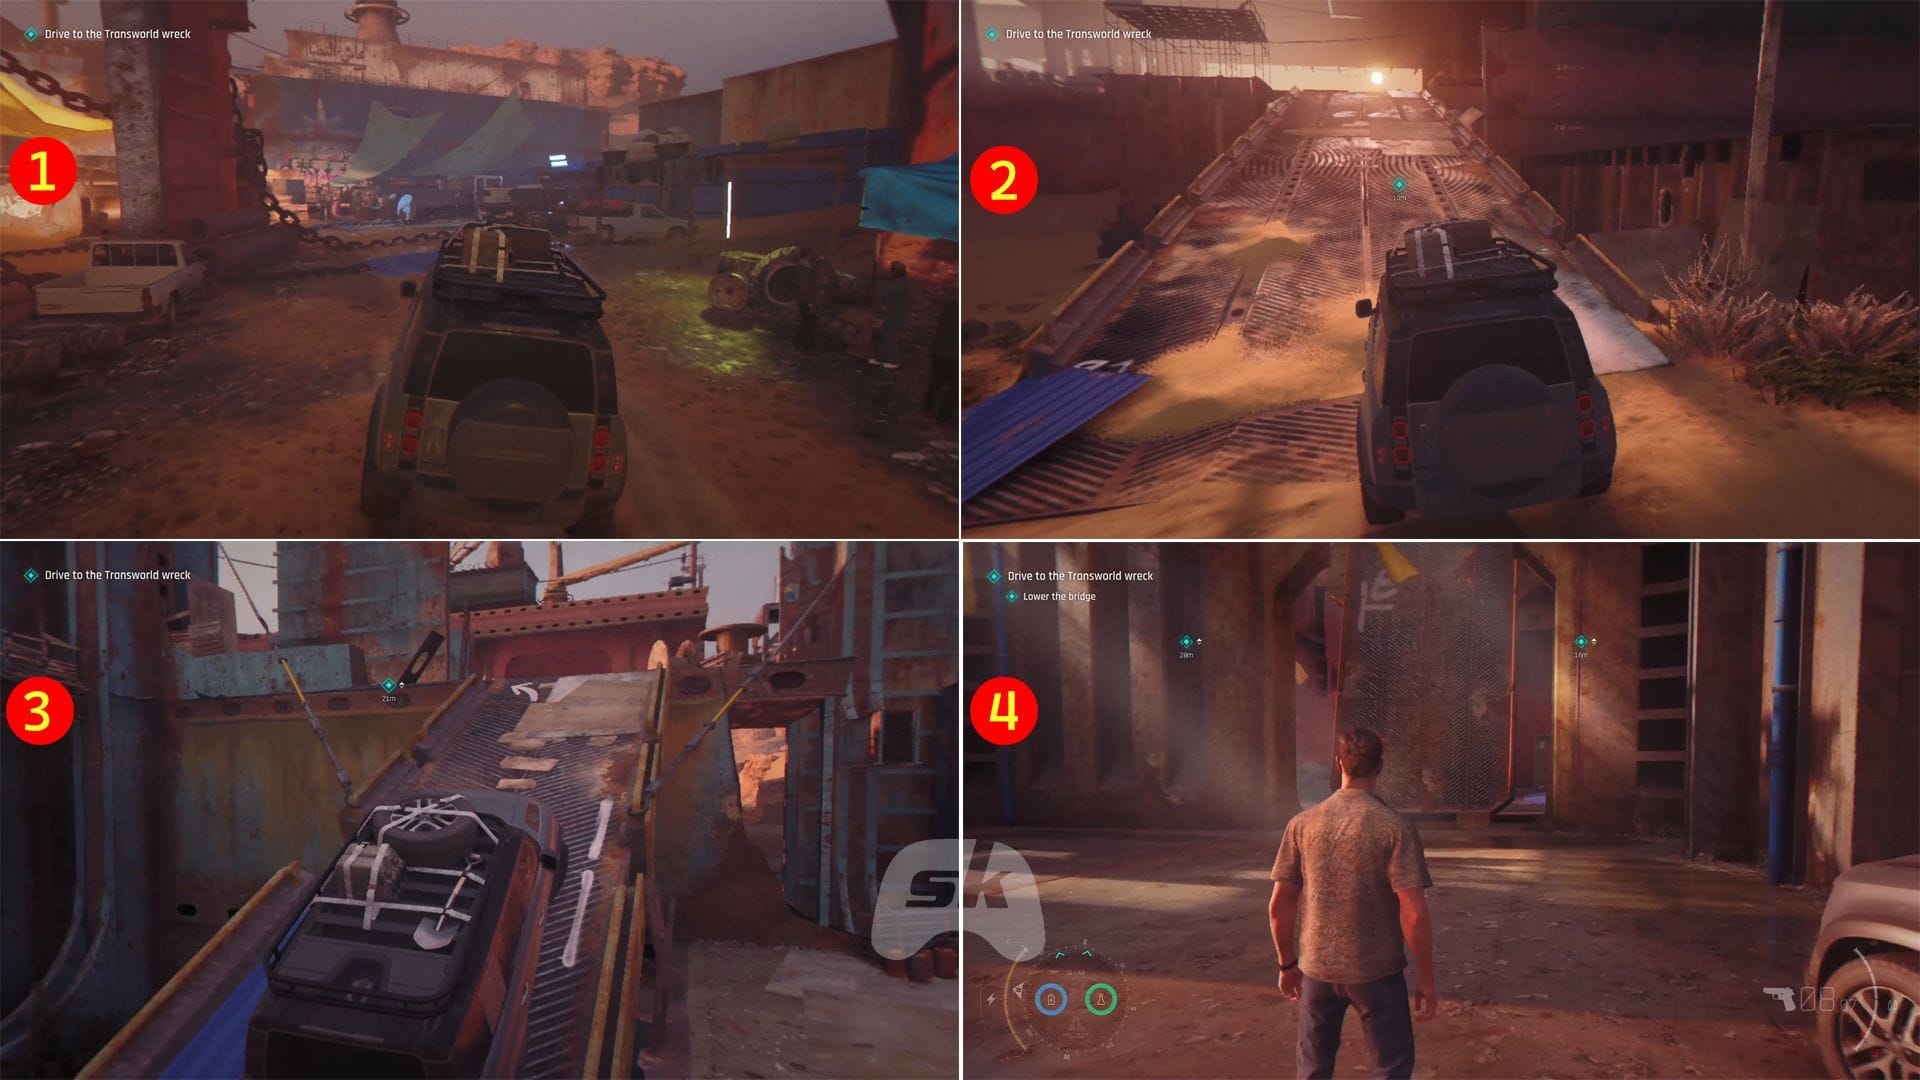
Climb up the blue pipes on both sides, then select the Release prompts to lower the drawbridge. Lastly, get into the car to trigger a cutscene.
Explore the shipwreck and follow the clues
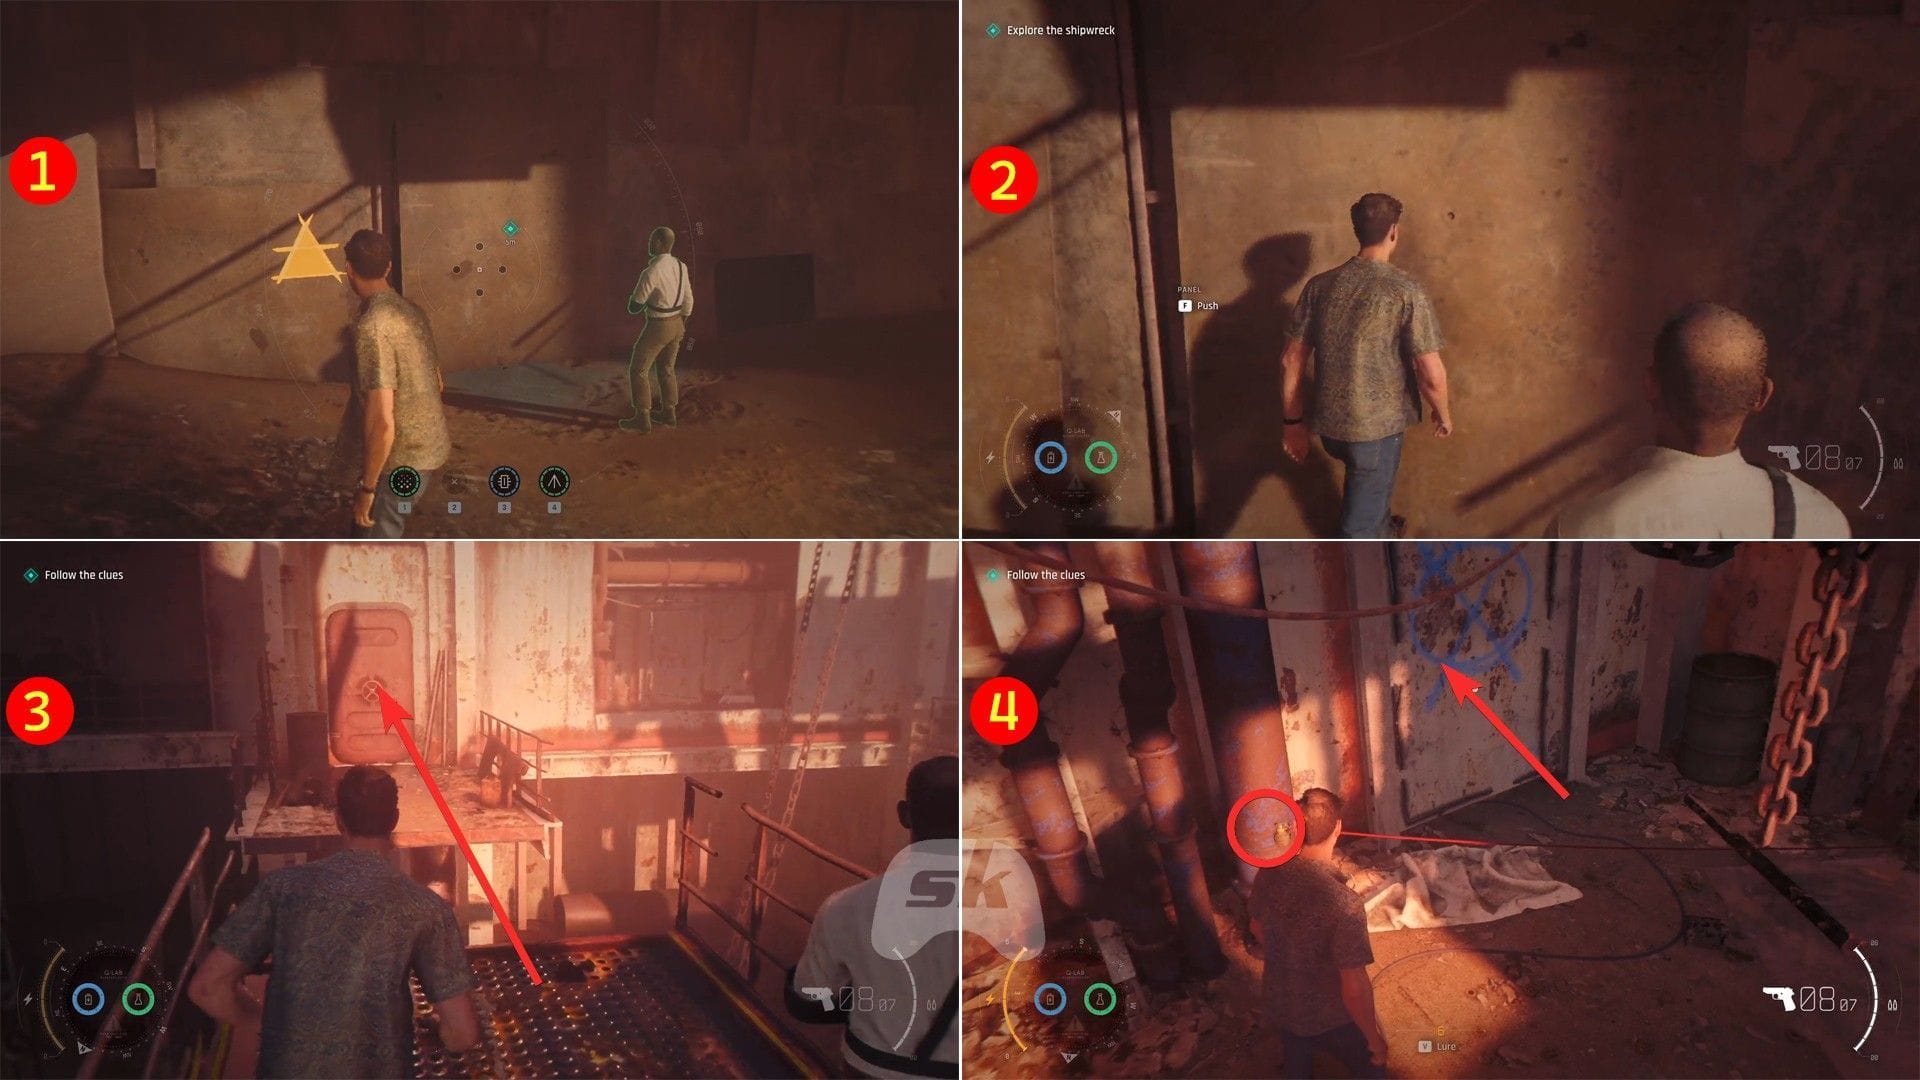
Follow Greenway forward and use your Q-Lens to reveal the mark on the wall. Then push the panel and continue forward. At the end, head left, cross the gap, and open the door. Afterward, disarm the booby trap and kick the white door open.
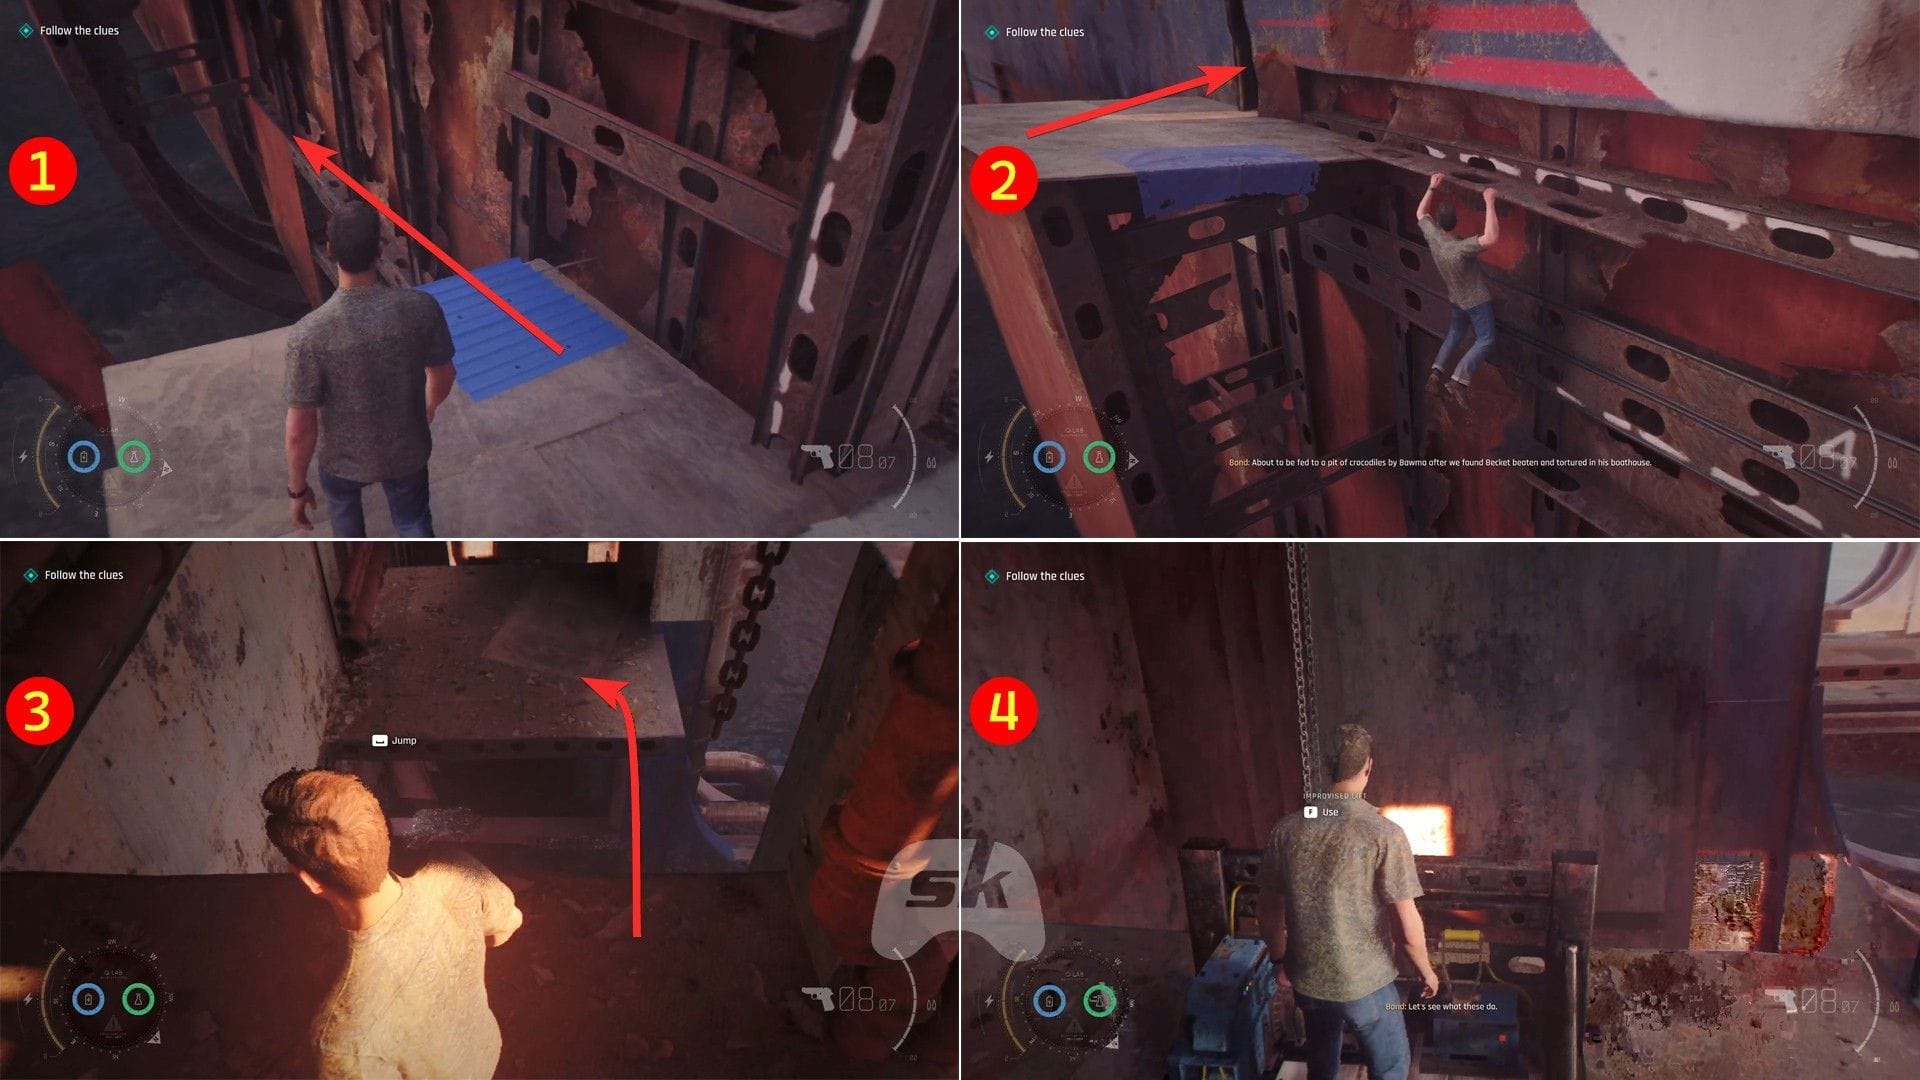
Grab the ledge to proceed left, reach the subsequent platform, then squeeze through the gap. Continue to the left again by jumping forward, dropping down, and using the lift to go up.
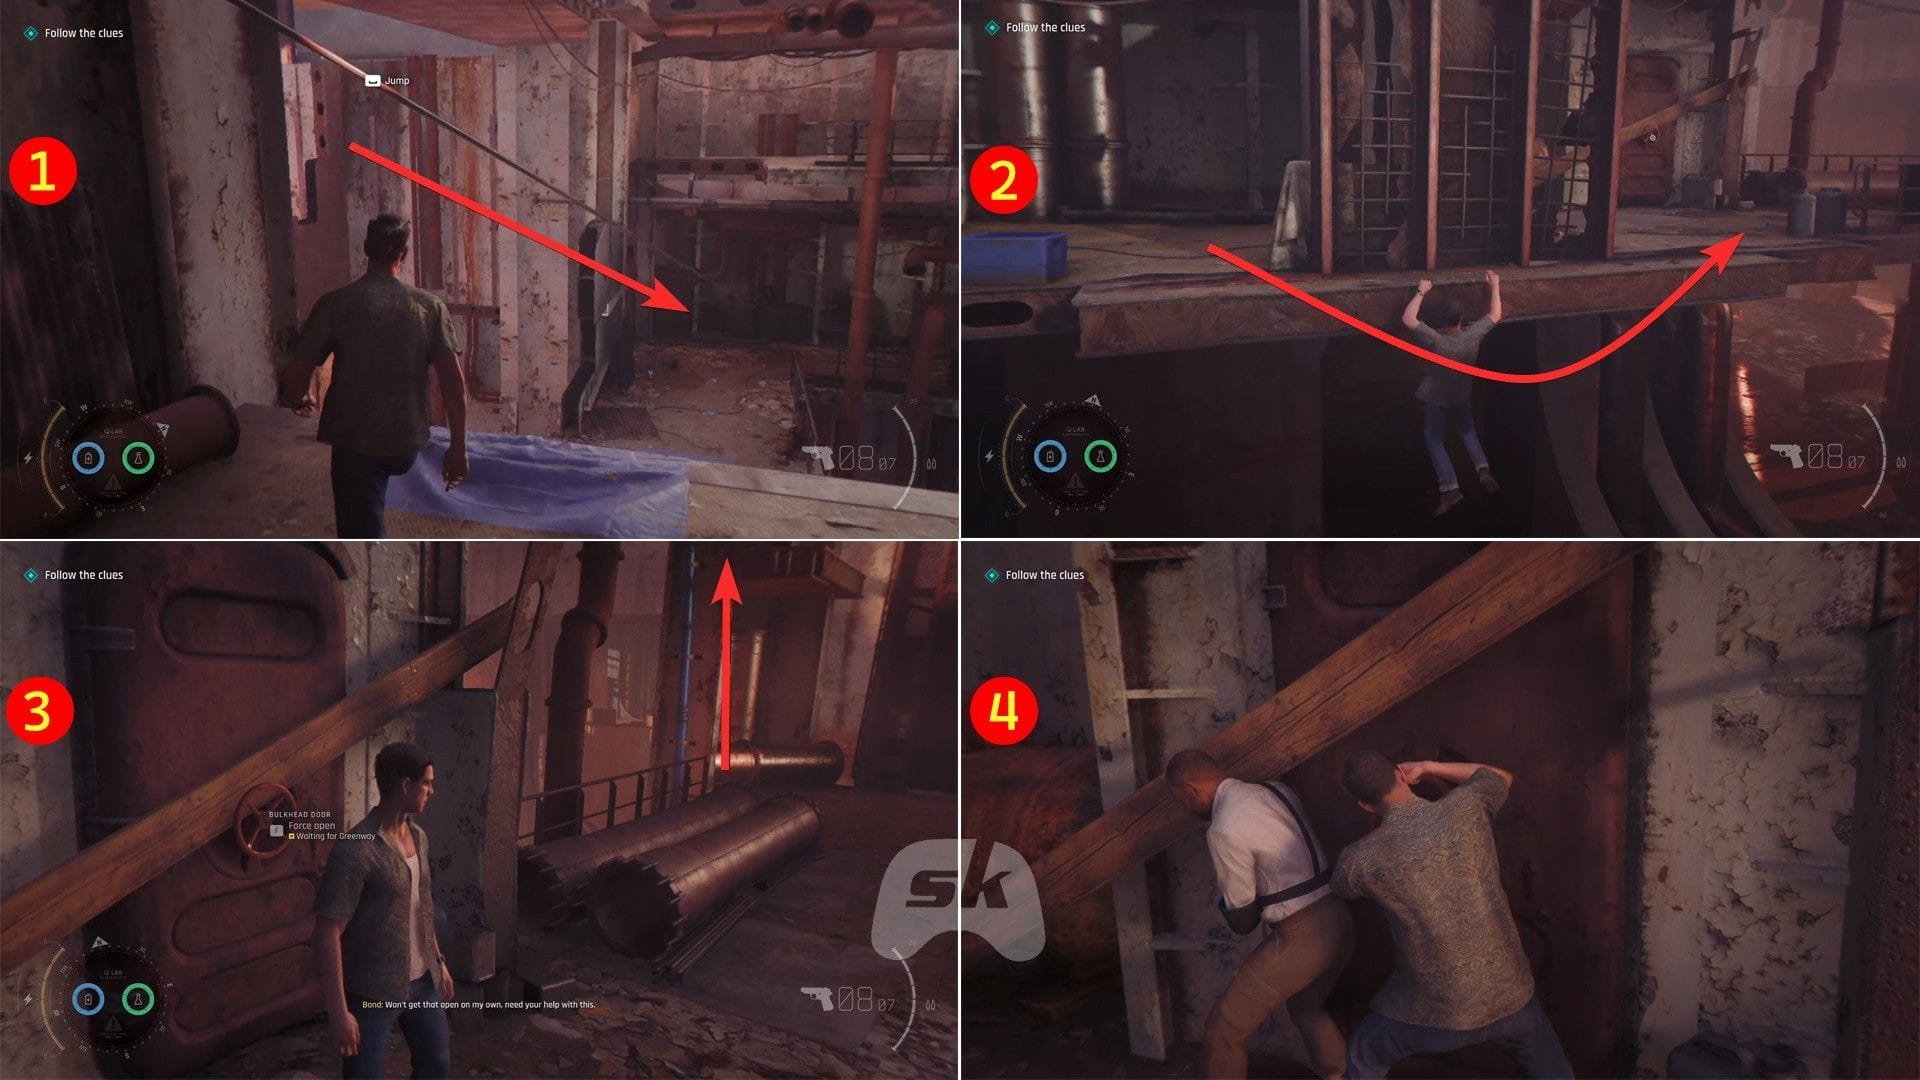
Use the zipline to move to the other side, open the door, then use the ledge on the right to avoid the booby trap. When you try to open the next bulkhead door, you will need Greenway’s help. For that, climb up the blue pipe nearby and lower the bridge. Next, open the door together and move inside.
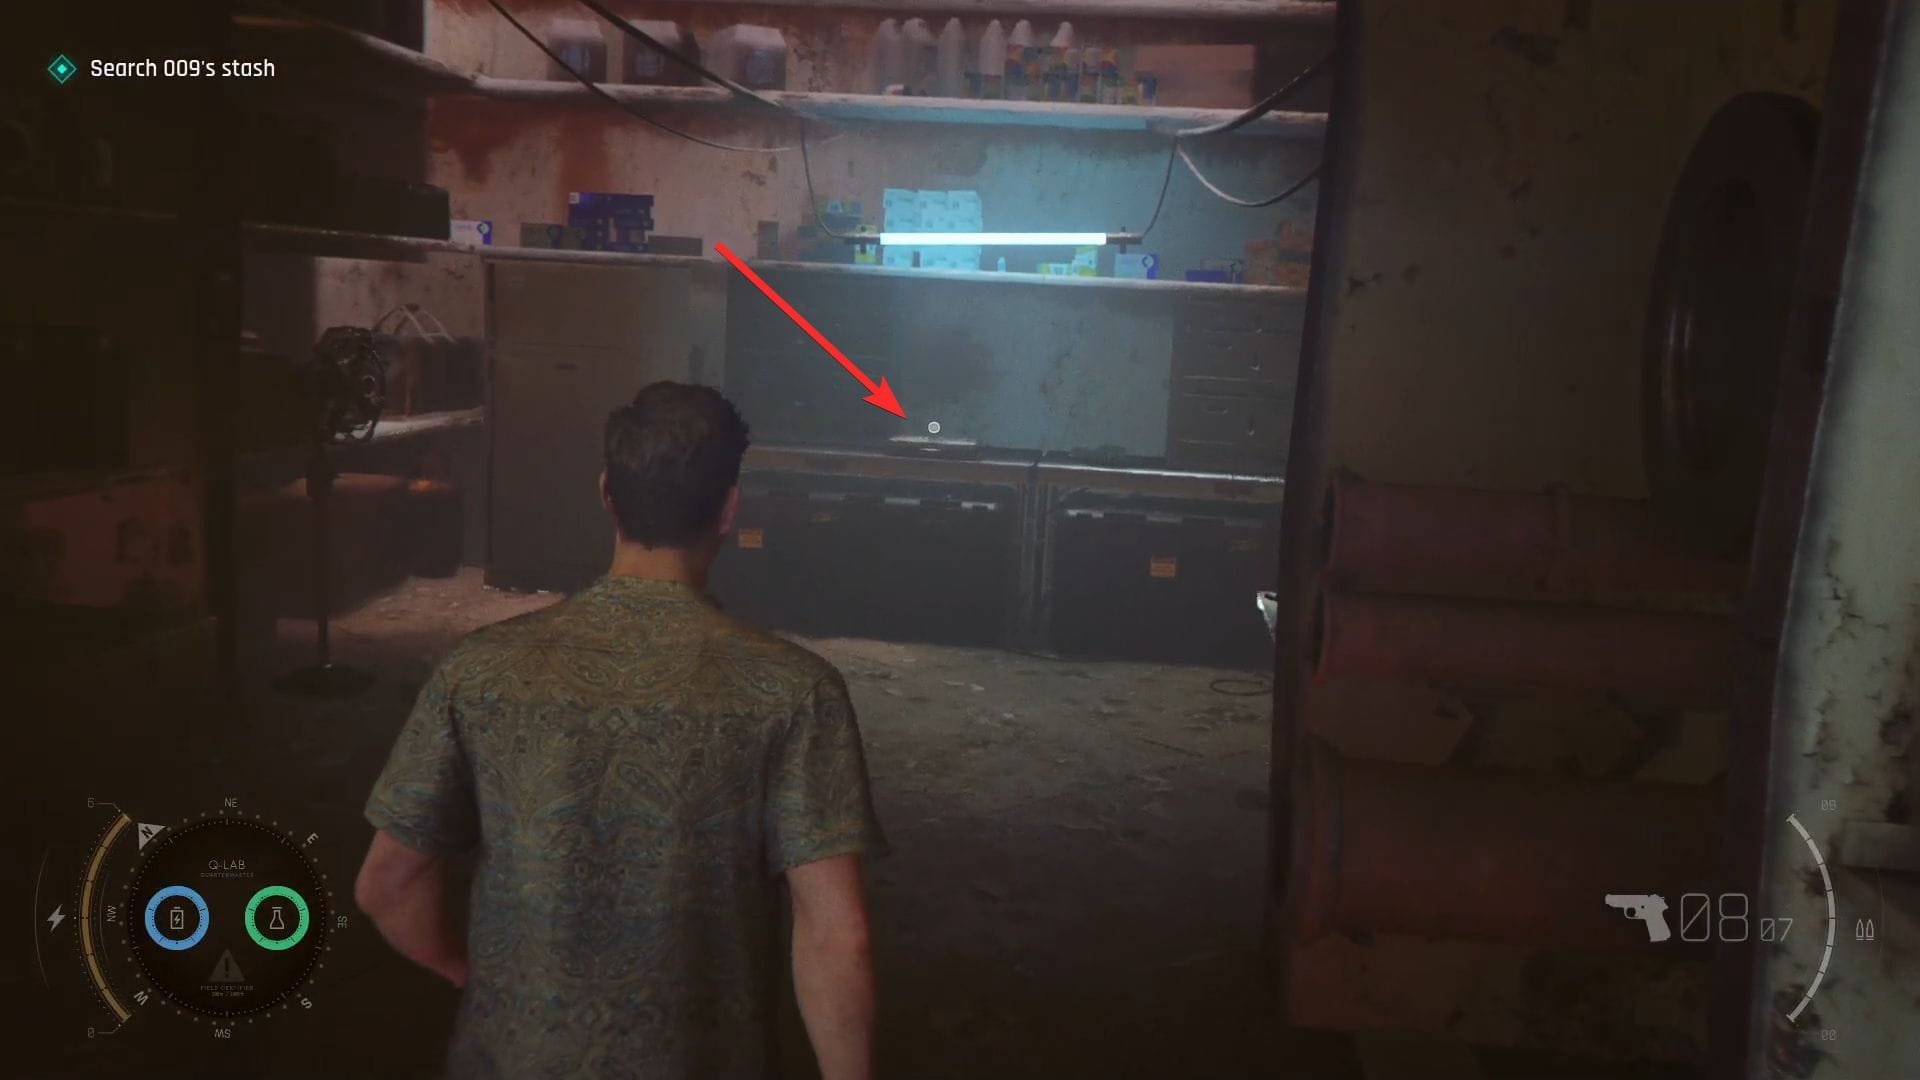
Lastly, search 009’s stash to trigger a cutscene.
Escape
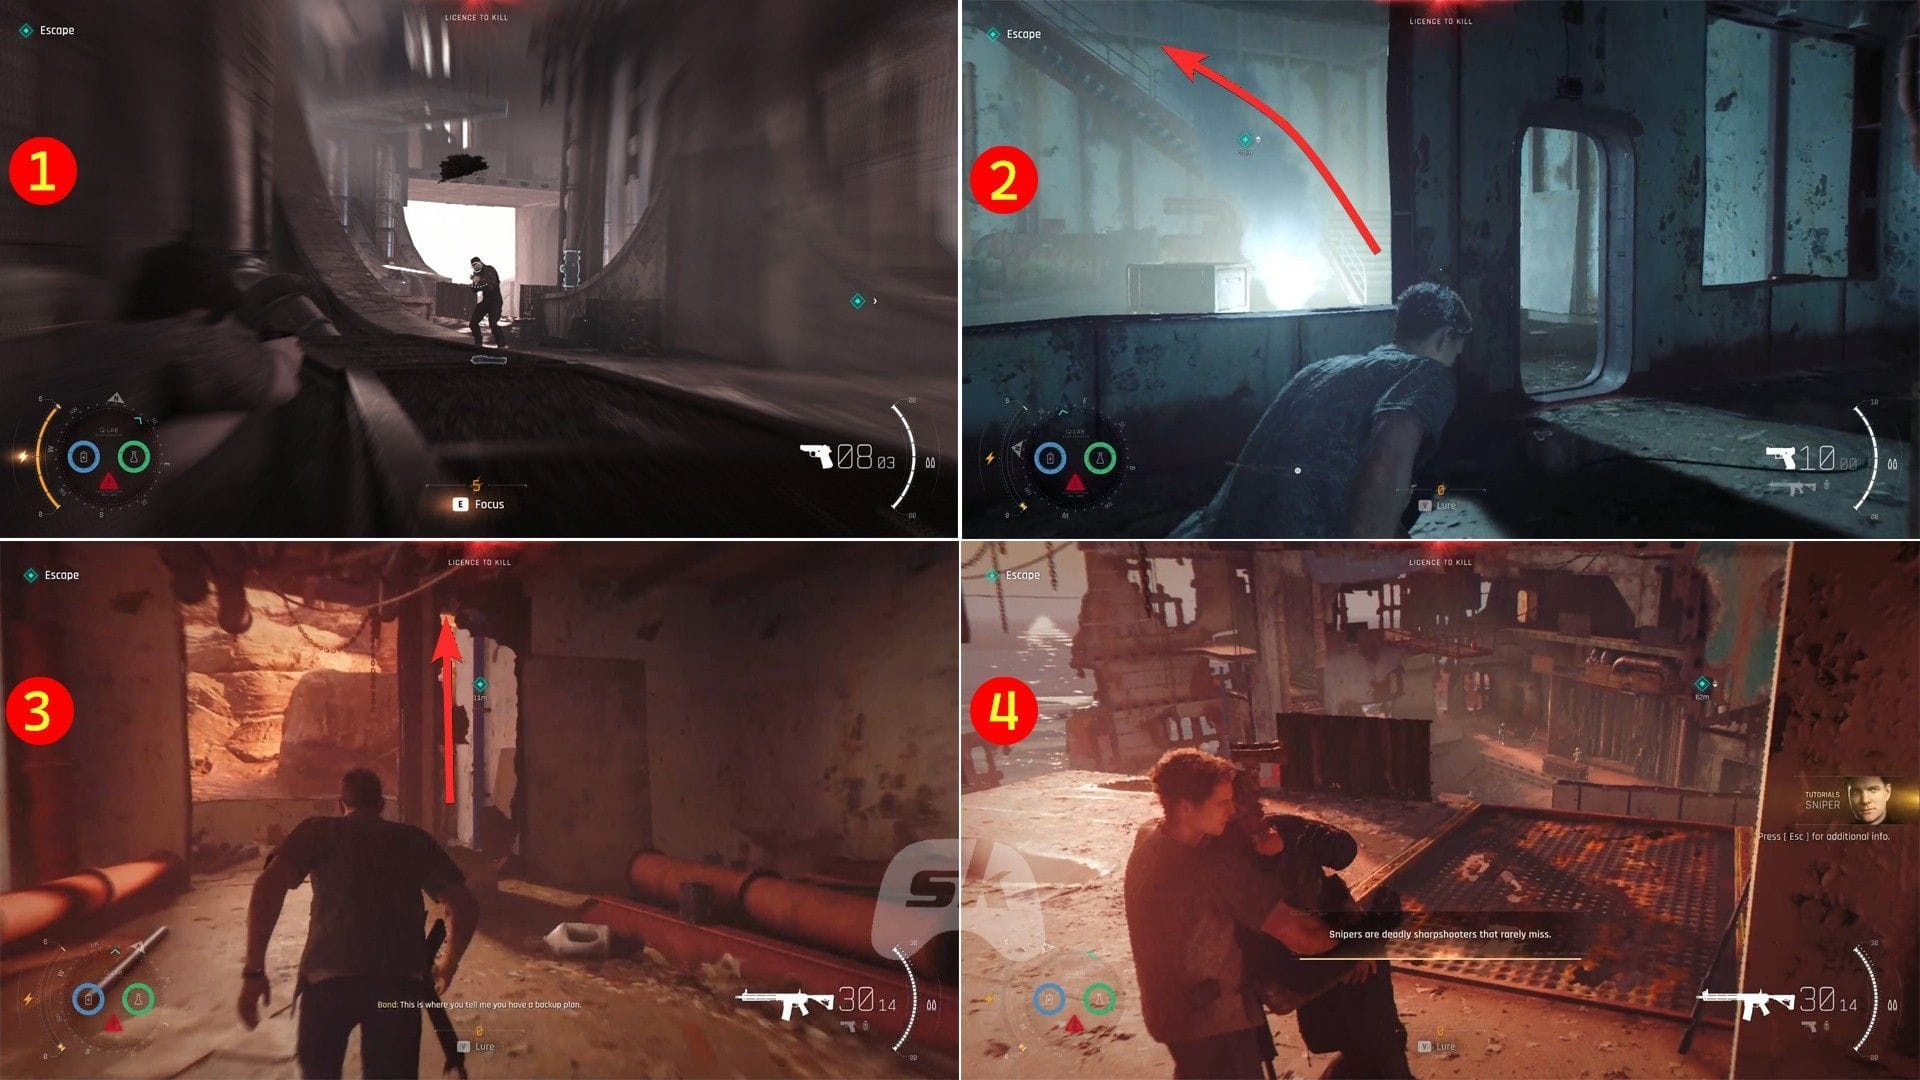
In this segment, you need to deal with a lot of enemies. Shoot at the explosives, and use your gadgets to eliminate the enemies. Keep heading forward to the objective marker in the opposite section while killing them. Go up the stairs, open the door, use the blue pipe to move up, then take out the enemy there sneakily.
Also read: How to unlock all gadget slots in 007 First Light
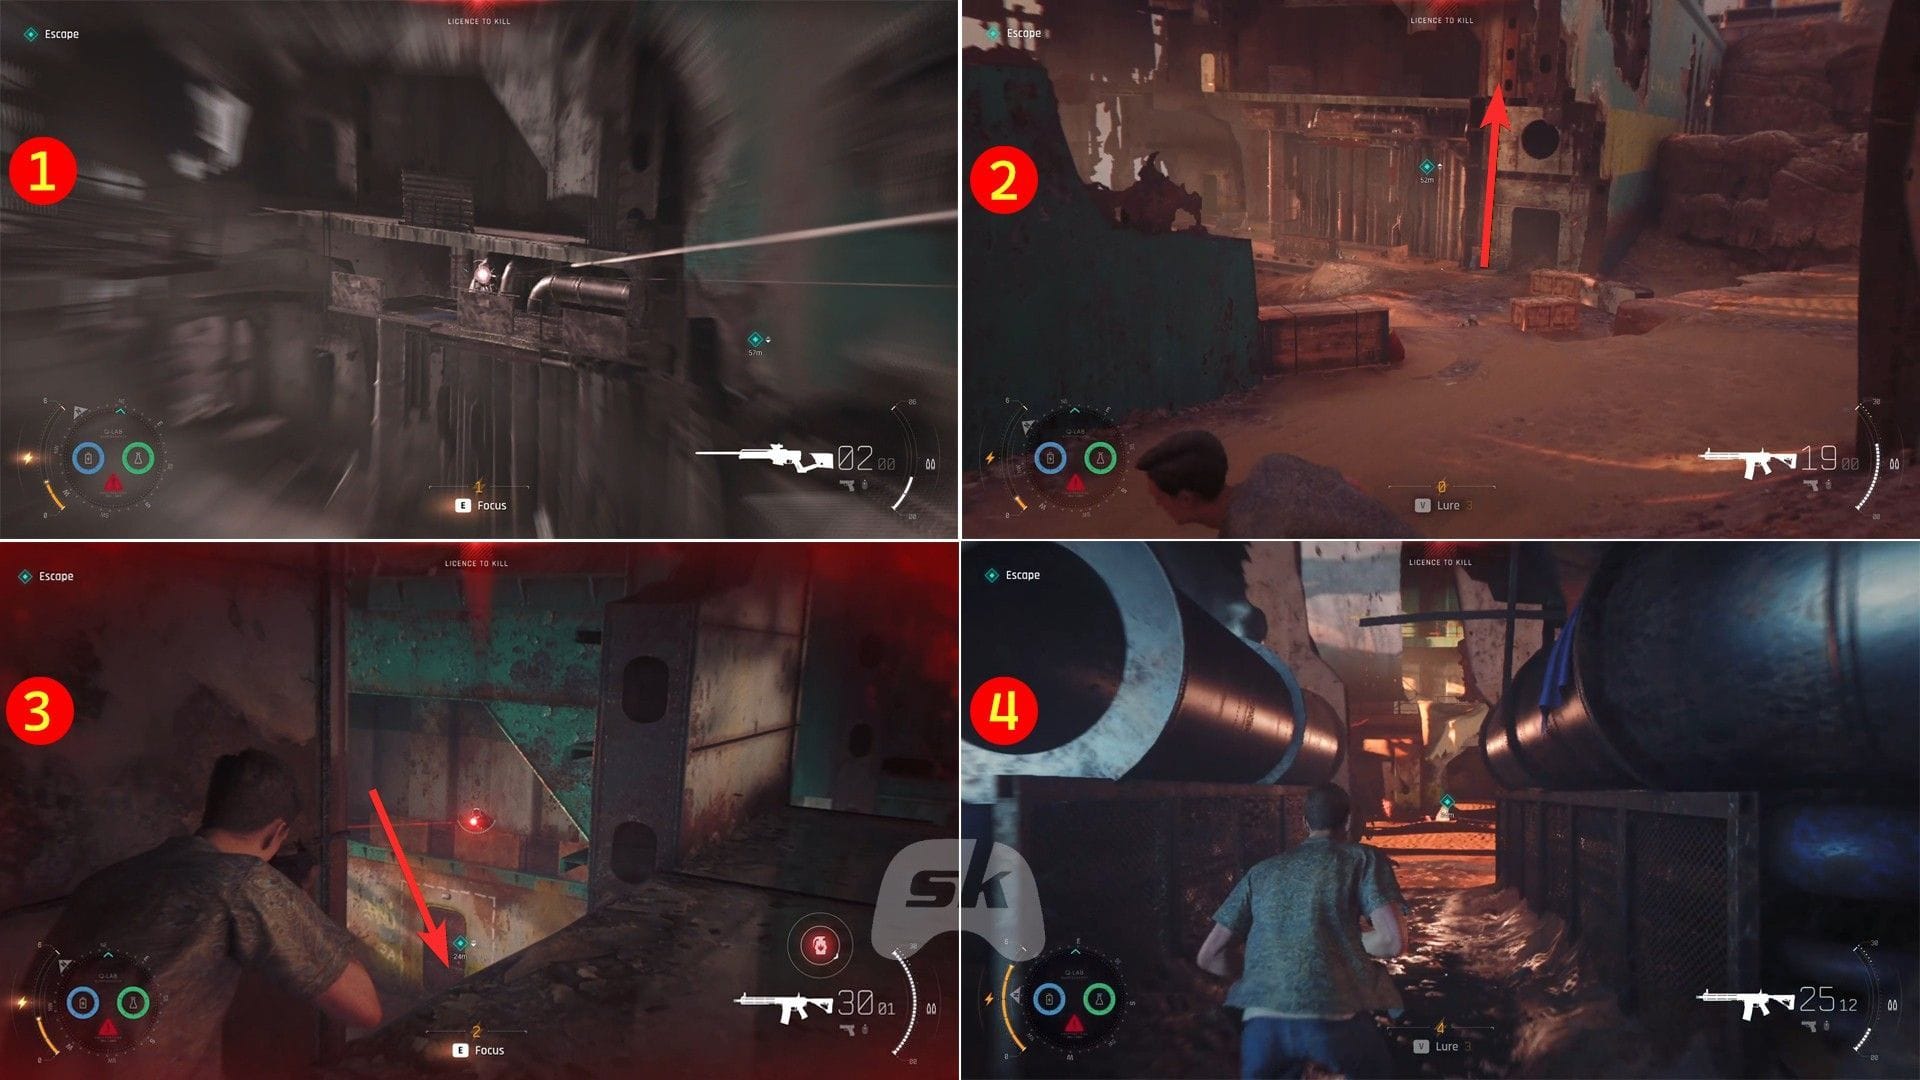
Then pick up the sniper from there and shoot at the enemies in the area. Move to the ground and use the lift ahead to go up. Kill the enemies, reach the objective marker, and open the doors, where you have to deal with more soldiers. Go to the objective location on the other side to trigger a cutscene.
Protect Greenway
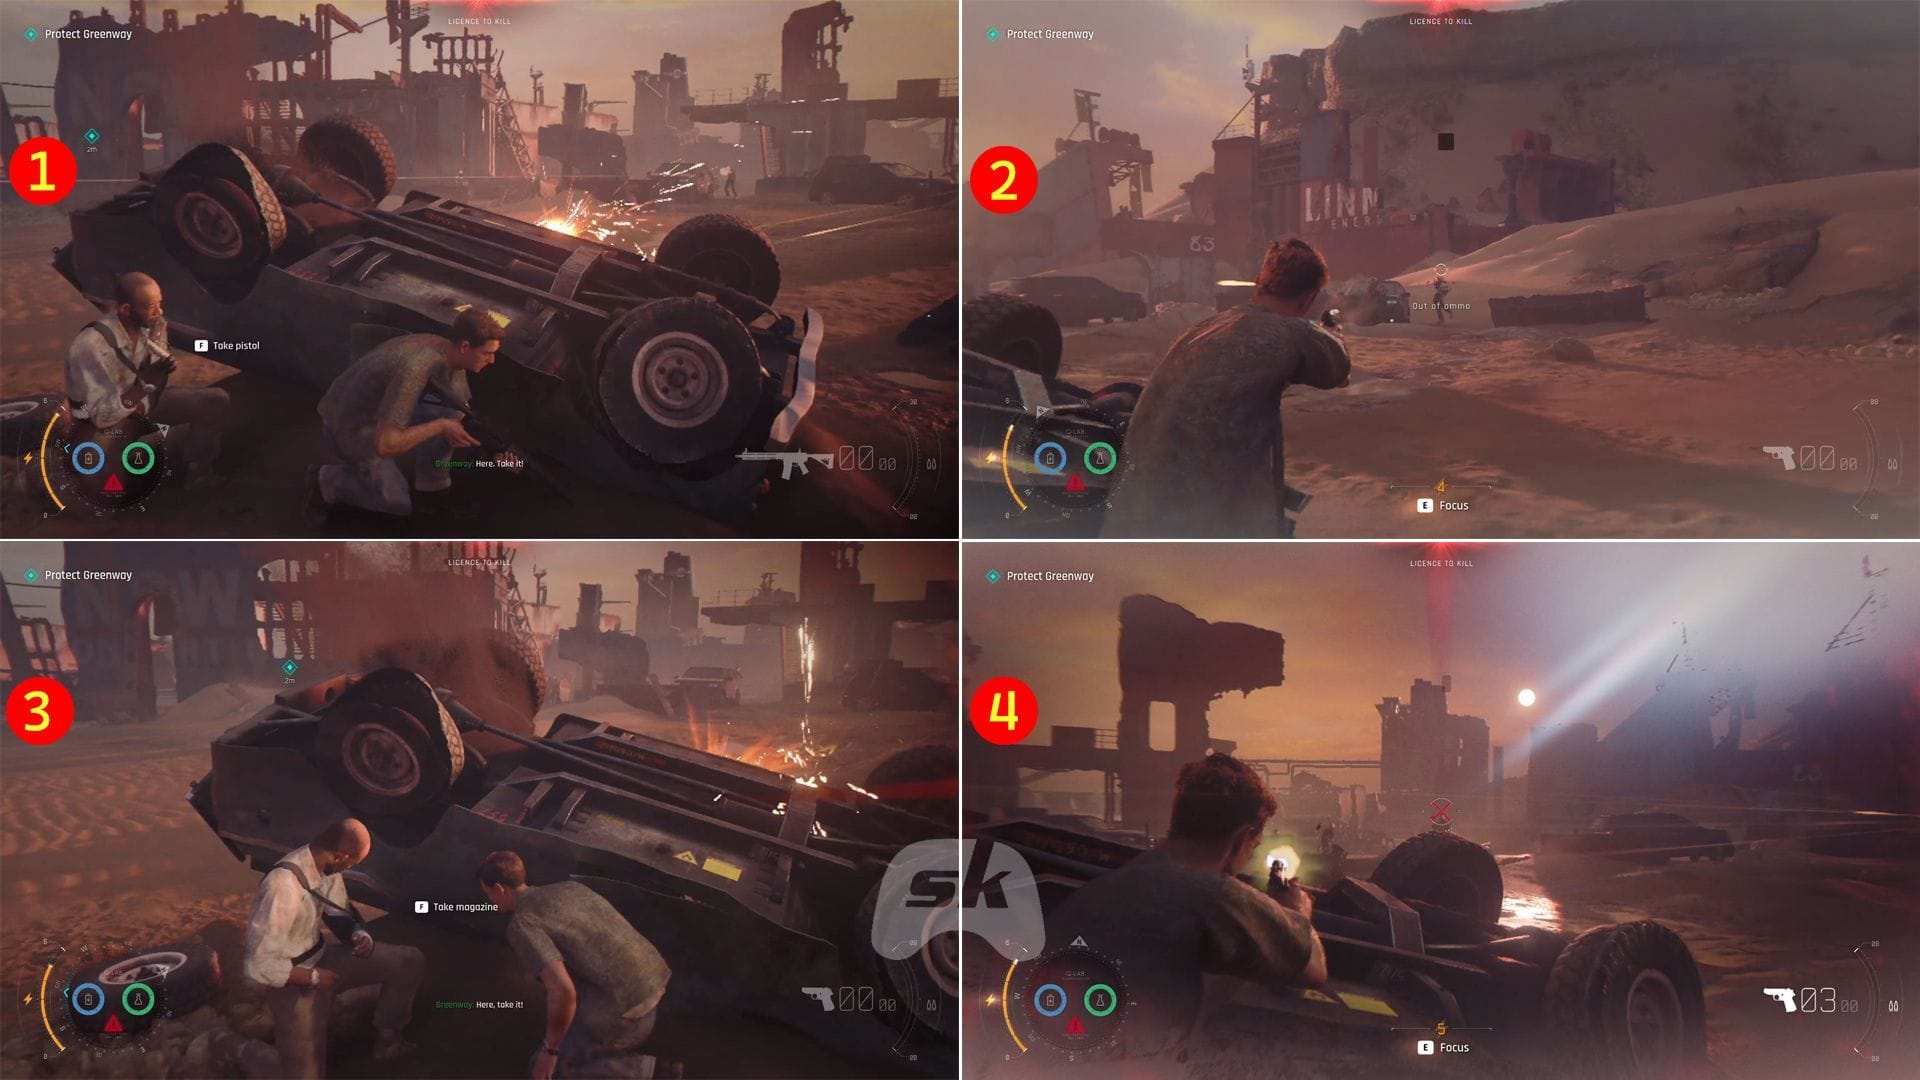
When the cutscene ends, you have to protect Greenway by killing the enemies. However, since you will have a limited number of bullets, you need to ask your partner for his pistol and additional magazines. At some point, when you run out of bullets, the final cutscene will start. With this, The Past Never Dies (chapter 10) in 007 First Light comes to an end.
This also marks the start of the next chapter, Uninvited (Chapter 11).
Check out more 007 First Light topics below:
Are you stuck on today’s Wordle? Our Wordle Solver will help you find the answer.
Edited by Debayan Saha
Recent Comments